
Finding the right stability ball size transforms your workout experience from frustrating to effective, yet most people measure incorrectly or skip this critical step entirely. A stability ball that’s improperly sized compromises your posture during core exercises, reduces workout effectiveness, and can lead to lower back strain or instability during basic movements. Understanding exactly how to measure a stability ball ensures you select equipment that supports proper alignment whether you’re using it for Pilates, physical therapy, or office seating. When you correctly measure a stability ball, your hips naturally align with your knees at a 90-degree angle, creating the foundation for safe and productive exercise sessions.
Many fitness enthusiasts make the mistake of guessing their size based on height alone or purchasing whatever’s on sale, only to discover discomfort during use. The truth is that proper measurement requires both precise diameter assessment and practical testing to account for individual body proportions. This guide reveals the exact process for measuring a stability ball correctly—whether you’re shopping online, verifying a new purchase, or troubleshooting an existing ball that doesn’t feel quite right. You’ll learn industry-standard sizing guidelines, the foolproof sitting test, and critical inflation techniques that most retailers never mention.
Match Your Height to Standard Stability Ball Sizes
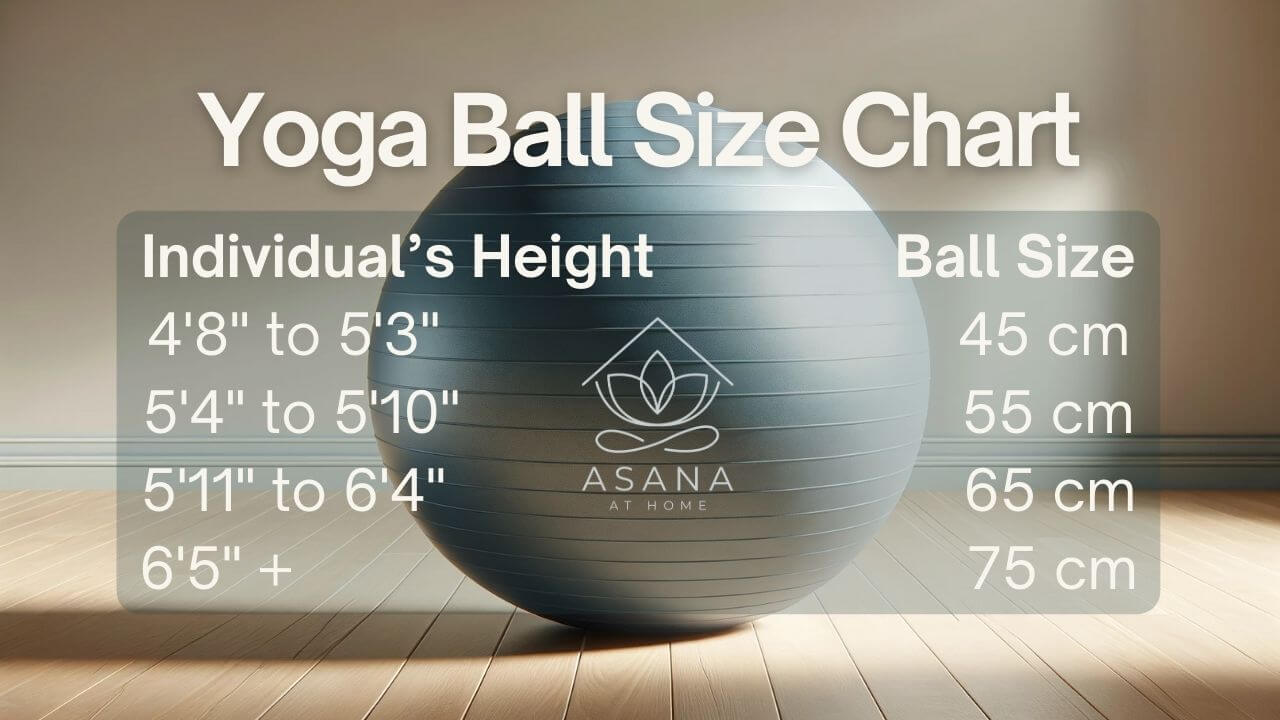
Your body height provides the most reliable starting point when determining how to measure a stability ball for your specific needs. Manufacturers design balls in standard diameter increments that correspond to specific height ranges, ensuring proper hip and knee alignment when seated. Ignoring these guidelines often leads to poor posture during exercises, making even simple planks uncomfortable or ineffective.
Height-Based Size Chart for Quick Reference:
- 45 cm (18-inch) ball: Best for users under 5 feet tall (152 cm). This size allows shorter individuals to maintain full foot contact with the floor while keeping thighs parallel to the ground.
- 55 cm (22-inch) ball: Ideal for users between 5’0″ and 5’7″ (152-170 cm). This midsize option accommodates most women and shorter men comfortably during seated exercises.
- 65 cm (26-inch) ball: Perfect for users between 5’7″ and 6’0″ (170-183 cm). The most common size for average-height adults supports proper spinal alignment during core workouts.
- 75 cm (30-inch) ball: Designed for users over 6 feet tall (183 cm). Taller individuals require this larger diameter to prevent hip flexion and maintain stability.
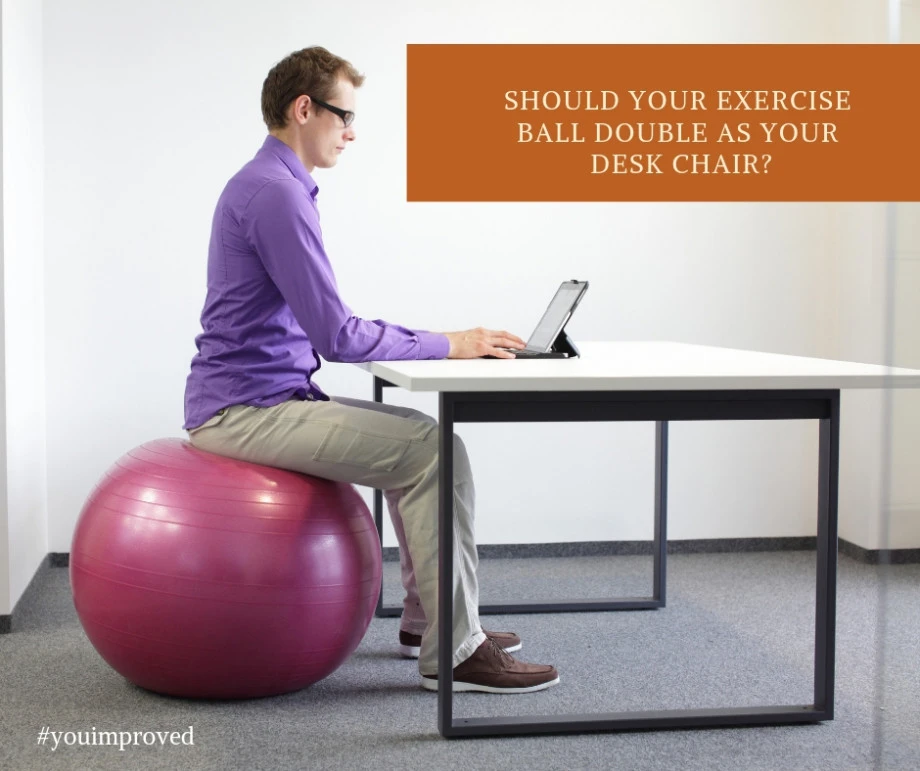
If you’re between sizes or have unusual proportions (like a longer torso), consider your primary use case. Office workers who sit for extended periods might prefer sizing up slightly for comfort, while athletes performing dynamic movements may benefit from sizing down for increased instability challenge. Never select a ball based solely on available storage space—proper fit always trumps convenience.
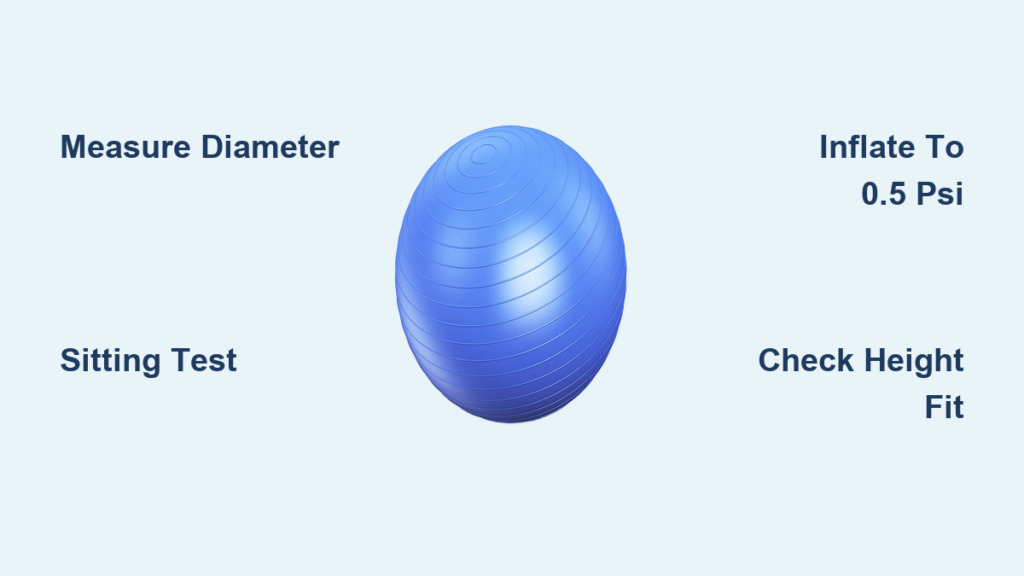
Measure Diameter Correctly With Household Tools
Knowing how to measure a stability ball’s actual diameter eliminates guesswork and confirms whether your ball matches its labeled size. Many users mistakenly measure circumference instead of diameter or test an under-inflated ball, leading to inaccurate size assessment. This simple measurement technique works with basic tools you likely already own.
Step-by-Step Diameter Measurement Process
Start by fully inflating your stability ball to the recommended pressure of 0.4-0.5 PSI. An under-inflated ball will measure smaller than its actual size, while over-inflation creates an artificially larger diameter. Most exercise balls feel firm but yield slightly when pressed with your palm—similar to the tension of a properly inflated basketball.
Place the ball on a hard, flat surface and locate its widest point (the equator). Use one of these two reliable methods:
- Flexible Tape Method: Wrap a cloth measuring tape around the ball’s circumference at the widest point. Divide this measurement by 3.14 (pi) to calculate the diameter. For example, a 204 cm circumference equals a 65 cm diameter (204 ÷ 3.14 = 65).
- String and Ruler Method: Wrap string around the ball’s circumference, mark where it meets, then measure the string length against a ruler. Divide by 3.14 to get the diameter.
Critical Measurement Tips:
– Measure at room temperature, as cold air contracts the ball while heat expands it
– Take multiple measurements from different angles for accuracy
– Check for manufacturer size markings near the valve as a secondary verification
– Never measure a partially deflated ball—this guarantees inaccurate results
Perform the Essential Sitting Test for Real-World Fit
The sitting test transforms theoretical measurements into practical verification, revealing whether a stability ball actually fits your body correctly. Many users measure diameter accurately but still end up with an uncomfortable ball because they skip this crucial step that accounts for individual proportions.
How to Execute the Proper Sitting Test
Sit on your inflated stability ball with both feet flat on the floor, hip-width apart. Your thighs should form a near-horizontal line parallel to the ground, with your knees bent at approximately 90 degrees. Most importantly, your hips should sit level with or slightly above your knees—never below them.
Interpreting Your Sitting Test Results:
- Hips significantly below knee level: The ball is too large. This strains your lower back and forces your knees upward, compromising stability during exercises.
- Hips substantially higher than knees with thighs angled downward: The ball is too small. This creates excessive hip flexion and reduces your base of support.
- Hips at or slightly above knee level with thighs parallel to floor: Perfect fit. Maintain this position for 2-3 minutes to confirm comfort.
For office use, add a keyboard-height test: Sit with arms resting comfortably on your desk. Your elbows should form 90-degree angles without shoulder shrugging. If you need to raise your shoulders, the ball is likely too small.
Inflate to Precise Pressure Before Final Measurement
Proper inflation directly impacts how to measure a stability ball accurately and affects its performance during use. An under-inflated ball compresses too much under your weight, while an over-inflated ball becomes dangerously rigid and measures larger than its true size.
Optimal Inflation Guidelines
Most standard stability balls require inflation to 0.4-0.5 PSI for exercise use. Heavy-duty models designed for taller or heavier users may require slightly higher pressure. When inflating:
- Use a pressure gauge for accuracy—don’t rely on feel alone
- Inflate gradually, checking firmness every 10-15 seconds
- Stop when the ball yields slightly under firm palm pressure but maintains its shape
- Allow 15-20 minutes for air to stabilize before final measurement
Warning: Over-inflation is the leading cause of stability ball failure. If you hear squeaking sounds or notice excessive surface tension, immediately release small amounts of air. The ball should never feel rock-hard or create visible stretching of the material.
Avoid These Common Stability Ball Measurement Errors
Even fitness professionals occasionally make critical mistakes when measuring stability balls. Recognizing these pitfalls ensures you get accurate measurements on your first attempt.
Top Measurement Mistakes to Avoid:
- Measuring on carpet or soft surfaces: Creates indentation that reduces apparent diameter
- Using height charts without verification: Body proportions vary significantly between individuals
- Ignoring temperature effects: Cold environments shrink the ball temporarily
- Relying solely on packaging labels: Manufacturing variances mean actual size may differ
- Testing without proper footwear: Bare feet or socks create different stability than shoes
If measuring for rehabilitation purposes after an injury, consult your physical therapist about potential size adjustments. Recovery may require a slightly larger ball to reduce hip flexion during initial exercises.
Troubleshoot Size Issues After Purchase
Sometimes measurement seems correct but discomfort persists during use. These practical solutions address common post-purchase sizing problems without requiring a new ball.
Size Adjustment Strategies:
- For balls that feel slightly too large: Place a 1-2 inch thick yoga mat underneath to effectively reduce diameter
- For balls that feel marginally too small: Add small air increments (5-10 seconds) while monitoring firmness
- For persistent lower back strain: Try a different inflation pressure within the recommended range
- For office use discomfort: Adjust chair height rather than ball size when possible
If these adjustments don’t resolve issues within 2-3 uses, exchange the ball for the next size up or down. Most reputable retailers allow returns within 30 days for unused fitness equipment.
Maintain Measurement Accuracy Through Proper Care
Your stability ball’s size remains consistent only with proper maintenance. Regular care preserves both the physical dimensions and performance characteristics that made your initial measurement accurate.
Preservation Best Practices:
– Store away from direct sunlight and extreme temperatures
– Clean with mild soap and water—avoid harsh chemicals
– Check inflation weekly as air naturally seeps through material
– Rotate the ball periodically to ensure even wear
– Inspect for micro-punctures that gradually reduce size
Replace your stability ball when it requires weekly inflation to maintain proper size or shows visible wear patterns. Most quality balls last 1-2 years with regular use before material degradation affects sizing accuracy.
Selecting the right stability ball through precise measurement creates the foundation for effective core training, improved posture, and injury prevention. By following these exact measurement techniques and verification steps, you’ll transform your stability ball from a simple piece of equipment into a precision fitness tool that perfectly matches your body’s unique dimensions. Remember that proper measurement isn’t a one-time event—regular checks ensure your ball continues performing as intended throughout its lifespan.


