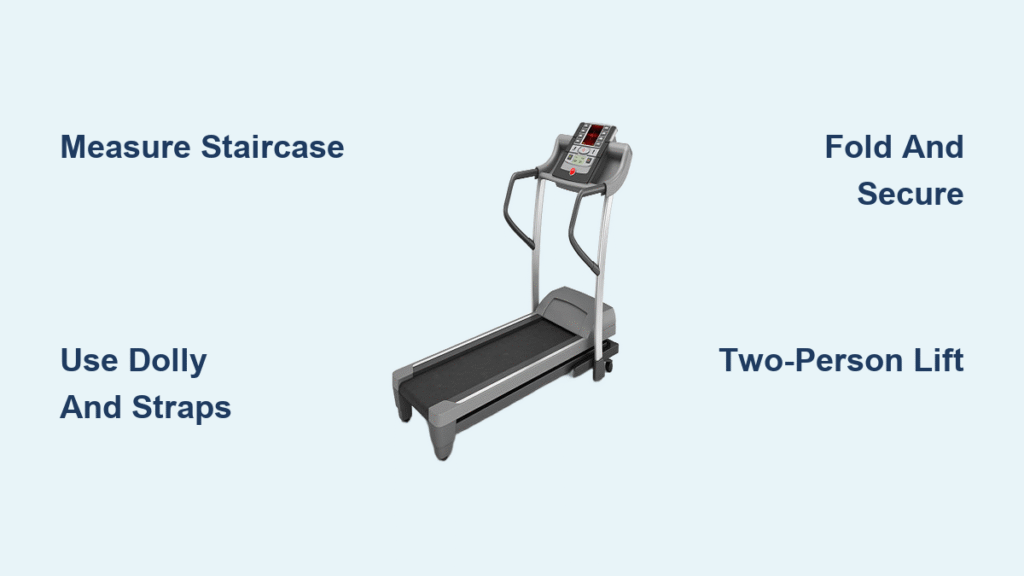
Your new treadmill arrived yesterday, and now you’re staring at the staircase wondering how on earth you’ll get this 300-pound machine to your second-floor home gym. Don’t panic—moving a treadmill upstairs is challenging but completely doable with the right approach. Whether you’re relocating your existing equipment or bringing a new purchase to its final spot, this guide gives you the exact steps professional movers use to transport treadmills safely up stairs without damaging your home or risking injury.
Most people attempt this move unprepared and end up with scratched walls, damaged equipment, or worse—serious back injuries. The key difference between success and disaster comes down to three factors: knowing your treadmill’s specific dimensions and weight, using proper equipment, and executing the right stair navigation technique. By following these proven methods, you’ll complete your treadmill move safely in under two hours.
Measure Your Treadmill and Staircase Before Lifting Anything
Identify Your Treadmill’s Critical Specifications
Start by gathering the numbers that determine your moving strategy. Most home treadmills weigh between 200-400 pounds, with compact folding models as light as 100 pounds and commercial units reaching 500+ pounds. Measure your treadmill’s width, length, and height in both folded and unfolded positions—this affects whether you can navigate turns without disassembly.
Look for these critical features:
– Folding mechanism with safety lock pin
– Built-in transport wheels (usually at the front)
– Removable components like console or handrails
– Weight distribution (motor location creates imbalance)
Analyze Your Staircase Configuration
Your staircase type dictates your approach. Straight stairs offer the easiest path, while curved or spiral stairs significantly increase difficulty. Measure the tread width against your treadmill’s dimensions—standard interior doors are 28-32 inches wide, so if your treadmill exceeds this, you’ll need to remove doors or disassemble parts.
Clear your pathway by:
– Measuring doorways and hallways (36″ minimum recommended)
– Removing doors from hinges for extra 1-2 inches
– Creating 3-foot clearance around final placement area
– Clearing obstacles from stairs and landings
Essential Equipment You Must Have Before Starting

Non-Negotiable Moving Tools
Don’t attempt this move without proper equipment. A heavy-duty furniture dolly rated for 400+ pounds is non-negotiable—cheap dollies will fail under treadmill weight. Pair it with ratchet straps or cam buckle straps to secure your treadmill during transport.
Complete equipment checklist:
– Furniture dolly with large wheels (rubber preferred over plastic)
– Moving straps (minimum 2, preferably 4)
– Moving blankets for protection
– Furniture sliders for carpet navigation
– Work gloves with non-slip grip
– Back support belt (optional but recommended)
Disassembly Tools Checklist
Most treadmills require some disassembly for safe transport. Keep these tools handy:
– Flathead screwdriver for console removal
– Adjustable wrench for handrail bolts
– Hex keys (various sizes for different models)
– Packing tape for securing cords
– Labeled bags for hardware storage
Prepare Your Treadmill for Safe Transport
Power Down Process
Safety first—never move a plugged-in treadmill. Follow these steps:
1. Turn off power switch (usually near power cord)
2. Unplug from wall outlet completely
3. Remove safety key and store in labeled bag
4. Tape power cord securely to frame using packing tape
Component Removal Strategy
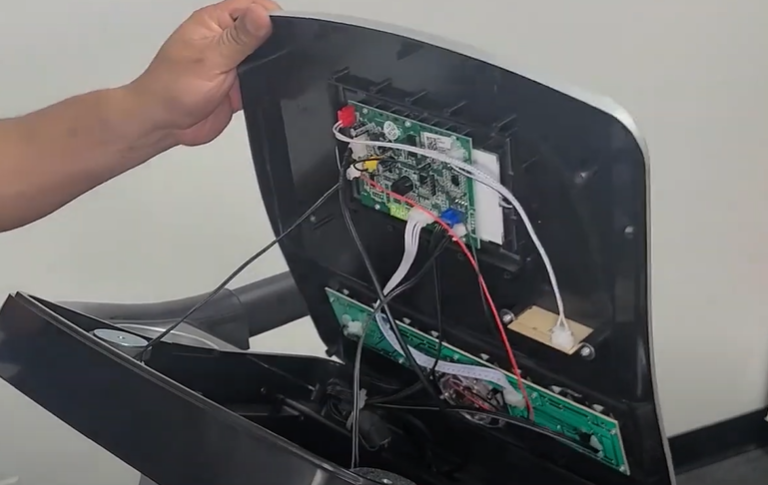
Check your owner’s manual for removable parts. Most treadmills allow console removal, which reduces weight by 20-30 pounds and eliminates fragile components that could break during transport.
Console removal steps:
– Unplug all cable connections (take photos first)
– Remove mounting screws/bolts
– Place console in padded box with accessories
Handrail removal (if applicable):
– Support weight while removing bolts
– Label hardware in zip-lock bags
– Keep bolts with their corresponding parts
Folding and Protection Techniques
Engage your treadmill’s folding mechanism per manufacturer instructions. Lock the safety pin securely—this prevents accidental unfolding during transport. Once folded, wrap the entire unit in moving blankets, securing with tape or plastic wrap. Pay special attention to the console area and belt edges.
Two-Person Stair Navigation Technique (Recommended)
Proper Positioning for Maximum Safety
This is the safest approach for most situations. Position your stronger partner below the treadmill, bearing 60-70% of the weight, while the upper person guides and maintains balance.
Pre-positioning:
– Tilt treadmill back 30-45 degrees onto dolly
– Secure with two straps—one horizontal, one vertical
– Test stability by gently rocking the load
– Establish clear verbal commands (“step,” “rest,” “steady”)
Executing the Stair Ascent
Ascent technique:
1. Lower person takes first step, leading with dominant foot
2. Move one step every 2-3 seconds
3. Use landings for 5-minute rest breaks
4. Monitor strap tension throughout climb
5. Adjust grip positions as needed
Critical warning: Never attempt to carry a treadmill weighing over 250 pounds alone. The risk of losing control increases exponentially with weight.
One-Person Method for Experienced Movers Only
When This Approach Is Appropriate
Only attempt this if you’re experienced with heavy lifting and your treadmill weighs under 250 pounds. Use a stair-climbing dolly with rotating wheels, and consider a rope and pulley system for mechanical advantage.
Single-person setup:
– Position dolly at stairs base facing backward
– Use additional ratchet straps for security
– Pull up using leg strength, not back
– Maintain three points of contact always
– Maximum safe weight: 250 lbs for experienced movers
Pro tip: Test your strength by lifting one end first. If you can’t lift it comfortably to knee height, get help—don’t risk injury.
Step-by-Step Moving Process Timeline
Phase 1: Pre-Move Setup (30-60 minutes)
Preparation prevents problems. Spend this time setting up your move correctly:
1. Measure all pathways and mark tight spots
2. Test dolly capacity and wheel movement
3. Remove doors from hinges where needed
4. Place furniture sliders under dolly wheels for carpet
5. Position spotter at top of stairs with phone ready
Phase 2: Loading the Treadmill (15-30 minutes)
Proper loading technique protects both you and your equipment:
1. Tilt treadmill onto dolly using squat-lift technique
2. Secure with minimum two straps in cross pattern
3. Double-check all connections are tight
4. Clear communication test with helper
5. Final pathway inspection
Phase 3: Ascending the Stairs
The actual move requires patience and coordination. Time varies significantly based on staircase length and complexity.
Key techniques:
– Maintain slow, steady pace (rush equals accidents)
– Rest every 5-7 steps on landings
– Monitor dolly wheels for stability
– Communicate constantly with partner
– Stop immediately if straps loosen
Critical Safety Protocols That Prevent Injuries
Physical Safety Rules
Never compromise on safety techniques. Use proper lifting form—squat down, keep back straight, lift with legs. Don’t attempt solo moves over 250 pounds, and take 5-minute breaks every 10-15 stairs to prevent fatigue.
Emergency preparedness:
– Keep phone accessible throughout move
– Inform others of your moving timeline
– Have first aid kit nearby
– Know when to stop and reassess
When to Call Professional Movers
Some situations require expert help. Hire professionals if your treadmill exceeds 350 pounds, you’re dealing with spiral stairs, or you have pre-existing back/joint issues. Professional movers typically cost $200-400 but include insurance coverage.
Solve Common Treadmill Moving Problems
Tight Corner Navigation Solutions
Corners create the biggest challenges. Use the “walk” technique—small pivot movements that gradually turn the treadmill around tight spaces. If that’s impossible, temporarily remove handrails for extra clearance.
Corner techniques:
– Measure minimum 4-inch clearance on all sides
– Use furniture sliders for smooth pivoting
– Remove door stops/trim if needed
– Consider partial disassembly for narrow spots
Uneven Weight Distribution Fixes
The motor creates significant weight imbalance. Always position the motor end toward the bottom during ascent—this prevents the treadmill from flipping backward. Use additional straps to secure the heavier section.
Doorway Obstacle Workarounds
Standard doorways often create bottlenecks. Solutions include:
– Removing door stops for extra 1/2 inch
– Taking doors off hinges for 1-2 inches more
– Tilting treadmill at 45-degree angle
– Partial disassembly as last resort
Post-Move Setup and Testing Protocol
Reassembly Checklist
Don’t skip these steps—improper reassembly creates safety hazards:
1. Verify all hardware accounted for using labeled bags
2. Reattach console following manufacturer’s guide
3. Replace safety key in designated slot
4. Plug in and test basic functions
5. Check belt alignment and tension
6. Calibrate incline if your model includes it
Initial Testing Procedure
Before your first workout:
– Start at lowest speed for 2-3 minutes
– Test incline through full range
– Verify safety key emergency stop
– Listen for unusual noises or vibrations
– Document any damage for insurance
Moving a treadmill upstairs successfully comes down to preparation, proper equipment, and technique. Measure twice, move once, and don’t hesitate to call professionals when the situation demands it. Your safety and your home’s integrity are worth far more than the savings from a risky DIY attempt.
Remember: A smooth move today means safe workouts for years to come. Take your time, follow these steps, and you’ll have your treadmill perfectly positioned for your fitness journey. If you encounter obstacles beyond your capability, professional movers typically cost $200-400 but provide insurance coverage that protects against costly damage or injury. Your health is your greatest asset—protect it while moving your treadmill upstairs.

