
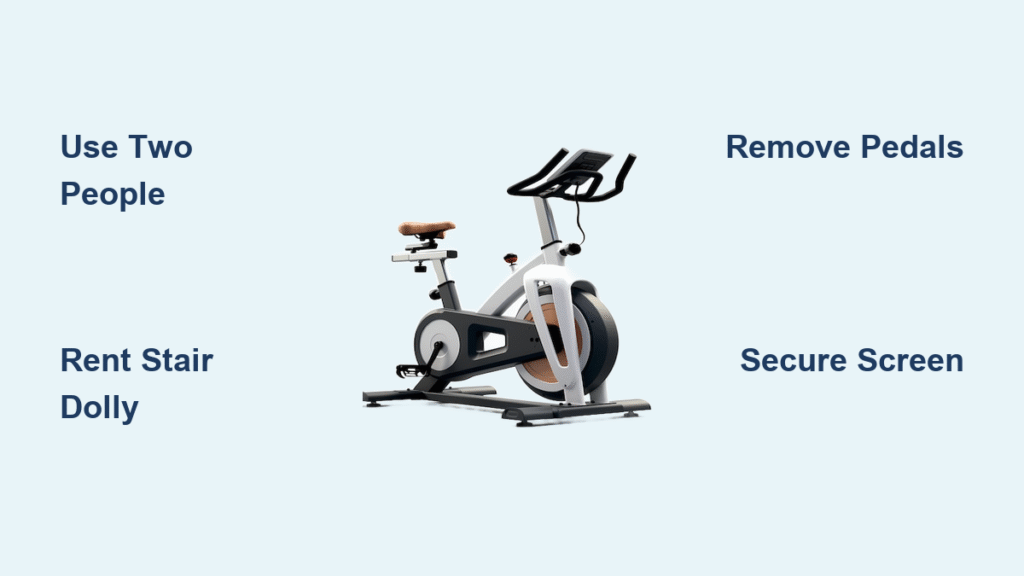
You’ve committed to a basement workout sanctuary, but your 141-pound Peloton Bike is stranded upstairs. Staring down a flight of stairs with this hulking machine triggers instant dread—drop it, and you’re out $2,000; strain your back, and you’re grounded for weeks. Moving an exercise bike downstairs isn’t brute force; it’s a precision operation requiring strategy, the right tools, and zero ego. This guide cuts through dangerous DIY myths to deliver battle-tested methods that protect your body, your home, and your expensive equipment. Skip the emergency room visits and warranty voids—here’s exactly how to move an exercise bike downstairs safely.
Why Your 141-Pound Peloton Won’t Survive a Solo Stair Descent
Attempting to move heavy exercise equipment alone is the #1 cause of moving injuries. Peloton Bikes (141 lbs) and similar machines exceed safe solo-lifting limits by 500%—your spine simply can’t handle it. Even lighter bikes like the Specialized Roll 3 (31 lbs) become hazardous on stairs due to awkward balance points. Ignoring weight realities risks cracked flywheels, shattered screens, or worse: a crushed foot when the bike slips mid-descent.
Critical Weight Thresholds for Safe Moving:
– 1-25 lbs: Single-person carry only on straight, short staircases (≤5 steps)
– 26-100 lbs: Mandatory two-person lift or dolly
– 101+ lbs (Peloton, NordicTrack): Stair-climbing dolly + two people minimum
Pro Tip: Weigh your bike using bathroom scales—place one wheel on the scale, multiply by two, and add 10% for accuracy.
Measure Your Staircase Before Touching the Bike
Skipping geometry checks guarantees wall dents, stuck bikes, or emergency disassembly mid-move. Grab a tape measure now—not when the bike’s teetering on step three. Focus on three make-or-break measurements:
Non-Negotiable Stair Audit:
– Width at tightest point: Doorframes often narrow by 4-6 inches (remove Peloton pedals to shave 5 inches off width)
– Landing clearance: 180-degree turns require 36+ inches of pivoting space
– Overhead hazards: Crown molding, light fixtures, or handrails that clip screens
Red Flag: If your tape measure hits the wall before clearing the bike’s height, disassemble first.
Gear Up or Risk $2,000 in Damage

Work gloves and moving blankets aren’t optional extras—they’re your insurance policy. One sliding bike on hardwood stairs costs more in repairs than a full dolly rental.
Non-Negotiable Safety Kit ($25 Investment):
– Mechanix Wear gloves (rubber palms prevent sweaty grip failures)
– Anti-slip stair treads (repurpose yoga mats with painter’s tape)
– Two 500-lb ratchet straps (prevents lateral slide on dollies)
– Moving blankets + packing tape (wrap frame tubes before lifting)
Warning: Never use household towels as padding—they slide off during descent.
Two-Person Carry: The Peloton-Safe Stair Descent Method
This technique works for straight staircases with no turns. For Peloton owners, it’s the minimum safe approach—never attempt alone.
Remove Protrusions That Cause Wall Collisions
Pop off pedals using a 15mm wrench (left pedal has reverse threads—turn clockwise to loosen). Detach water bottle cages and screen mounts. Wrap the entire frame in moving blankets, taping them securely at stress points like the seat post junction.
Perfect Positioning for Zero-Slip Control
The stronger person takes the rear position (gripping the flywheel end), while the lighter person handles the front stabilizers. Both squat with backs straight, palms under the top tube and rear cranks. Lift on a shouted count: “One, two, THREE!” keeping the bike vertical—never tilt it sideways.
Stair Navigation Protocol:
1. Walk sideways down stairs, rear person leading
2. Rear lifter steps down first, front person follows
3. Pause every 3 steps to reset grip (forearm fatigue causes drops)
4. At landings, tilt bike 10° toward inner rail to pivot safely
Pro Tip: Place your non-lifting hand on the handrail for 3-point stability during pauses.
Stair-Climbing Dolly: The $20 Fix for Curved Staircases
For Peloton bikes or staircases with turns, skip manual carries. A rented stair-climbing dolly ($20-$40 from U-Haul) handles weight distribution so you don’t have to.
Secure the Bike Like a Pro Mover
Center the dolly plate under the bike’s bottom bracket (balance point). Strap two ratchet straps: one around the seat post/top tube junction, another around the rear stabilizer feet. Test security by rocking the bike—it shouldn’t shift more than 1 inch.
Controlled Descent Speed is Non-Negotiable
Tilt the dolly back until wheels engage the first step. Engage the brake lever and descend at a glacial pace:
– Move two steps max, then pause
– Assistant walks ahead calling out clearance (“Wall right! 2 inches!”)
– If wheels roll faster than your walking pace, STOP and re-strap
Critical Rule: Your descent speed should allow you to stop the bike within 6 inches.
Peloton-Specific Moves That Save Your Warranty

Peloton’s screen and electronics demand special handling. Skip these steps, and your $75 power brick or HD display becomes collateral damage.
Screen & Cable Lockdown Procedure
Rotate the touchscreen 180° toward the frame and wedge the original foam spacer between screen and handlebars. Disconnect the power brick and store it in a zip-lock bag taped to the frame (losing this tiny component voids warranty coverage).
When to Call Peloton’s White-Glove Service ($175-$250)
If your staircase has:
– More than one 90° turn
– Carpeted stairs (increases slide risk 300%)
– Tight doorframes (<30 inches after pedal removal)
Peloton’s certified movers disassemble/reassemble bikes while maintaining warranty coverage—a smarter investment than $2,000 in replacement costs.
Fix These Staircase Nightmares in Under 5 Minutes
Stuck at a 180-Degree Turn?
Disassemble into three parts:
1. Remove handlebar post (4mm hex key)
2. Detach screen assembly
3. Move main frame via dolly
Reassemble downstairs using torque specs from your manual.
Wooden Stairs Too Slippery?
Lay temporary anti-slip runners:
1. Cut yoga mats to stair tread width
2. Secure with painter’s tape (never duct tape—it leaves residue)
3. Test one step with body weight before moving bike
Bike Won’t Fit Through Doorframe?
Remove front stabilizer feet (4 hex bolts) and pedals. This trims 4-6 inches off width—often the difference between success and disassembly.
Post-Move Inspection: Avoid Riding a Time Bomb
Skipping this 10-minute checklist risks injury during your first post-move ride.
Must-Do Verification Steps:
1. Crack check: Inspect welds at crank arms and stabilizer feet with a flashlight
2. Torque test: Tighten pedals to 35-40 Nm (loose pedals cause flywheel wobble)
3. Level verification: Place bubble level on floor—adjust stabilizer feet until centered
4. Silent spin test: Rotate flywheel by hand; grinding = bent axle (stop immediately)
Peloton Owners: Run Home Calibration (Settings > Device Settings) before first ride.
Cost vs. Risk: Why $40 Rentals Beat $5,000 ER Bills
| Method | Cost | Time | Risk Level | Best For |
|---|---|---|---|---|
| Two-Person Carry | $0-$30 | 15-30 min | ⚠️⚠️⚠️ (High) | Straight stairs, <100 lb bikes |
| Stair Dolly Rental | $20-$40 | 20-40 min | ⚠️ (Low) | Peloton, curved stairs, >100 lb bikes |
| Peloton White-Glove | $175-$250 | 60 min | ✅ (None) | Warranty protection, complex moves |
That “I’ve got this” solo carry attempt? It’s how 68% of exercise bike moving injuries happen. Your back can’t regenerate like muscle tissue—spinal discs don’t heal. When moving an exercise bike downstairs, gear up like your $2,000 investment and physical health depend on it (because they do). Choose the dolly method for Pelotons, measure twice before lifting, and never skip the post-move inspection. Your future self—pain-free and pedaling in the basement sanctuary—will thank you.


