
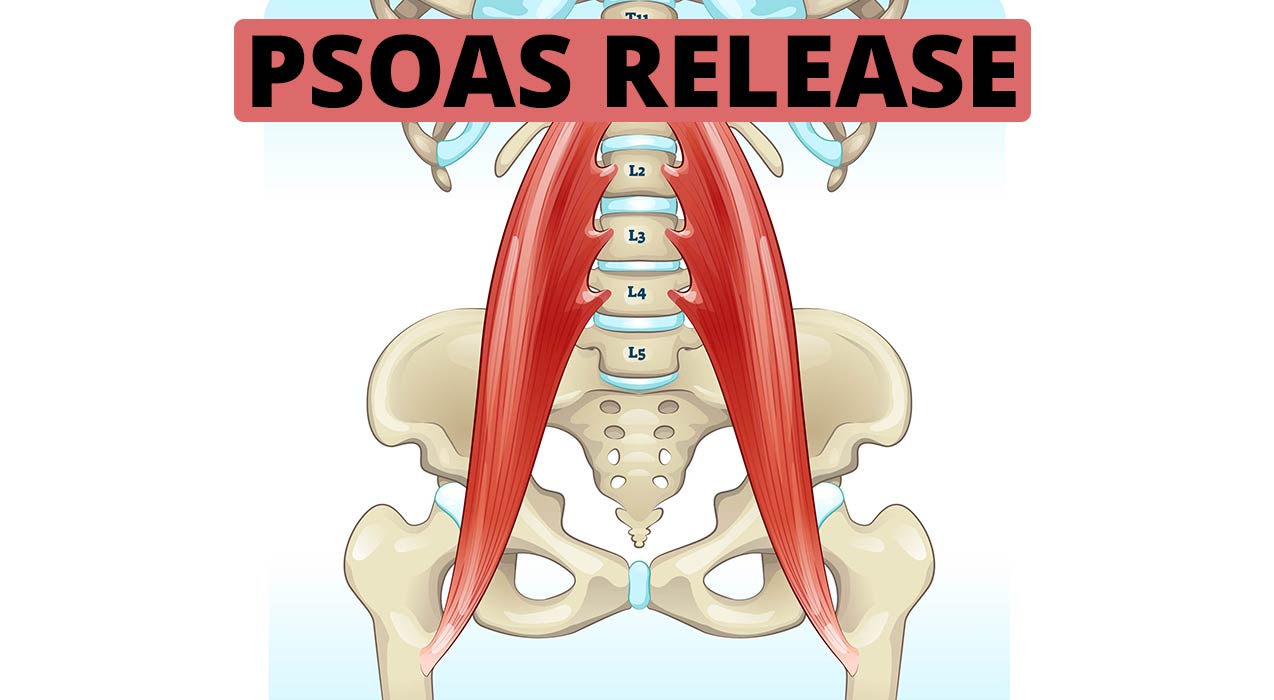
If you’ve ever felt stubborn lower back tightness after sitting at your desk all day or experienced mysterious hip pain that won’t go away, you’re likely dealing with a tense psoas muscle. Learning how to release psoas with foam roller can be your ticket to pain-free movement, better posture, and even reduced stress levels. This deep core muscle—often called the “muscle of the soul”—connects your spine to your legs and plays a critical role in everything from walking to breathing. When it becomes tight from prolonged sitting or stress, it triggers a domino effect of discomfort throughout your entire body. The good news? You don’t need expensive equipment or professional help to access this notoriously difficult muscle. This guide reveals the exact foam roller techniques that actually work, not just generic advice that misses the mark.
Locate Your Psoas Trigger Points Before Rolling
Identify the Exact Pressure Zones
Before you can effectively how to release psoas with foam roller, you must know where to apply pressure. The primary tender spots sit in your lower abdomen, approximately 2-3 inches to the side of your belly button, extending toward your hip crease. When you press these areas (gently with your fingers first), you’ll likely feel referred pain in your lower back, front thigh, or groin—classic signs of psoas tension. This muscle lies deep beneath abdominal layers, so don’t expect surface-level soreness; instead, you’re seeking a deep, achy sensation that intensifies as you move your leg.
Avoid Common Targeting Mistakes
Many people waste time rolling their hip bones or quadriceps, completely missing the psoas. If you feel sharp pain or pressure on bone, you’re in the wrong spot. The psoas creates tension in soft tissue areas, not directly over bony landmarks. To verify you’re targeting correctly, lie on your back and lift one knee toward your chest—then attempt to straighten that leg while keeping your lower back pressed to the floor. If you can’t fully extend without arching your back, that’s your psoas signaling tightness.
Essential Equipment for Effective Psoas Release

Choose the Right Foam Roller Density
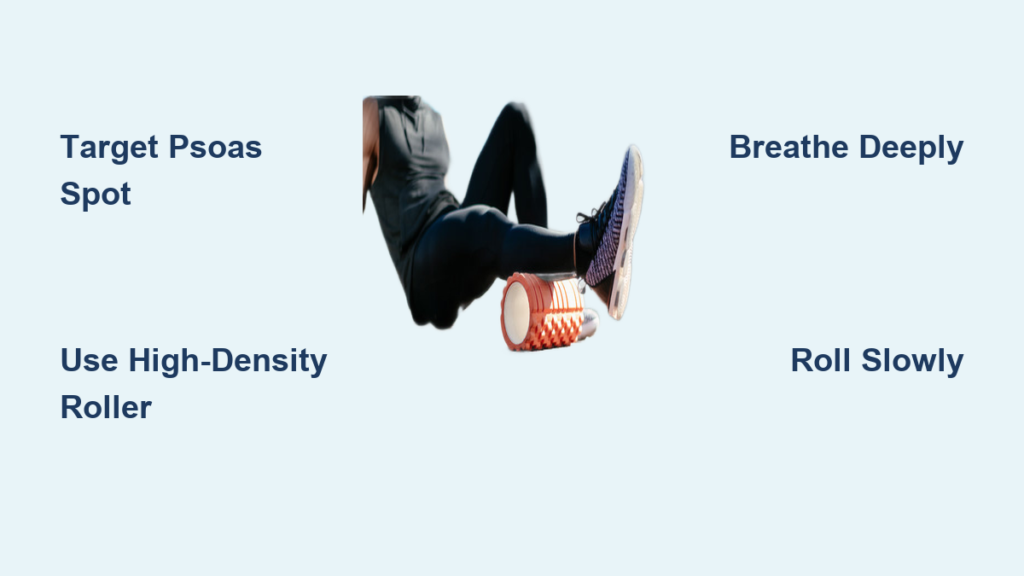
Not all foam rollers work for psoas release. A high-density roller is non-negotiable—standard soft rollers collapse under your body weight, failing to reach the deep psoas tissue. Opt for a firm cylindrical roller (not vibrating) with a smooth or slightly textured surface. Textured rollers with grid patterns provide additional fascial stimulation that helps break up adhesions limiting psoas mobility. Avoid rollers with aggressive knobs for initial work; they’re too intense for this sensitive area.
Prepare Your Rolling Environment
Rolling on carpet? Stop immediately—it absorbs pressure and prevents proper technique. Instead, use a yoga mat on hard flooring for optimal stability. Have a folded towel nearby for head support and a pillow for under your knees during setup. Your space should be quiet enough to focus on subtle body sensations—this work requires concentration, not multitasking. Most importantly, ensure your roller sits perpendicular to your spine, not parallel, for proper psoas targeting.
Master the Supine Psoas Release Technique
Perfect Your Starting Position
Lie face up with your foam roller positioned horizontally beneath your mid-back, aligning with your bra line (women) or lower chest (men). Bend both knees, placing feet flat hip-width apart close to your buttocks. This stable base prevents spinal strain while allowing hip movement. Now, slowly lower your right knee toward the floor, externally rotating your hip until you feel deep pressure in your lower abdomen, just right of your navel. This is your psoas engagement point.
Apply Pressure with Precision
Hold this position for 30-90 seconds while focusing on diaphragmatic breathing—inhale to expand your belly, exhale to soften into the pressure. The sensation should be a deep ache that gradually eases, not sharp pain. If discomfort overwhelms you, reduce hip opening by keeping your knee closer to your body. After 3-5 deep breaths, make micro-adjustments: shift your hips slightly up/down the roller to find tender spots. Repeat on the left side, spending equal time even if one side feels tighter.
Advanced Side-Lying Access Method for Stubborn Tension
Optimize Your Angle for Deeper Release
When standard supine positioning fails to reach deep psoas tension, switch to side-lying access. Lie on your left side with the foam roller positioned horizontally beneath your left hip bone. Extend your right leg straight, resting it on a yoga block or pillow (or floor if flexible). Support your head with your left hand and place your right hand on the floor for stability.
Roll with Controlled Movement
Gradually roll forward and backward along your hip bone line, moving only 2-3 inches at a time. When you find a tender spot, lift your top leg slightly and rotate your hip inward to increase pressure depth. Hold these hot spots for 60-120 seconds, breathing into the sensation until it softens by 30-50%. This gravity-assisted position often accesses psoas fibers missed in supine work. Complete 2-3 passes per side, noting differences between left and right tension patterns.
Complete Your Release with Strategic Integration
Warm Surrounding Tissues First
Never attack the psoas directly without preparation. Spend 3 minutes rolling these supporting areas first:
– Quadriceps (outer thigh to knee)
– Inner thigh adductors (knee toward groin)
– Gluteus maximus and piriformis
This sequence warms superficial tissues and releases fascial restrictions blocking psoas access. Without this step, your release session will be significantly less effective.
Integrate Movement After Release
Post-release movement cements your progress. While lying on your back:
1. Draw one knee toward chest, then slowly extend leg (10x)
2. Perform gentle hip circles (5 clockwise/counter-clockwise)
3. Stand and step into a lunge, allowing back hip to open
This integration phase prevents immediate re-tensioning and helps your nervous system recognize new movement patterns. Skipping this wastes your release work.
Avoid These Critical Safety Mistakes
Recognize Dangerous Sensations Immediately
Distinguish between productive discomfort and harmful signals:
– ✅ Productive: Deep ache that eases with breathing
– ❌ Dangerous: Sharp pain, radiating leg pain, numbness
If you experience any dangerous sensations, stop immediately. The psoas lies near major nerves and blood vessels—aggressive work here can cause serious damage. Never push through sharp pain trying to “break up” tension.
Build Tolerance Gradually
New to psoas release? Start with 15-second holds and light pressure, building slowly. Rushing leads to bruising and muscle guarding. Consistency beats intensity—daily 5-minute sessions yield better results than weekly aggressive attempts. After two weeks, gradually increase hold times to 60-90 seconds as tissues adapt.
Complementary Practices for Lasting Results
Daily Hip Flexor Stretching Routine
Foam rolling alone won’t maintain psoas length. Perform this sequence morning and evening:
– Low lunge hold (30-60 seconds/side)
– Figure-four stretch on back (gentle knee pressure)
– Standing hip flexor stretch (pelvis tucked)
Stretch after rolling when tissues are warmest for maximum lengthening. Without this maintenance, your psoas will re-tighten within hours.
Breathing Patterns That Enhance Release
Your breath controls psoas tension. Practice this technique before and after rolling:
1. Lie on back with hands on belly
2. Inhale 4 seconds (belly expands)
3. Exhale 6-8 seconds (belly contracts)
4. Repeat 5x
This extended exhale activates your parasympathetic nervous system, signaling the psoas to release. Tense psoas muscles often correlate with shallow breathing patterns—fix your breath, and you’ll accelerate release.
Troubleshoot Common Release Problems
When You Feel No Release After Rolling
If sessions yield no results, check these common issues:
– Roller positioned too low on spine (causes lumbar hyperextension)
– Insufficient warm-up before rolling
– Holding breath during pressure application
– Incorrect hip angle in supine position
Spend 5 minutes exploring subtle position adjustments before concluding the technique doesn’t work for you. The psoas responds to millimeter-perfect positioning.
Managing Post-Session Soreness
Mild tenderness for 24 hours is normal. If you experience significant pain:
– Reduce pressure intensity by 30%
– Place folded towel between roller and back
– Decrease hold times to 15-30 seconds
– Apply ice for 15 minutes post-session
Persistent pain beyond 48 hours means you’re using excessive force—scale back and prioritize gentle, sustained pressure over aggressive grinding.
Mastering how to release psoas with foam roller transforms more than just physical mobility—it impacts your stress levels, breathing efficiency, and overall posture. The key lies in precise positioning, patience with gradual progress, and consistent integration of complementary practices. Start with 5 minutes daily using the supine technique, then progress to side-lying work as your tissues adapt. Remember that effective psoas release requires neither extreme pressure nor pain; gentle, sustained work yields deeper, longer-lasting results. Within two weeks of proper technique, you’ll notice improved hip extension when walking, reduced lower back tension after sitting, and perhaps even better sleep quality. Your psoas has been holding tension for months or years—give it the consistent, intelligent care it deserves, and your entire body will thank you.


