

If you’ve ever stood up from your desk chair only to feel that familiar tightness radiating through your hips and down your leg, learning how to roll out glutes with a foam roller could be your ticket to lasting relief. Tight glutes plague millions who sit for extended periods, creating trigger points that refer pain to the lower back, hips, and even legs. The good news? You can address this common issue in just five minutes daily with nothing more than a foam roller and proper technique. This guide delivers precise instructions that target the exact areas causing your discomfort—no guesswork required.
Foam rolling your glutes isn’t just for athletes or fitness enthusiasts. Whether you’re an office worker battling hip pain after eight hours at your desk, a runner struggling with tight hips, or someone managing chronic sciatica symptoms, this self-myofascial release technique puts powerful relief in your hands. By applying strategic pressure to specific glute muscles, you’ll break up adhesions, increase blood flow, and restore natural movement patterns that sitting destroys. Read on to discover exactly how to roll out glutes with a foam roller for immediate and lasting results.
Why Glute Foam Rolling Matters for Pain Relief and Mobility
Your gluteus maximus, medius, and minimus muscles bear the brunt of modern life—constantly shortened while sitting yet expected to power explosive movements when you finally stand. This paradox creates dense adhesions in the fascia surrounding these muscles, restricting blood flow and causing referred pain throughout your lower body. When you learn how to roll out glutes with a foam roller correctly, you’re not just easing surface tension; you’re addressing the root cause of hip pain, lower back discomfort, and even sciatic nerve irritation.
The piriformis muscle—often overlooked in general glute rolling—sits directly atop the sciatic nerve. When this small muscle tightens from prolonged sitting, it compresses the nerve, creating that unmistakable shooting pain down your leg. Targeted foam rolling releases this pressure point, providing relief where painkillers and general stretching often fail. Unlike passive treatments, mastering how to roll out glutes with a foam roller gives you control over your recovery, putting the power to alleviate pain directly in your hands.
Essential Equipment: Choosing the Right Foam Roller for Glutes

How to roll out glutes with a foam roller effectively starts with selecting the proper tool. High-density foam rollers (18-24 inches long) provide the optimal balance of firmness and comfort for glute work. Avoid cheap, low-density rollers that collapse under pressure—they won’t reach deep tissue where your pain originates. For beginners or those with extreme sensitivity, a medium-density roller offers sufficient pressure without excessive discomfort.
Consider these foam roller options based on your needs:
- Standard high-density roller: Best for most users seeking deep tissue release
- Textured roller with ridges: More effective for breaking up stubborn adhesions
- Vibrating roller: Enhances blood flow beyond manual rolling alone
- Lacrosse ball: Critical for precise piriformis targeting (keep one in your desk drawer)
Pro Tip: When performing how to roll out glutes with a foam roller techniques, position yourself near a wall for stability. The wall provides crucial support when targeting deep glute muscles, allowing you to control pressure without straining your arms.
Basic Glute Rolling Position: Step-by-Step Execution
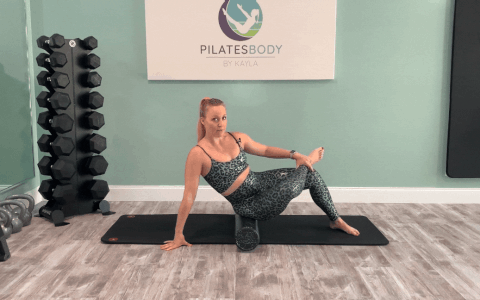
Stop wasting time with ineffective rolling—this precise technique delivers real results. Sit on your foam roller with it positioned horizontally beneath one buttock. Cross the ankle of your target side over the opposite knee (figure-four position), placing your hand on the floor behind you for support. Lift your hips slightly off the ground, transferring weight onto the roller through your hand and opposite foot.
Now roll slowly through these critical zones:
- Upper glutes near hip bone: Roll from the top of your pelvis down toward mid-buttock (3-4 seconds per roll)
- Pause on tender spots: Hold pressure for 30-60 seconds while taking deep belly breaths
- Rotate slightly inward: Targets gluteus medius along outer hip (common pain referral zone)
- Rotate slightly outward: Accesses deeper gluteus minimus and piriformis attachments
You’ll know you’ve found a trigger point when pressure creates a dull, spreading sensation—not sharp pain. Breathe into these spots as they gradually release. Spend 2-3 minutes per side, focusing on areas where you feel referred pain during daily activities.
Targeting the Piriformis: Critical for Sciatica Relief
If you experience shooting pain down your leg, this piriformis technique could be life-changing. Return to the figure-four position but shift your weight slightly toward the center of your buttock. Locate the piriformis muscle halfway between your hip bone and tailbone—this small muscle often feels like a dense pea-sized knot.
Apply steady pressure using these precise movements:
- Hold static pressure for 60-90 seconds while breathing deeply
- Make tiny hip circles (1-2 inch diameter) to break up adhesions
- Lean forward slightly to increase pressure if needed (stop immediately if you feel nerve pain)
Warning: If pressure creates sharp, shooting sensations down your leg, reduce intensity immediately—this indicates nerve irritation rather than muscular tension. Use a lacrosse ball for more precise piriformis targeting if foam rolling alone doesn’t provide relief.
Avoid These Common Glute Rolling Mistakes
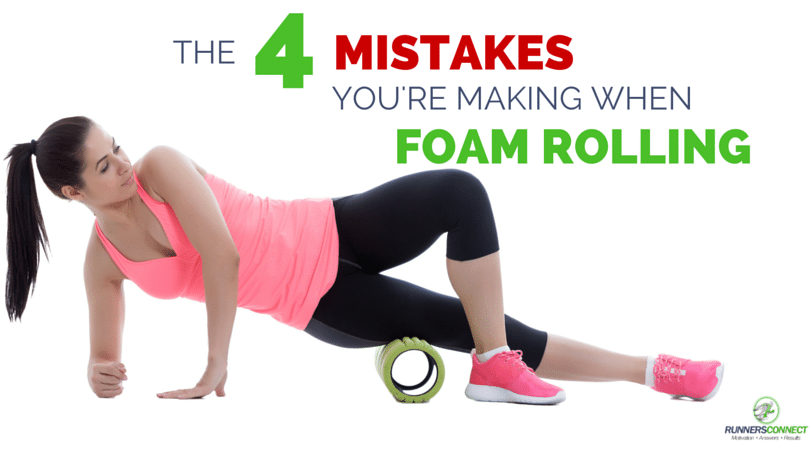
Most people waste time rolling incorrectly—fix these critical errors immediately:
- Rolling too quickly: Move at 1 inch per second to allow tissues to respond (not 10 seconds per side)
- Pressing on bones: Avoid sitting bones and hip bones—focus pressure on fleshy muscle tissue
- Using excessive force: Bruising means you’re causing damage, not release (discomfort should be 5-7/10)
- Neglecting the piriformis: This tiny muscle causes 80% of sciatica-like symptoms
Pro Tip: Place a towel over your roller if you’re new to foam rolling. This reduces pressure while you build tolerance, preventing the bruising that discourages most beginners from continuing.
Ideal Frequency: How Often to Roll Your Glutes
Timing your glute rolling correctly maximizes benefits while preventing tissue irritation. For desk workers combating sitting-related tightness, roll your glutes daily for five minutes (2-3 minutes per side). Athletes should roll post-workout to accelerate recovery, spending extra time on areas that feel particularly tight after training.
Optimize your schedule with these guidelines:
- Pre-workout: 1-2 minutes per side (light pressure only to activate muscles)
- Post-workout: 3-5 minutes per side (moderate pressure for recovery)
- Chronic pain management: Daily rolling plus 2-3 maintenance sessions weekly
Warning: More isn’t better—excessive rolling creates inflammation. If you experience increased soreness lasting beyond 48 hours, reduce frequency to every other day until your tissues adapt.
Combine Rolling with Targeted Stretching
Foam rolling alone won’t fix chronic tightness—pair it with these glute-specific stretches:
- Figure-Four Stretch: After rolling, hold this seated stretch for 30 seconds per side
- Pigeon Pose: Deeply stretches piriformis—hold 45 seconds after foam rolling
- Seated Spinal Twist: Releases tension connecting glutes to lower back
Perform these stretches immediately after rolling when muscles are most receptive. This combination creates lasting change by addressing both the physical restrictions and neurological tension patterns that keep your glutes tight.
When to Seek Professional Help
While learning how to roll out glutes with a foam roller solves most everyday tightness, consult a physical therapist if you experience:
- Numbness or tingling that persists beyond your rolling session
- Pain that worsens despite consistent rolling for 2-3 weeks
- Significant weakness when climbing stairs or rising from chairs
- Symptoms that interfere with sleep or daily activities
These signs may indicate underlying conditions requiring professional assessment, though most common glute tightness responds remarkably well to proper foam rolling technique.
Consistent glute foam rolling delivers cumulative benefits that transform how your body feels and moves. Within two weeks of daily five-minute sessions, most people report noticeable improvements in hip mobility, reduced lower back discomfort, and elimination of that nagging sciatic-type pain. The key lies in precise technique—not just randomly rolling your buttocks. By targeting the exact muscles causing your discomfort with the right pressure and timing, you’ll unlock mobility that sitting destroys. Keep your foam roller by your desk and commit to just five minutes daily—your hips (and entire lower body) will thank you.


