
You sit down, pull the handle on the rowing machine, and feel immediate discomfort. The chain jerks, your back protests, and the monitor shows numbers that make no sense. If you’re struggling with how to row on a rowing machine, you’re not alone—most beginners skip the critical sequencing that separates effective rowing from injury-prone flailing. Mastering how to row on a rowing machine takes just 10 minutes of focused practice. This guide reveals the exact 4-phase stroke sequence used by elite rowers, adapted for home and gym use. You’ll fix common errors that cause back pain, set up your machine for maximum efficiency, and build a workout plan that burns fat while building full-body strength.
Drive Phase: Push with Legs First (Not Arms!)
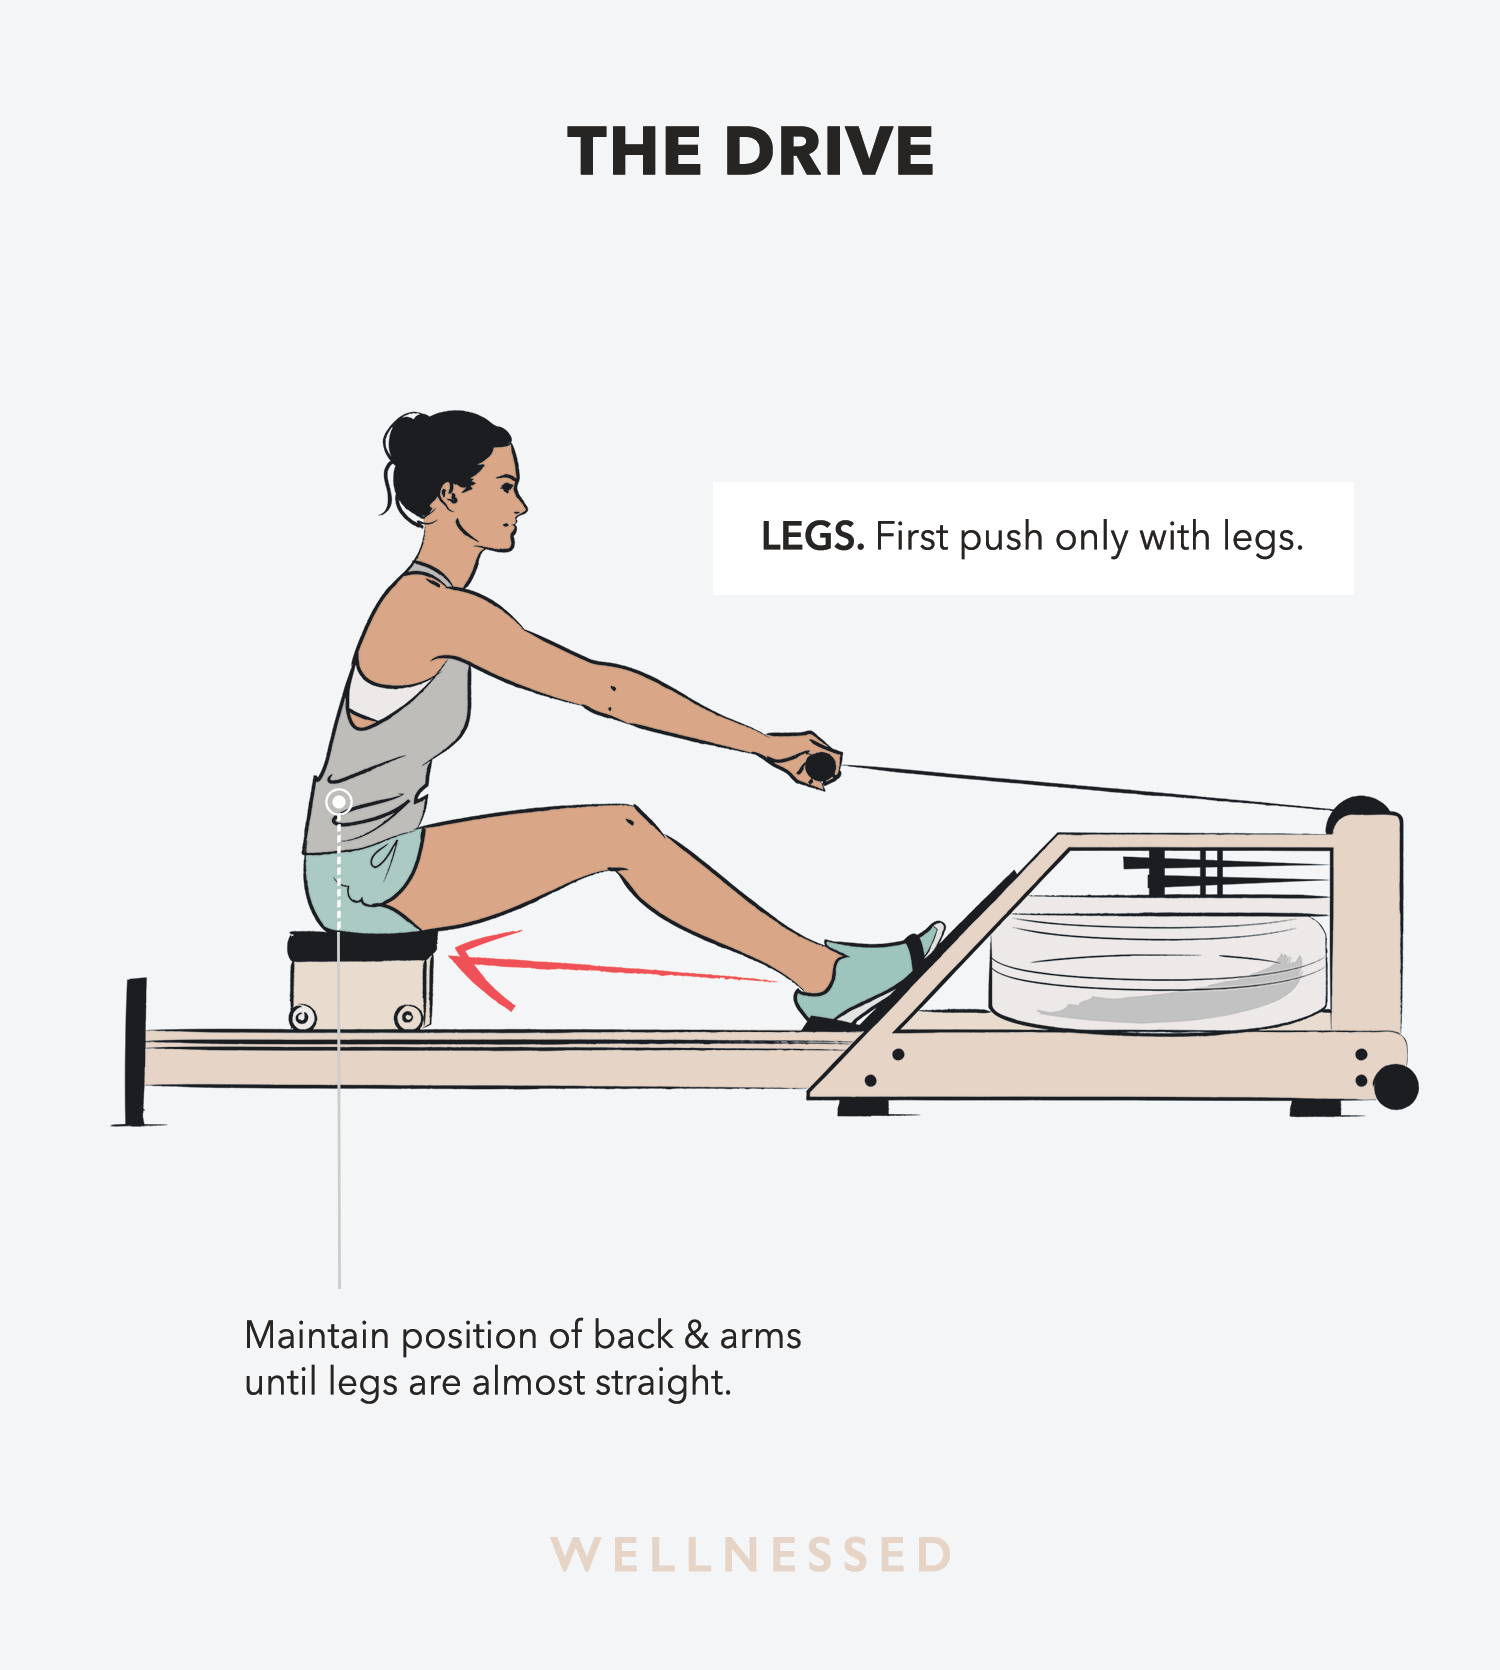
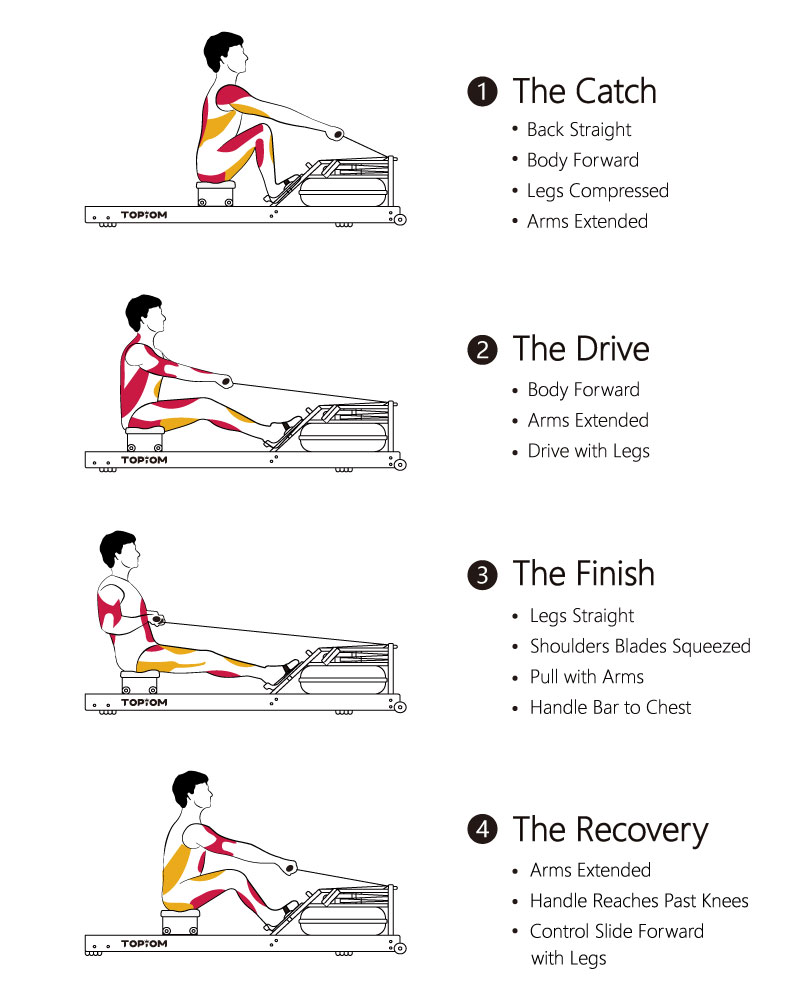
Your power comes from your legs—not your arms. Skip this sequence, and you’ll strain your back while getting minimal results. The drive phase should last about one second and follow this exact order:
Leg Push: Ignite Power from Your Heels
Drive 1 starts with explosive leg extension while keeping arms straight. Push through your heels as if standing up from a chair. Your arms act only as cables connecting leg power to the handle—never initiate with arm pull. Watch for: shins staying vertical and torso maintaining its 1 o’clock forward angle. If your arms bend early, reduce resistance and practice leg-only strokes.
Hip Swing: Transfer Power Smoothly to Torso
Drive 2 begins when legs reach 50% extension. Hinge your torso from 1 o’clock to 11 o’clock while keeping the handle moving in a straight horizontal line. Critical fix: If you feel your lower back rounding, consciously brace your core as if preparing for a light punch to the stomach. Elite rowers maintain a neutral spine here—your lumbar curve shouldn’t flatten or exaggerate.
Arm Pull: Finish with Light Hand Contact
Drive 3 happens only after legs are fully extended and torso leans back 10-15°. Draw the handle to your lower ribs (not chest or neck) with elbows skimming past ribs. Warning: Gripping too tightly causes forearm fatigue—hold with three fingers and thumb only. The handle should touch your body lightly; if you’re muscling it into position, you’ve broken the sequence.
Recovery Phase: Glide Back at Half Speed for Better Rhythm
Recovery isn’t rest—it’s preparation for your next powerful stroke. Move forward twice as slowly as your drive (2:1 ratio) to reset tension and breathe. Rushing this phase causes sloppy catches and knee pain.
Arm Extension: Reset Before Moving Torso
Recovery 1 starts by shooting your hands forward like handing off a baton. Arms must be fully straight before any other movement. Pro tip: Place a piece of tape on the rail at handle height. Practice 10 strokes keeping the chain parallel to the tape—this prevents the “scooping” motion that strains knees.
Hip Hinge: Protect Your Spine During Forward Swing
Recovery 2 begins only after arms extend. Pivot from hips (not waist) to return shoulders in front of hips. Common mistake: Rounding your upper back here transfers stress to lumbar discs. Keep shoulders rolled back and down, maintaining that core brace throughout.
Knee Bend: Wait Until Handle Passes Knees
Recovery 3 happens last—only when the handle clears your knees. Bend knees to glide forward until shins turn vertical. Visual cue: Your seat wheels should move silently during recovery; loud rolling means you’re rushing the sequence.
Perfect Catch Position: Avoid Knee Pain and Slipping Straps
The starting position sets up your entire stroke. Mess this up, and you’ll waste power while risking knee strain.
Footplate Setup: Stop Your Feet from Slipping Off
Straps must cross the ball of your foot (metatarsal heads), not the arch. Tighten snugly—but you should still flex your ankle 90°+ at the catch. Quick fix: If heels pop up excessively, loosen straps one notch or lower the footplate. Your weight should balance on the balls of feet, with heels free to lift slightly if ankle mobility requires.
Torso Angle: The 1 O’Clock Secret
Hinge forward from hips until shoulders sit directly in front of hips (like a clock hand at 1 o’clock). Critical error: Over-reaching beyond vertical shins strains hamstrings. Shorten your slide by 2-3 cm if you feel lower back pulling. Keep arms straight, grip relaxed, and core braced—this position should feel athletic, not strained.
Damper Setting Myth: Why 4-5 Beats Level 10 Every Time
Ignore the “10” setting—it’s a trap. Concept2 data proves elite rowers train at damper 4-5 (out of 10) 99% of the time. Higher settings mimic a heavy boat, causing early fatigue without building real power.
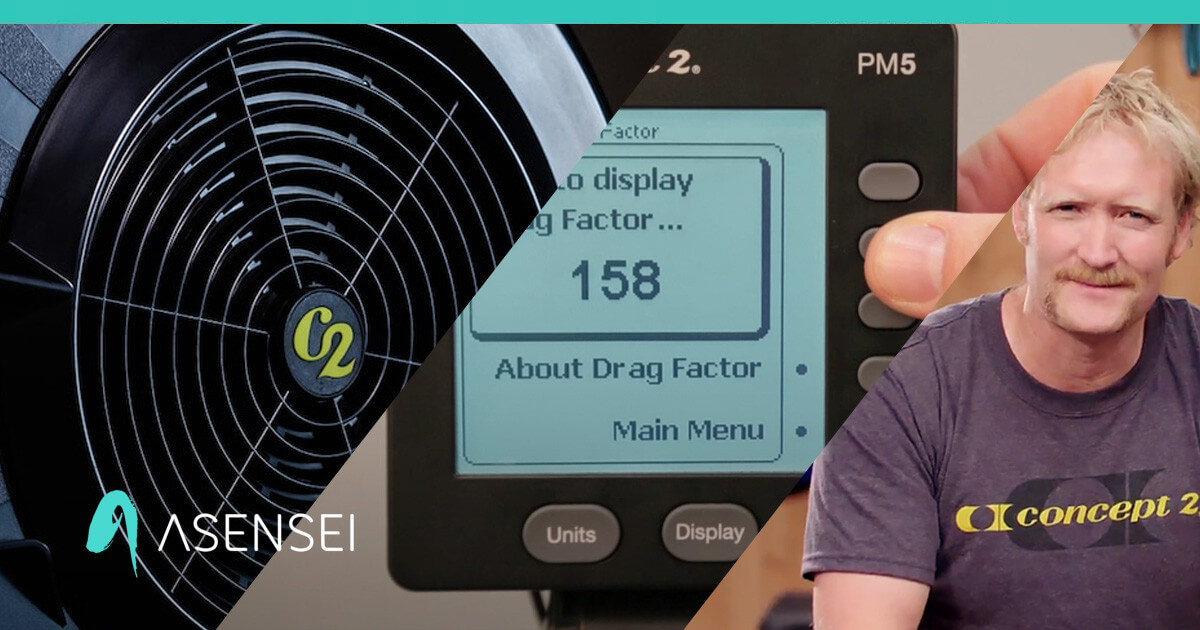
Find Your Drag Factor Sweet Spot
Press “Display Drag Factor” on your monitor. Aim for 110-130—this creates optimal flywheel resistance. Why it matters: At damper 10, you’re fighting air resistance instead of building leg power. You should maintain perfect form for 15+ minutes; if your stroke breaks down before then, lower the setting immediately.
SPM Control: Slow Down to Speed Up
Keep strokes per minute (SPM) ≤30 while learning. Shockingly, frantic 40+ SPM rowing with weak legs yields worse splits than controlled 24 SPM with full leg drive. Beginners target 2:00 per 500m—improve by pushing harder with legs, not pulling faster with arms.
Fix These 5 Common Rowing Machine Mistakes Immediately
| What You See | What It Means | Instant Fix |
|---|---|---|
| Handle bounces over knees | Early knee bend on recovery | Chant “Arms-body-legs” aloud for 5 strokes |
| Rounded upper back | Weak core engagement | Roll shoulders back, brace abs, hinge from hips |
| Sore lower back | Over-reaching at catch | Shorten slide by 2-3 cm, keep shins vertical |
| Blistered palms | Death grip on handle | Float pinkies, hold with three fingers + thumb |
| 40+ SPM with slow splits | Powerless frantic rowing | Drop to 24 SPM, push 2x harder with legs |
3 Beginner Drills to Build Muscle Memory in 10 Minutes
Leg-Only Drill: Reboot Your Power Source
Sit with arms straight and torso forward. Push back using legs only for 3×20 strokes at 18-20 SPM. Focus: Driving through heels while maintaining neutral spine. Do this daily for 3 days—you’ll feel 30% more power immediately.
Pause Drill: Lock In Each Position
Row normally but pause 2 seconds at: catch position, half-slide, and finish. Complete 5×1 minute sets with 1-minute rest. Why it works: Eliminates rushed transitions that cause back strain. You’ll discover where your sequence breaks.
Quarter-Slide Drill: Shorten to Strengthen
Reduce slide length by 50%. Row 10 minutes focusing on perfect sequencing before adding full range. Pro tip: Place tape on the rail marking half-slide position. This drill fixes “scooping” within one session.
Rowing Workouts That Burn Fat (Not Just Calories)
30-Minute Fat Burner (Beginner)
- 5 min warm-up @ 22 SPM
- 10×1 min hard (26-28 SPM) / 1 min easy (20 SPM)
- 5 min cool-down @ 20 SPM
Key: During hard intervals, push through heels—not arms—to torch calories. Total calorie burn: 350-450.
Low-Rate Power Builder (Intermediate)
- 8x500m @ 24 SPM
- Rest 2 min between pieces
- Target: Consistent split within 2 seconds per rep
Why it works: Lower stroke rates force full leg extension, building muscle while improving endurance. Do this twice weekly.
Grip and Breathing: The Secret to Effortless Rows
Handle Hold: Ditch the Death Grip
Place hands on the outer third of the handle, shoulder-width apart. Hold like a briefcase: index/middle/ring fingers + thumb on top, pinkies floated off the end. Power flows from legs through lats—your forearms should stay relaxed. If veins pop on your hands, you’re gripping too hard.
Breathing Rhythm: Sync Airflow with Stroke
- Drive phase: Sharp exhale (like blowing out candles)
- Recovery phase: Deep nasal inhale
Pro tip: Inhaling through your nose forces slower recovery, locking in the 2:1 tempo. This stabilizes your core and prevents hyperventilation.
60-Second Pre-Row Checklist for Injury-Free Sessions
- Straps over balls of feet (not arches)—test ankle flexion
- Shins vertical at catch position—no knee past toes
- Core braced, shoulders relaxed—no shrugging
- Drive sequence: Legs → Body → Arms (say it aloud)
- Recovery tempo: Arms → Body → Legs at half speed
- Settings: SPM ≤30, damper 4-5, split goal 2:00/500m
Rowing rewards precision, not power. Nail this sequence for 10 minutes daily, and within two weeks you’ll glide with the quiet efficiency of the flywheel itself—burning calories while building full-body strength. Your next step: Do the leg-only drill before every workout for 7 days. Track your 500m split—you’ll drop 5-10 seconds while feeling less fatigue. For advanced technique videos, visit Concept2’s official YouTube channel (free elite coaching demos).


