
Adding resistance bands to your bench press routine creates dynamic tension that builds explosive strength and overcomes stubborn plateaus. The progressive resistance curve from bands—lighter at the bottom and heavier at lockout—perfectly matches your natural strength curve, forcing maximum muscle recruitment when your chest and triceps are already fatigued. Whether you’re working with limited equipment at home or looking to enhance your gym performance, properly configured resistance bands deliver unique training benefits that traditional weights alone can’t match.
Many lifters struggle with inconsistent band setups that slip, snap, or fail to provide the right tension throughout the movement. This guide eliminates those frustrations with precise, step-by-step instructions for every band configuration—from beginner single-band setups to advanced multi-band systems. You’ll learn exactly how to anchor bands securely, select the right resistance levels, and integrate banded pressing into your training for faster strength gains and better muscle development.
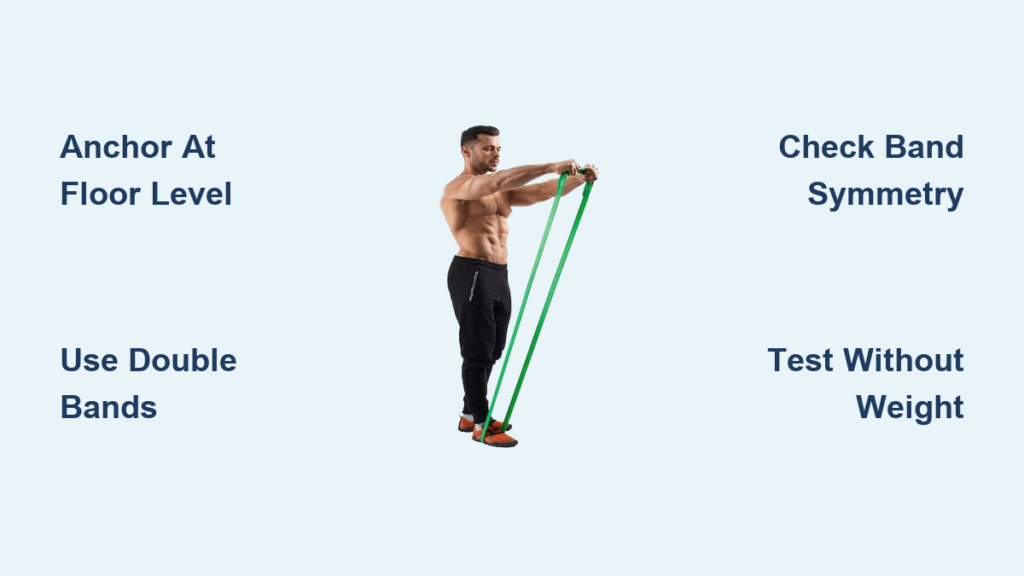
Choosing Your Resistance Band Configuration

Single Band Setup for Beginners
Start with a single resistance band when adding bands to your bench press for the first time. Select a light to medium resistance band (typically yellow or green) that provides noticeable tension at lockout while allowing you to maintain proper form throughout the movement. Drape the band over both barbell sleeves simultaneously, ensuring equal length on each side for balanced resistance. The band should sit securely in the groove between the sleeve collar and barbell shaft to prevent slippage during your press.
Route the band beneath your bench and anchor it to a secure point at floor level. Power racks with band pegs offer the most stable attachment, but you can also loop the band around the base of rack uprights if properly secured. Step back and visually confirm the band runs straight from each sleeve to its anchor point without crossing or interference. Perform several unweighted barbell presses to test the tension curve—adjust anchor height higher for more lockout resistance or lower for greater bottom-position assistance.
Double Band Configuration for Serious Lifters
Double your resistance by adding a second identical band when you’ve mastered the single-band setup and need greater overload. This configuration delivers substantial tension at lockout while maintaining enough assistance at the bottom to maintain proper form with heavier loads. Place both bands over the barbell sleeves together, ensuring even distribution on each side to prevent uneven resistance that could strain your shoulders.
For optimal security with double bands, use carabiners or band clips to attach each band to the barbell sleeve. This prevents slippage under heavy tension and allows quick resistance adjustments between sets. Anchor both bands to the same secure point on each side of your rack, verifying the attachment can handle the combined force without shifting. Double-check that both bands stretch evenly throughout your full range of motion—uneven stretching indicates improper setup that could compromise safety and effectiveness.
Perfecting Your Band Anchor Points
Floor-Level Anchors for Maximum Accommodation
Anchor your resistance bands at floor level when you need maximum assistance at the bottom of the press and want to overload the lockout position. This configuration creates the steepest tension curve, with minimal resistance when the bar touches your chest and dramatically increased resistance as you approach full extension. Ideal for lifters struggling with the initial pressing phase or those training with heavy weights who need accommodation throughout the movement.
Secure floor-level anchors by looping bands around the base of your power rack uprights or using dedicated band pegs positioned near the floor. Ensure the anchor point sits directly beneath where the barbell will be at the bottom of your press to maintain a straight resistance path. Test the setup with lighter weights first—floor anchors create the most dramatic tension increase at lockout, which can catch unprepared lifters off guard when attempting heavy singles.
Mid-Rack Anchors for Balanced Resistance
Position band anchors midway up your power rack uprights for the most balanced tension curve across your entire pressing range. This versatile setup provides continuous resistance from start to finish without extreme assistance at the bottom or overwhelming overload at lockout. Perfect for hypertrophy-focused training where maintaining constant muscle tension drives growth.
Use specific rack holes to standardize your anchor height—most lifters find the 3rd-5th hole from the bottom creates optimal tension for standard bench press height. Wrap bands around both uprights at the same height on each side to ensure symmetrical resistance. The band should create slight tension when the bar rests on your chest and provide challenging but manageable resistance at full extension. This mid-range anchor point works exceptionally well for tempo sets and controlled repetitions that maximize time under tension.
Critical Safety Checks Before Lifting
Verifying Band Security and Symmetry
Double-check band security before every set to prevent dangerous releases during heavy presses. Confirm bands are fully seated in sleeve grooves and properly anchored at both ends—give each band a firm tug to test security before unracking the bar. Inspect both sides for equal band length and tension, as even minor asymmetry creates uneven resistance that can strain joints and reinforce strength imbalances.
Examine bands for signs of wear including micro-tears, thinning areas, or deformation that indicates material fatigue. Replace any band showing wear patterns before using it in your setup—snapped bands can cause serious injury when under tension. Never use bands with visible damage, even for light warm-up sets, as compromised material fails unpredictably under load.
Testing Range of Motion Without Weight
Always test your band setup with an empty barbell before adding weight to verify full range of motion without interference. Perform 5-10 controlled repetitions, watching how the bands behave throughout the entire pressing path. The bands should move smoothly without catching on rack components, your body, or each other. Pay special attention to the transition point where bands shift from slack to taut—this should occur naturally within your normal pressing range.
Note any unusual sounds or resistance patterns during your test reps. Squeaking bands indicate friction points that could lead to premature wear, while sudden tension changes suggest improper anchor positioning. Adjust your setup until the resistance feels smooth and progressive from chest to lockout. This safety check takes less than two minutes but prevents potentially disastrous equipment failures during working sets.
Integrating Banded Bench Press Into Your Routine
Strength Phase Programming Strategies
Incorporate resistance band bench press during specific strength phases rather than every session for maximum effectiveness. Use heavy bands (black or purple) with 70-85% of your 1RM for 3-5 sets of 3-6 reps when targeting maximal strength development. The accommodating resistance allows handling heavier effective loads at lockout while maintaining challenging tension throughout the movement.
Begin each strength session with 1-2 sets using bands alone (no barbell weight) to activate your nervous system and prepare for the variable resistance. Then progress to your working sets with bands plus traditional weight. Keep total banded pressing volume moderate—4-8 working sets per session—to prevent excessive fatigue that could compromise technique on subsequent exercises.
Hypertrophy-Focused Band Applications
For muscle growth, combine moderate band resistance with controlled tempos and moderate weights. Use medium resistance bands (red or blue) with 50-65% of your 1RM for 3-4 sets of 8-12 reps, emphasizing a 3-second eccentric phase and explosive concentric press. The continuous tension from bands keeps muscles under load throughout both lowering and pressing phases, enhancing time under tension for greater hypertrophy stimulus.
Try band-assisted drop sets by performing an initial set to failure with bands and weight, then immediately removing the bands for additional reps with the same barbell weight. This technique extends your set beyond normal failure while maintaining proper form—bands provide the extra assistance needed to complete additional repetitions when muscles are fully fatigued.
Troubleshooting Common Band Setup Problems
Solving Band Slippage During Pressing
When bands slide off barbell sleeves mid-set, secure them properly by wrapping once around the sleeve before anchoring the free end. This creates a locked configuration that prevents slippage under tension. Alternatively, use band collars—special clips that hold bands securely in place without damaging the barbell.
If slippage persists, switch to thicker bands with greater surface contact against the barbell sleeve. Thinner bands (yellow, green) lack sufficient grip for heavier loads, while medium and heavy bands (red, black) stay securely positioned throughout heavy presses. Never attempt to correct slipping bands by adding weight—that only increases the risk of sudden band failure when it slips completely off the bar.
Fixing Uneven Resistance Between Sides
Correct uneven resistance immediately by comparing both sides of your setup side-by-side. Check that bands are identical in type and condition, as even slight differences in elasticity create noticeable imbalance. Measure band length from sleeve to anchor point on both sides—adjust one side to match the other precisely.
Replace bands showing uneven wear patterns—using mismatched bands that have stretched differently over time creates dangerous asymmetry. When anchoring bands to rack holes, use the exact same hole position on both sides of your rack. Small height differences between anchor points generate significant resistance variations that strain joints and reinforce strength imbalances.
Mastering resistance band setup for bench press transforms an ordinary exercise into a dynamic strength-building tool that targets weaknesses and accelerates progress. Start with single-band configurations using floor-level anchors to experience the unique tension curve, then progress to double bands and mid-rack anchors as your strength improves. Always prioritize safety through thorough equipment checks and proper anchoring techniques—never sacrifice security for convenience when working with elastic resistance.
Integrate banded pressing strategically into your programming: use heavy bands during strength phases for accommodating resistance and moderate bands during hypertrophy blocks for continuous tension. Track your band configurations and progress systematically, just as you would with traditional weights. With consistent practice and attention to proper setup details, resistance band bench press becomes an indispensable tool for breaking through plateaus and building a stronger, more powerful upper body.


