

That empty Rogue weight vest staring at you from the floor isn’t ready for Murph yet. Without plates properly locked in place, both the Echo and USA-built Plate Carrier models are just expensive fabric shells—weighing only 1.75 lbs and 1.12 lbs respectively when unloaded. You’re about to transform that cardboard box into a workout-ready tool in under 10 minutes, whether you ordered the budget-friendly Echo or premium Plate Carrier. Skip the frustration of mismatched plates or unstable straps; this guide cuts straight to verified setup steps from Rogue’s official documentation. Grab your vest, compatible plates, and let’s get weight where it belongs.
Verify Your Rogue Weight Vest Package Contents First
Don’t assume everything arrived correctly—Rogue ships vests completely empty of plates. Before touching tools (none needed!), cross-check your box against this critical inventory:
| Included in Box | Must Purchase Separately |
|---|---|
| Vest chassis (Echo or Plate Carrier) | Rogue Echo Cast Plates or Rogue USA Cast Plates |
| Shoulder straps with padding | Optional shoulder pads (Plate Carrier only) |
| Adjustable waist belt with Velcro® | Morale patches for customization |
| Front/rear plate pockets | — |
| MOLLE webbing & Velcro® patch fields | — |
Critical mistake alert: Rogue never includes weight plates. If you see only the vest shell, immediately check your order confirmation—without compatible plates, your $145-$185 investment remains useless. The Plate Carrier requires USA Cast Plates while the Echo uses Echo Cast Plates (though dimensions are nearly identical). Confusing these models causes plate misalignment and dangerous shifting during workouts.
Pick the Right Rogue Weight Vest Size for Your Chest
Echo vs Plate Carrier: Key Differences
| Feature | Echo Weight Vest | Plate Carrier |
|---|---|---|
| Made in | Imported | USA |
| Unloaded weight | 1.75 lb (M) | 1.12 lb (M) |
| Shoulder comfort | Built-in padding | Removable pads (sold separately) |
| Price (vest only) | $145 | $165-$185 |
Sizing Matters: Don’t Guess
| Size | Chest Range | Max Load Capacity |
|---|---|---|
| Small | 28–34 in | 40 lb total (20+20) |
| Medium | 34–40 in | 40 lb total (20+20) |
| Large | 40–46+ in | 40 lb total (20+20) |
Pro tip: Vest size matches your shirt size—not your ego. A Medium fits most athletes with 34″-40″ chests. Oversizing causes bouncing; undersizing restricts breathing. Measure your bare chest at nipple level with a tape measure. If you’re between sizes (e.g., 40″), size up—Rogue’s elastic waist belts accommodate expansion during deep breaths.
Choose Rogue-Compatible Plates for Your Vest
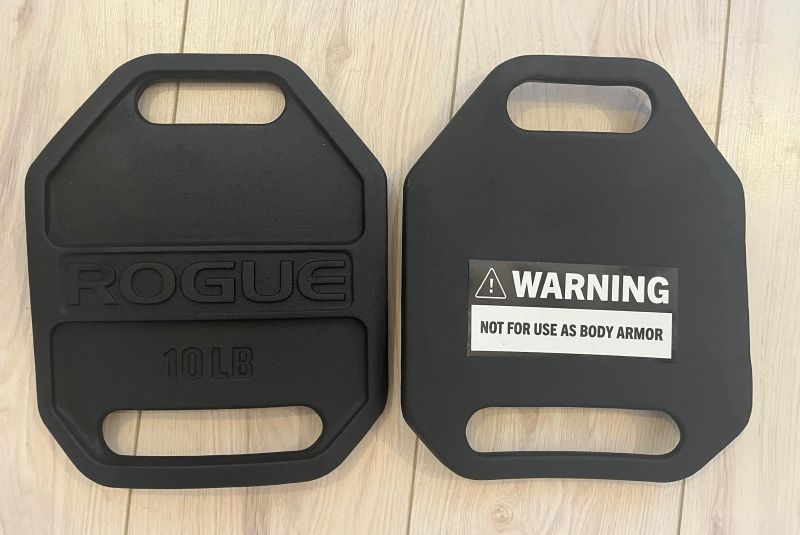
Plate Options Compared
| Plate Pair | Total Weight | Dimensions | Price |
|---|---|---|---|
| 5 lb set | 10 lb | 11.3″ × 9.3″ | $60 |
| 10 lb set | 20 lb | 11.3″ × 9.3″ | $80 |
| 20 lb set | 40 lb | 11.3″ × 9.3″ | $145 |
Plates always ship as pairs—one “20 lb set” means two 10 lb plates (10+10=20 lb total load). Never mix Rogue USA Cast Plates with Echo vests or vice versa; the 0.05″ dimensional difference causes binding in pockets. For beginners, start with the 10 lb set (20 lb total)—enough resistance for pull-ups without compromising running form. Warning: Exceeding 20 lb per pocket risks seam failure during high-impact movements.
Unbox and Inspect Your Rogue Vest Before Setup
Critical Pre-Setup Steps
- Remove vest from plastic sleeve and lay flat on clean floor
- Check for defects: Run fingers along MOLLE webbing rows and plate pockets for snags or loose threads
- Flatten creases: Gently smooth any folded plate pockets—curled edges prevent full plate insertion
- Clean Velcro®: Brush off fibers with dry cloth so closures grip firmly during use
Skip this inspection and you’ll battle weak Velcro® adhesion mid-workout. The Plate Carrier’s removable shoulder pads often shift during shipping—reposition them centered on straps before loading plates. Note: Rogue includes zero tools—you’ll rely solely on their industrial-strength hook-and-loop system.
Lock Plates Securely in Rogue Vest Pockets
Insert Front Plate Correctly
- Flip open the chest pocket’s Velcro® flap completely
- Slide plate curved side toward body until it hits the pocket’s bottom seam
- Secure retention strap over the plate’s top edge—pull tight until no gap remains
- Seal flap firmly: Press palm across entire flap for 10 seconds to activate full adhesion
Install Rear Plate Safely
Repeat identical steps on the back panel. Critical balance tip: If using uneven weights (e.g., 10 lb front + 20 lb rear), always place heavier plates rearward. This centers your center of gravity during running and prevents forward tipping during pull-ups. Test plate security by shaking the vest upside down—zero movement means success.
Adjust Your Rogue Vest Fit for Running, Lifting, or Gymnastics

3-Step Fit Protocol
- Loosen everything: Fully extend waist belt and shoulder straps
- Put on vest: Slide arms through straps like a jacket—plates must sit front/back
- Belt first: Cinch waist until snug with ½” elastic stretch room for deep breaths
Sport-Specific Tuning
| Activity | Fit Adjustment | Why It Matters |
|---|---|---|
| Running | Tighten belt 1 notch, shorten straps 1″ | Prevents vertical bounce that strains knees |
| Gymnastics | Loosen belt ½”, keep straps snug | Allows rib cage expansion for kipping pull-ups |
| Heavy Squats | Lengthen straps slightly, max-tighten belt | Stops rear plate from riding up during descent |
Warning: If plates rest on your waist belt line, the vest will bounce violently. Adjust straps until the vest’s top edge sits at collarbone level. Fail the jump test? Tighten the waist belt before shoulder straps—this transfers weight to your hips, not shoulders.
Customize with Patches and Accessories Properly
Installation Guide
- Velcro® patches: Press standard 2″×3″ or 3″×5″ morale patches firmly onto front/rear loop panels
- MOLLE gear: Weave carabiners through horizontal webbing rows for keys or ID sleeves
- Echo pocket: Store phone/mouthguard in front utility pocket—seal flap with full Velcro® contact
Avoid overloading MOLLE rows—they’re designed for lightweight accessories only. Heavy items (like water bottles) unbalance the vest during movement. For Plate Carrier users: Slide optional shoulder pads over straps before plate insertion—padding compresses under load if added later.
Extend Your Rogue Weight Vest Lifespan with Proper Care
Maintenance Must-Dos
- Cleaning: Hand-wash in cold water with mild detergent only when visibly soiled
- Drying: Air-dry flat—never hang or machine-dry (shrinks elastic waistband)
- Velcro® preservation: Always close hook surfaces before washing to prevent lint clogging
- Plate care: Wipe cast plates with damp cloth after workouts; never drop on concrete
Critical longevity tip: Store unloaded in a dry corner with waist belt slightly loose. Compressing the elastic belt for weeks degrades its rebound, causing fit issues during future workouts. Inspect stitching monthly along plate pockets—retire the vest immediately if any seam separates.
Stay Safe: Rogue Vest Weight Limits and Warnings
Non-Negotiable Safety Rules
- 40 lb maximum total load (20 lb front + 20 lb rear)—exceeding this tears seams during box jumps
- Fitness use only: Not rated for ballistic protection—never wear in hazardous environments
- Joint stress multiplier: Weighted jumps increase impact force by 300%—land softly on toes
- Monthly inspection: Check plate pockets for stretching; replace vest if pockets feel loose
Rogue explicitly states these vests aren’t for children. If you experience shoulder numbness during wear, reduce weight immediately—this indicates improper strap adjustment cutting off circulation. Never wear during swimming; saltwater corrodes plate edges.
Complete Your Rogue Vest Setup with This Final Checklist
Before your first WOD, verify these 5 points:
– [ ] Vest size matches bare-chest measurement (S/M/L)
– [ ] Plates fully seated with retention straps locked
– [ ] Waist belt allows ½” breathing expansion when tightened
– [ ] Shoulder straps positioned so vest top edge hits collarbone
– [ ] Zero plate movement during vigorous shake test
With plates secure and straps dialed, your Rogue weight vest transforms instantly from shipping box to Murph-ready gear. Clip on a morale patch, chalk your hands, and own that weighted workout. Remember: Proper setup prevents mid-WOD disasters—when sweat loosens straps, you’ll thank yourself for nailing these steps today. Now go earn that vest.


