Your child fidgets constantly during homework, their teacher reports difficulty staying seated at school, and transitions between activities trigger meltdowns. You’ve heard weighted vests might help, but the conflicting advice online leaves you unsure where to start. This guide walks you through the exact steps to implement a weighted vest program safely and effectively, based on current evidence and professional recommendations. You’ll learn how to use a weighted vest for autism properly while avoiding common pitfalls that could reduce its effectiveness.
Select Your Child’s Ideal Weighted Vest Type for Autism
Traditional vs. Compression Vest Options
Traditional weighted vests use removable steel bars or sandbags distributed across the torso. These offer precise weight control and typically range from 5-15% of body weight. Weighted compression vests combine both weight and snug compression, making them ideal for children who benefit from both deep pressure and proprioceptive input.
Deep pressure vests skip external weights entirely, providing consistent snugness through specialized materials. They’re less bulky but may not provide sufficient input for some users. The Squease inflatable vest offers real-time pressure adjustment via hand pump—perfect for verbal individuals who can communicate their sensory needs. Choose materials compatible with sensory sensitivities to prevent discomfort from fabric textures.
Vest Selection Checklist for Autism Sensory Needs
- Weight adjustability: Ensure weights can be modified as tolerance develops
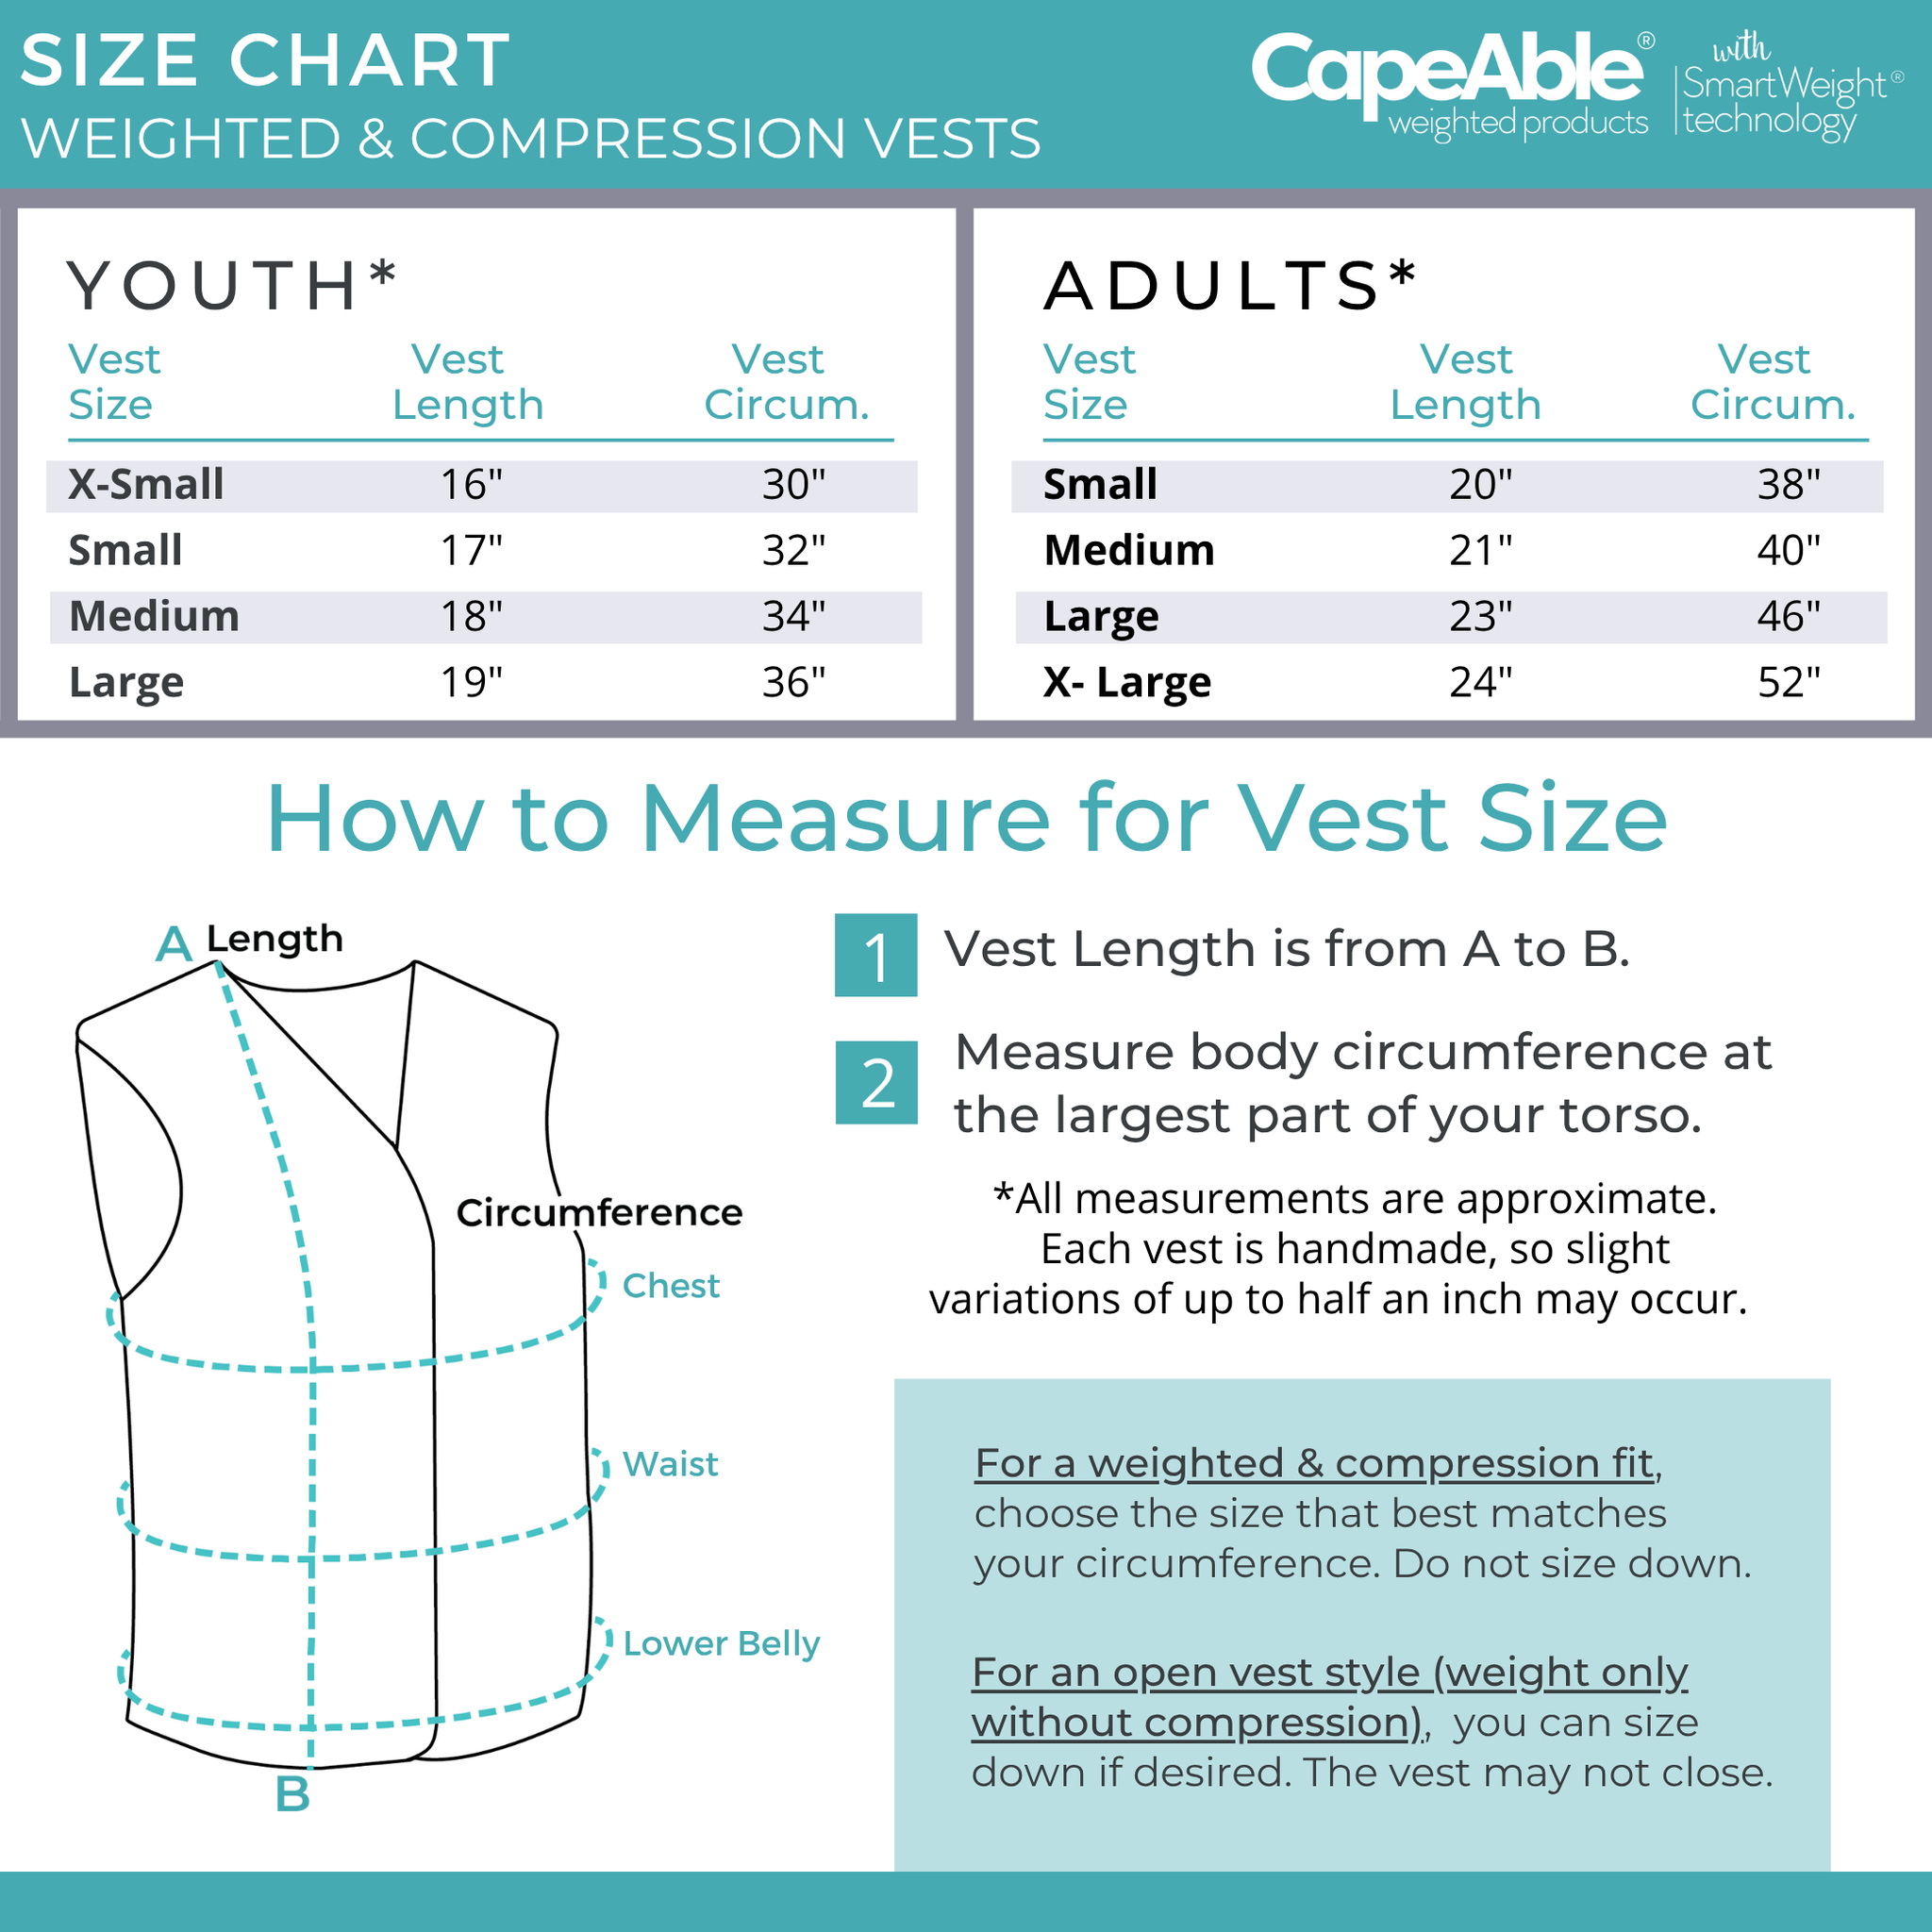
- Proper fit: The vest should feel snug but not restrictive during movement
- Quick-release features: Essential for bathroom breaks or emergencies
- Removable weights: Allows for washing and weight adjustments
- Distribution pattern: Weights should be evenly spread across the torso
Calculate the Perfect Weighted Vest Weight for Your Child

Age-Specific Weight Guidelines
For children: Start with 5% of body weight and never exceed 10%. A 50-pound child should use 2.5-5 pounds total weight. For adults: The range extends up to 12%, allowing 150-pound individuals to use up to 18 pounds safely. Never exceed 15% of body weight regardless of age group to prevent overstimulation or physical strain.
Step-by-Step Weight Calculation Process
- Weigh your child on a reliable scale (first thing in the morning works best)
- Calculate 5% of total body weight using a simple math equation
- Divide by number of pockets for even weight distribution
- Start at the lowest setting regardless of initial tolerance
- Adjust upward gradually only if clear benefits emerge after consistent use
Critical safety note: Always begin below the recommended percentage if your child shows respiratory sensitivity or has circulatory concerns. Consult with an occupational therapist before making any adjustments.
Schedule Weighted Vest Use for Maximum Autism Benefits
Optimal Timing Strategies for Sensory Support
Morning routine: Apply 15 minutes before school to ease transition anxiety. Academic periods: Use during 20-30 minute focused tasks like writing or math. Community outings: Wear during grocery shopping or crowded events to reduce sensory overload. Avoid continuous wear beyond 1-2 hours—your child’s nervous system needs breaks to prevent habituation and maintain effectiveness.
Sample Daily Vest Schedule for School Days
Morning:
– 7:30-7:45 AM: Vest on during breakfast prep
– 8:00-8:30 AM: Removed for bus ride
– 9:00-9:30 AM: Applied during first academic period
Afternoon:
– 11:00-11:30 AM: Used during challenging subject
– 1:00-1:30 PM: Worn during quiet reading time
– 4:00-4:30 PM: Applied for homework completion
Implement Your Weighted Vest Program in 3 Phases

Phase 1: Professional Setup for Autism Intervention
Essential first steps:
– Schedule occupational therapy evaluation to assess sensory needs
– Obtain medical clearance from pediatrician for underlying conditions
– Establish baseline behavior tracking without vest for 1-2 weeks
– Complete vest fitting session with qualified therapist
Red flags requiring immediate medical consultation:
– Respiratory conditions (asthma, frequent colds)
– Circulatory disorders (cold hands/feet, dizziness)
– Orthopedic concerns (scoliosis, joint pain)
– Recent surgeries or skin conditions
Phase 2: Introduction Process for Vest Acceptance
Week 1: Initial Trials
– Limit to 10-15 minute sessions
– Choose calm, familiar environments
– Monitor for immediate physical responses
– Document any signs of discomfort
Week 2-3: Gradual Extension
– Increase duration by 5-minute increments
– Introduce during preferred activities first
– Watch for habituation (reduced effectiveness)
– Adjust weight only after 2 weeks of consistent use
Monitor Critical Safety Signals During Vest Use

Immediate Removal Indicators for Autism Safety
Physical warning signs:
– Excessive sweating or red face
– Shortness of breath or rapid breathing
– Complaints of pain or discomfort
– Red marks on shoulders or torso
– Skin irritation or rashes
Behavioral red flags:
– Increased agitation or distress
– Refusal to wear or remove attempts
– Regression in previously mastered skills
– New avoidance behaviors
Daily Vest Safety Checklist
Before each use:
– [ ] Check vest for wear or damage
– [ ] Verify weight calculations remain accurate
– [ ] Inspect skin for pressure marks from previous use
– [ ] Confirm 2-hour maximum continuous wear rule
– [ ] Test quick-release mechanisms
Track Weighted Vest Effectiveness for Autism with Simple Tools
Practical Measurement Systems
ABC Data Sheet (Antecedent-Behavior-Consequence):
– Antecedent: What happened right before vest use?
– Behavior: Specific observable action (tantrum lasted 8 minutes)
– Consequence: What occurred after the behavior?
Weekly review questions:
– Did target behaviors improve during vest use?
– Are benefits consistent across different settings?
– Does your child request the vest independently?
– Are side effects minimal or non-existent?
Decision Criteria After 4 Weeks of Consistent Use
Continue use if:
– 25% improvement in target behaviors
– Child asks for vest during stressful times
– No adverse effects reported
– Benefits clearly outweigh time investment
Discontinue immediately if:
– Zero improvement after consistent 4-week trial
– Physical discomfort or medical concerns
– Behavioral regression or increased distress
– Better evidence-based alternatives identified
Create a Budget-Friendly Weighted Vest for Autism at Home
DIY Vest Assembly Guide
Materials needed:
– Sturdy fishing vest ($15-25 at sporting goods stores)
– Bean bags or aquarium gravel ($5-10)
– Kitchen scale for accuracy
– Safety pins or Velcro strips
Assembly steps:
1. Calculate total weight (5% of child’s body weight)
2. Divide weight equally among vest pockets
3. Secure weights to prevent shifting during movement
4. Test distribution by having child walk around
5. Get therapist approval before regular use
Cost comparison:
– Commercial vest: $50-150
– DIY version: $20-35
– School provision: Often free with IEP
Solve Common Weighted Vest Problems for Autism Children
When Vests Don’t Deliver Expected Results
First troubleshooting steps:
– Reduce weight by 25%
– Shorten wear duration
– Try different vest style
– Check for underlying medical issues
Evidence-based alternatives:
– Sensory diets with movement breaks
– Fidget tools for hands during seated tasks
– Noise-canceling headphones for auditory sensitivity
– Visual schedules for transition support
– Weighted blankets for sleep issues
Insurance and School Funding Solutions
School district options:
– Request occupational therapy evaluation
– Include vest in IEP sensory accommodations
– Ask for trial period through assistive technology
Financial assistance programs:
– Medicaid waivers (varies by state)
– Autism Speaks local grants
– United Healthcare Children’s Foundation
– Easter Seals equipment lending programs
Maintain Long-Term Weighted Vest Success for Autism Without Habituation
Preventing Effectiveness Decline
Schedule variations:
– Skip vest use 1-2 days per week
– Rotate between different sensory strategies
– Adjust timing based on daily stress levels
– Increase weight gradually as child grows
Growth adjustments:
– Recalculate weight every 6 months
– Resize vest annually or as needed
– Involve child in weight selection process
– Celebrate milestones in self-regulation
Quarterly therapist reviews:
– Analyze collected data for trends
– Adjust weight or schedule as needed
– Discuss alternative strategies
– Plan gradual fade-out if appropriate
Weighted vests offer potential benefits for some individuals with autism, but success requires systematic implementation and careful monitoring. Start with professional guidance, use 5% body weight maximum, and track specific behaviors for 4 weeks before deciding effectiveness. Remember that current research shows mixed results, making individualized assessment crucial.
Your child’s response—not research studies or other families’ experiences—ultimately determines whether weighted vests belong in your sensory toolkit. Stay flexible, document everything, and don’t hesitate to explore evidence-based alternatives if benefits aren’t clear. Never exceed 15% of body weight regardless of age, and always prioritize safety over convenience when learning how to use a weighted vest for autism effectively.


