Stuck in a weight-loss rut despite meticulous calorie counting? You’re not alone. Research reveals a powerful solution hiding in plain sight: strategically using a weighted vest. Studies prove wearing a vest equal to just 15% of your body weight burns 12-18% more calories during the same walk while preserving muscle mass—critical for sustainable fat loss. This isn’t about adding hours to your routine; it’s about transforming everyday movement into a metabolic powerhouse. In this guide, you’ll discover exactly how to use a weighted vest for weight loss based on clinical evidence, avoiding common pitfalls that sabotage results.
How Weighted Vests Accelerate Fat Loss
Adding external load forces your entire musculoskeletal system to work harder, triggering measurable metabolic shifts. When you wear a vest equal to 15% of your body weight during a 3 mph walk, oxygen consumption jumps significantly—translating to 12% more calories burned without increasing perceived effort. The real magic happens in daily life: Swedish researchers found participants wearing an 11% body-weight vest for eight hours daily lost five times more fat than controls in just three weeks, even without diet changes. This occurs because the added mass elevates your Metabolic Equivalent of Task (MET) value for every movement.
Calorie Burn Multiplier Effect
Your vest turns mundane activities into stealth fat-burning sessions:
– Walking: A 30-minute walk burns 548 calories instead of 463 (18% increase)
– Household chores: Cooking or cleaning torches 50-150 extra calories per hour
– Zone-2 cardio: Reach optimal fat-burning heart rates at slower, joint-friendly speeds
Muscle Preservation Advantage
Unlike traditional cardio that depletes muscle, weighted vests provide resistance training benefits. Wake Forest research shows dieters using vests maintained leg power, while the diet-only group lost 25% strength. This muscle preservation is crucial—more lean mass means a higher resting metabolic rate, accelerating fat loss long after your workout ends.
Weighted Vest Selection Criteria for Weight Loss

Skipping this step guarantees subpar results. Most “fashion” vests lack the load capacity needed for clinically proven fat loss. Your vest must meet specific research-backed requirements to deliver measurable outcomes.
Key Specifications
| Feature | Research Recommendation | Critical Impact |
|---|---|---|
| Starting Load | 5-10% body weight | Prevents joint overload while triggering metabolic response |
| Maximum Load | 10-15% body weight | Diminishing returns and injury risk spike beyond 15% |
| Adjustability | Mandatory incremental weights | Enables precise progressive overload |
| Fit | Snug, low-bounce design | Prevents posture compensation that causes back strain |
Pro tip: At 70kg (154 lbs), begin with 3.5-7kg (8-15 lbs) total load. Distribute weights evenly front-to-back to avoid spinal compression.
Red Flags to Avoid
- Fixed-weight vests under 4kg (9 lbs): Too light to replicate study results
- Ankle/wrist weights: Alter gait mechanics, increasing knee injury risk by 37%
- Poor weight distribution: Causes rib abrasion and lower back pain within weeks
Beginner Weighted Vest Protocol for Weight Loss

Rushing progression causes injuries that derail your fat-loss journey. This phased approach builds resilience while maximizing metabolic benefits.
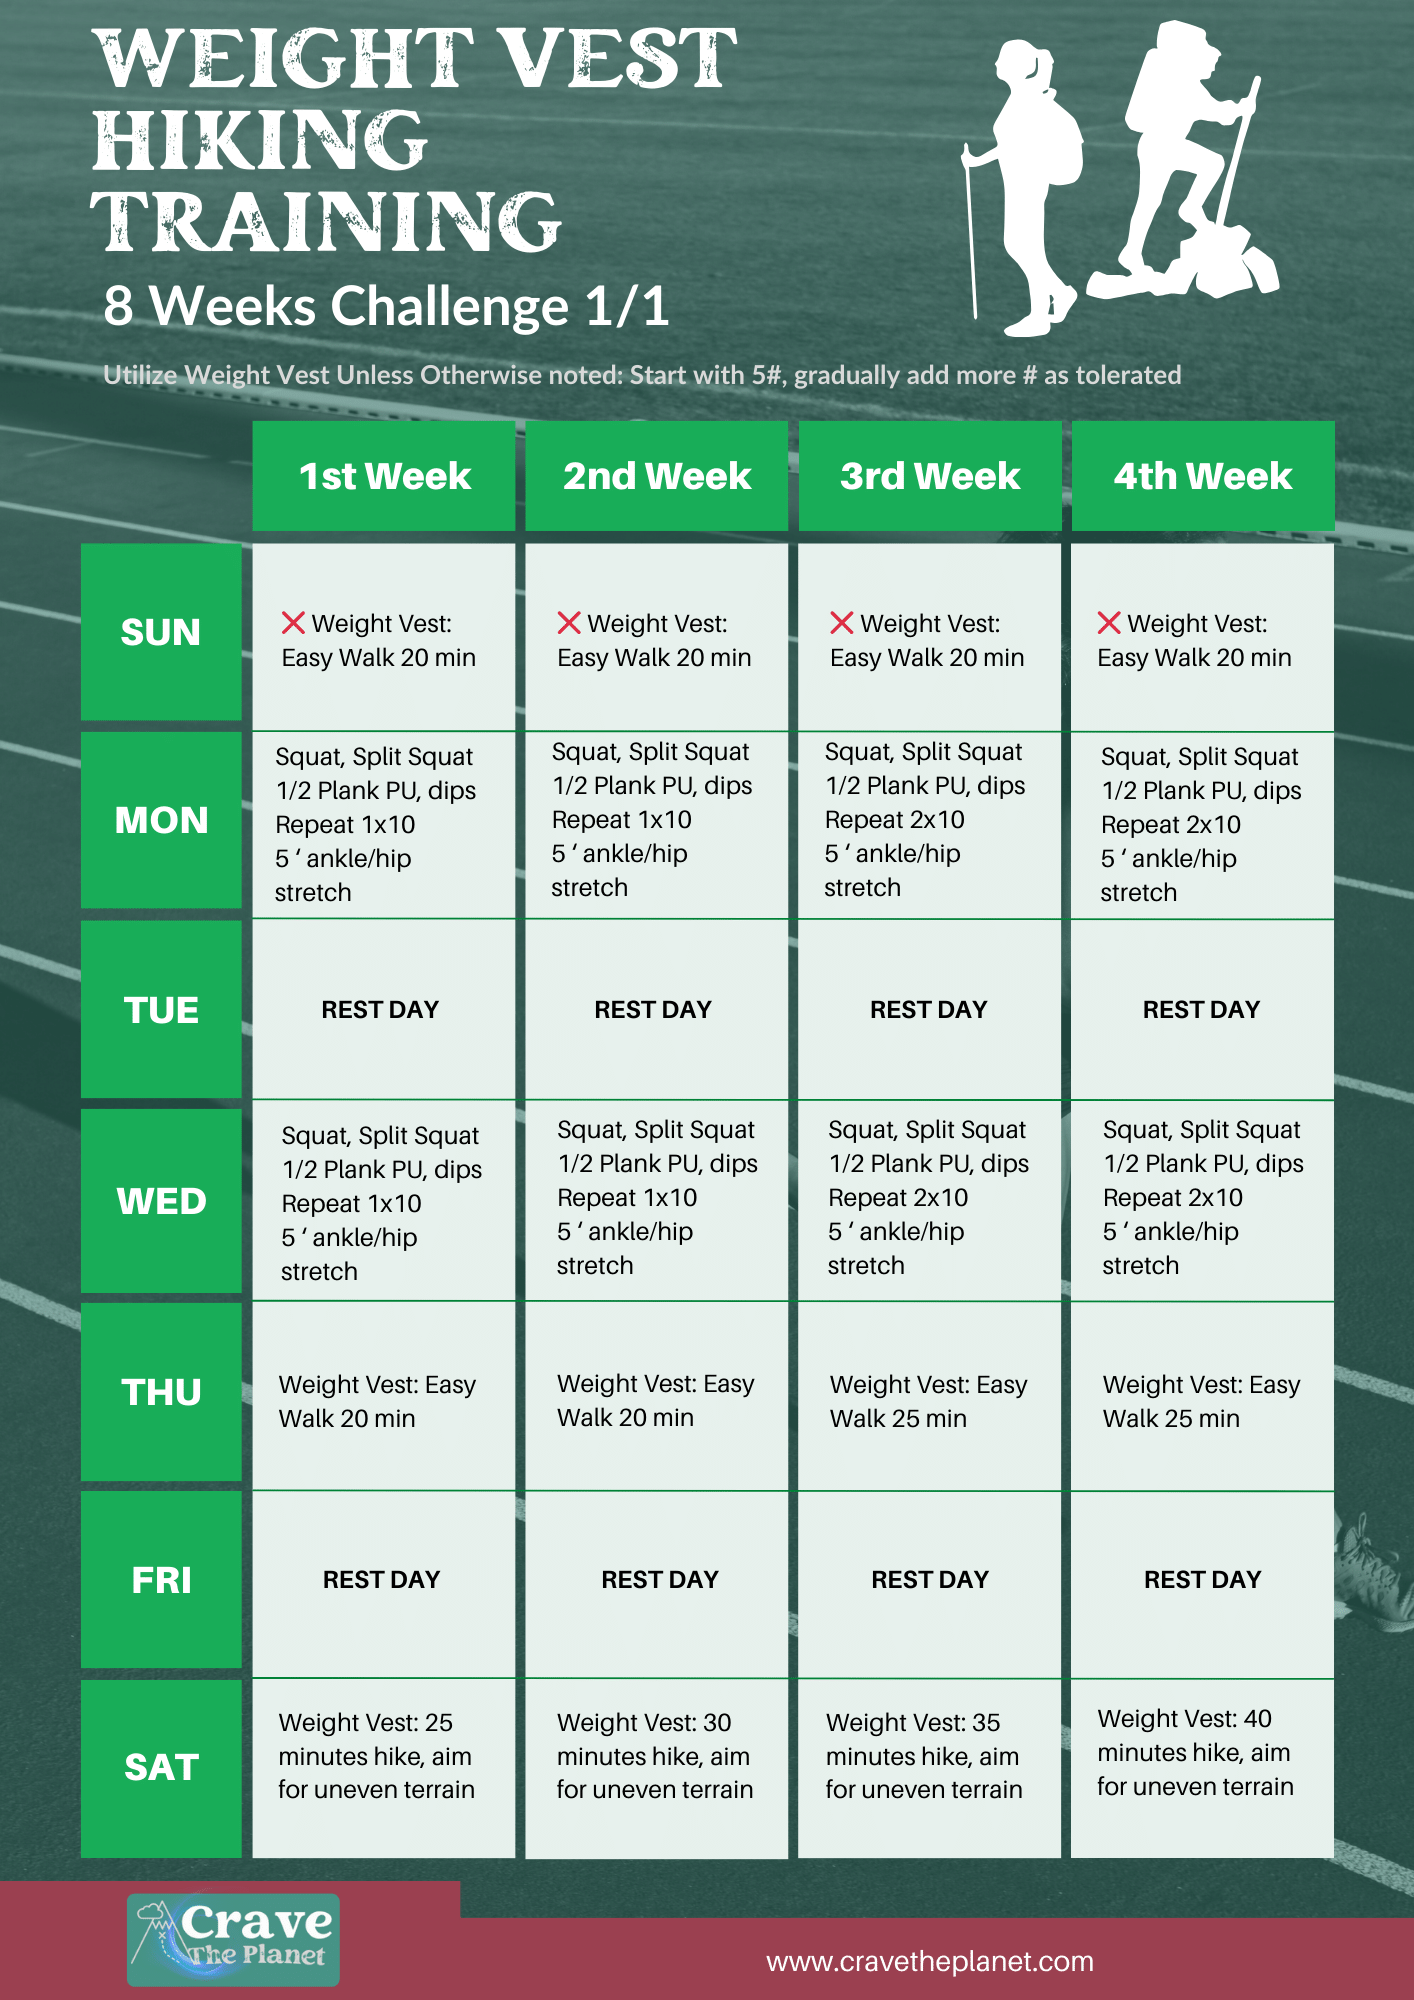
Phase 1: Foundation (Weeks 1-4)
- Weeks 1-2: 5% body weight, 15-20 minute flat walks, 3x weekly
- Weeks 3-4: Add only 1kg OR 5 minutes per session—never both
- Month 2: Progress to 10% body weight, 30-45 minutes, 5x weekly
Phase 2: Intensity Progression
- Option A: Increase treadmill incline by 2% every two weeks
- Option B: Boost walking speed by 0.5 mph increments
- Option C: Add 1kg vest weight (stop at 15% body weight)
Critical decision point: If your heart rate exceeds 70% of max during walks, prioritize incline/speed increases over additional weight.
Sample Week Progression
| Week | Load | Duration | Sessions |
|---|---|---|---|
| 1 | 5% | 15 min | 3 |
| 4 | 7% | 25 min | 4 |
| 8 | 10% | 35 min | 5 |
| 12 | 12% | 40 min | 5 |
Zone-2 Cardio Mastery with a Weighted Vest
This is where vests shine brightest for sustainable fat loss. You’ll hit optimal fat-burning heart rates without jogging—protecting joints while maximizing results.
Setting Your Zones
Calculate your max heart rate (220 minus age), then target 60-70% of that number. The vest typically adds 4-8 bpm at identical walking speeds, letting you reach Zone 2 at comfortable paces. For a 40-year-old, that means maintaining 108-126 bpm instead of struggling at higher intensities.
Session Structure
- Warm-up: 3 minutes walking without vest
- Main set: 30-60 minutes maintaining target heart rate
- Cool-down: 5 minutes vest-free walking
Monitoring tip: If you can’t speak in full sentences, reduce vest weight immediately. Zone 2 should feel “comfortably hard.”
HIIT Enhancement Protocol Using a Weighted Vest
Transform plateau-busting intervals with strategic vest loading—but only after building foundational fitness.
Proven HIIT Format
- Warm-up: 5 minutes dynamic movement (no vest)
- Intervals: 30 seconds fast walk/jog + 90 seconds recovery × 8-10 rounds
- Vest load: 8-12% body weight
- Cool-down: 5 minutes walking vest-free
This protocol delivers 20% higher heart rates during work intervals with lower perceived exertion—ideal for breaking through stubborn plateaus. The vest amplifies Excess Post-Exercise Oxygen Consumption (EPOC), burning extra calories for hours post-workout.
Safety Guidelines
- Never attempt until completing 4+ weeks of base training
- Stop immediately if knee or hip pain occurs
- Progress weight before increasing interval volume
Daily Life Integration Secrets with a Weighted Vest

The Swedish study’s secret weapon wasn’t exercise—it was wearing vests during normal activities. This “NEAT amplification” (Non-Exercise Activity Thermogenesis) builds calorie burn effortlessly.
NEAT Amplification Tasks
- Grocery shopping: Burns 100+ extra calories per 30-minute trip
- Stair climbing: Triples calorie burn per flight
- House cleaning: Transforms chores into lower-body workouts
Practical Wearing Schedule
- Session length: 30-60 minute blocks
- Daily total: 2-4 hours maximum
- Break protocol: Remove vest every 2 hours for 30 minutes
Real-world example: Wear during morning routine (20 min), lunch errands (30 min), and evening chores (45 min) to burn 95+ extra calories daily—adding up to 2.8 pounds monthly.
Weighted Vest Safety Checkpoints
Respect these guidelines to prevent injuries that derail progress. Weighted vests demand strategic implementation.
Pre-Screening Requirements
Consult your physician before starting if you have:
– Osteoporosis or low bone density
– Chronic lower back pain
– Cardiovascular conditions
– Pregnancy or balance disorders
Daily Safety Protocol
- Warm-up: 3 minutes of dynamic hip circles and ankle pumps
- Posture check: Chest up, shoulders back, core engaged before moving
- Pain assessment: Stop immediately for sharp joint pain
- Recovery: Allow 48 hours between high-load sessions
Warning Signs to Stop Immediately
- Numbness or tingling in hands/feet
- Lower back pain beyond mild muscle fatigue
- Knee pain during or after sessions
Nutrition Coupling Strategy for Weighted Vest Workouts
Your vest increases TDEE by 50-150 calories per 30-minute session, but nutrition determines your fat-loss success. Pair strategically.
Macro Guidelines
- Protein: 1.2-1.6g per kg body weight to preserve muscle
- Hydration: +250ml fluids per 30-minute vest session
- Caloric deficit: Maintain 300-500 calories below maintenance
Meal Timing
- Pre-workout: Light protein + complex carbs 60-90 minutes prior
- Post-workout: 20-30g protein within 2 hours
- Hydration: Electrolyte replacement after sessions
Common Weighted Vest Mistakes to Avoid
These errors sabotage fat loss despite consistent effort. Fix them to unlock results.
Loading Errors
- Starting above 10% body weight: Causes joint overload and early burnout
- Ignoring form: Slouching to handle heavy loads strains the spine
- Skipping progressive overload: Using same weight for months
Recovery Oversights
- Insufficient protein: Undermines muscle preservation benefits
- Dehydration: Ignoring increased fluid needs impairs recovery
- Sleep debt: Less than 7 hours nightly halts fat-loss progress
Weighted Vest Troubleshooting Guide
“I’m not seeing results after 4 weeks”
- Verify load: Weigh your vest—many claim 20lbs but deliver only 12lbs
- Track consistency: Aim for minimum 3-5 hours weekly vest time
- Audit calories: Vest increases burn but doesn’t override surplus intake
“My knees hurt during walks”
- Immediate action: Halve vest weight and shorten stride length
- Surface change: Switch to treadmill or grass instead of pavement
- Cadence boost: Increase steps per minute by 10% to reduce joint impact
“I feel exhausted all day”
- Deload week: Drop to 5% body weight and reduce sessions by 30%
- Sleep audit: Prioritize 7-9 hours nightly for hormonal balance
- Hydration check: Drink 500ml electrolyte water upon waking
Final success checklist: Start with an adjustable vest at 5-10% body weight, commit to 3-5 weekly sessions of 20-60 minutes, track both exercise metrics and nutrition, and progress load gradually. The weighted vest isn’t magic—but when you know how to use a weighted vest for weight loss based on clinical evidence, it transforms ordinary movement into a scientifically-proven fat-loss accelerator. Implement these protocols consistently, and you’ll break through plateaus while preserving the lean muscle that keeps your metabolism firing long after the vest comes off.


