
Rowing machines gather dust in gyms because most people jump on without knowing how to use air rowing machine properly. You see them yanking the handle, hunching their back, and wondering why their shoulders burn while their legs barely work. The air rower—often called an “erg”—offers one of the most efficient full-body workouts available when you master the fundamentals.
This guide transforms you from a flailing beginner into a confident rower who maximizes every workout. You’ll learn the precise sequence that activates 85% of your muscles, avoid the posture mistakes that cause back pain, and discover programming strategies that deliver results faster than traditional cardio. Whether you’re stepping on an air rower for the first time or refining your technique, these proven methods will revolutionize your approach to this powerful training tool.
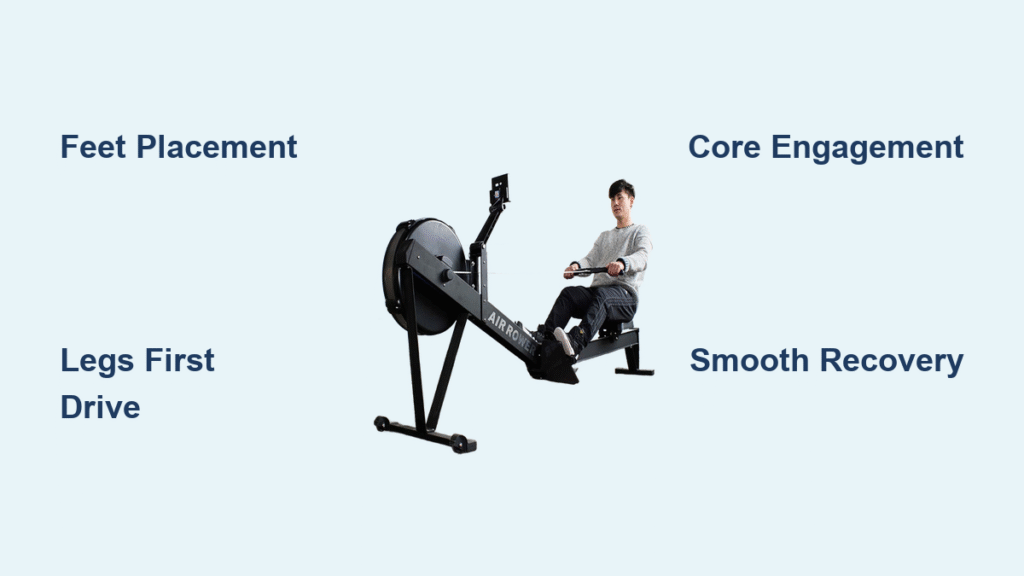
Position Your Feet for Maximum Power Generation
Secure Foot Placement That Prevents Slipping
Your power starts at your feet—improper foot positioning sabotages your entire stroke. Slide your feet into the adjustable platform and position the strap directly over the ball of your foot where your big toe connects. This placement allows your heel to lift naturally during the drive phase while maintaining security through the stroke. The strap should feel snug but not restrictive; you should be able to wiggle your toes freely.
Three-Finger Grip Technique for Reduced Fatigue
Forget the death grip that causes forearm cramps within minutes. Hold the handle with your index, middle, and ring fingers wrapped around the bar while your thumb rests lightly on top. Let your pinky fingers float free—this three-finger grip prevents forearm fatigue and allows your larger back muscles to generate power rather than your arms. Keep your wrists straight and shoulders relaxed away from your ears.
Navigate the Monitor Without Interrupting Your Workout
Most air rowers display similar metrics, but Concept2 models dominate gyms. Press any button to wake the monitor, then select “Just Row” for immediate use. Track these three critical numbers: split time (minutes per 500m), stroke rate (strokes per minute), and watts (power output). These metrics become your roadmap for progress—ignore irrelevant data that distracts from your primary performance indicators.
Perfect Your Four-Phase Stroke Sequence

Master the Catch Position for Explosive Power
Start every stroke in the catch position—your body compressed like a coiled spring. Slide forward until your shins reach vertical, keeping your knees directly over your ankles. Your torso hinges forward to about 1 o’clock (imagine your body as a clock face), arms straight, core engaged. Your heels may lift slightly, and the handle should hover directly over your shoelaces. This position loads your powerful posterior chain—glutes, hamstrings, and back—for the explosive drive ahead.
Drive with Your Legs First: The 60% Power Secret
The drive phase separates effective rowers from everyone else. Press through your heels and extend your legs powerfully before anything else moves. This sequence—legs first, body second, arms last—maximizes force production. Your legs generate approximately 60% of the stroke’s power, so rushing this phase shortchanges your workout. Maintain straight arms until the handle passes your knees, then add the body swing.
Body Swing Mechanics for 30% More Power
After your legs extend, hinge your torso back from 1 o’clock to 11 o’clock. This body swing contributes 30% of your power while protecting your lower back. Think of it as a controlled lean rather than a dramatic arch. Your arms remain straight during this phase—resist the urge to pull early. The combination of leg extension and body swing creates the foundation for the arm pull.
Recovery Sequence for Rhythm and Efficiency
The recovery isn’t rest—it’s controlled preparation for your next stroke. Reverse the drive sequence: extend your arms first, hinge your torso forward to 1 o’clock, then bend your knees to slide forward. Maintain a 1:2 ratio—your recovery takes twice as long as your drive. This timing builds momentum and prevents jerky movements that waste energy. Smooth transitions between strokes conserve energy for longer, more effective workouts.
Fix Common Air Rower Form Errors Immediately
Stop Hunching Your Back: The #1 Beginner Mistake
Rounded shoulders and a curved spine plague new rowers. This position restricts breathing and transfers stress to your lower back. Instead, engage your core by pulling your belly button toward your spine. Roll your shoulders back and down, creating a proud chest position. You should be able to take deep breaths without your chest collapsing—this simple adjustment prevents the most common cause of rowing-related back pain.
Correct Early Arm Bending That Wastes Energy
Pulling with your arms before your legs fully extend is like hitting the gas before releasing the parking brake. This mistake shifts the workload to your biceps and shoulders while minimizing leg engagement. Practice leg-isolation drills: row with straight arms for 20 strokes, focusing solely on the leg drive. Add the body swing only after mastering the leg sequence—your 500m split times will improve dramatically once you correct this error.
Eliminate Scooping Motion for Smooth Transitions
Scooping occurs when you bend your knees before your arms fully extend during recovery. This forces the handle to travel in an awkward arc around your knees. Instead, extend your arms completely before your knees bend. The handle should travel in a straight horizontal line throughout the entire stroke. Watch your reflection or record yourself—this visual feedback makes correcting the scoop motion much easier.
Adjust Air Rower Resistance for Your Specific Goals

Damper Settings Decoded: What 1-10 Really Means
The damper lever (1-10 scale) controls airflow to the flywheel, affecting how each stroke feels rather than creating direct resistance. Most beginners benefit from settings 3-5, which mimics actual water rowing. Higher settings (6-8) feel like rowing a heavy boat—useful for power development but taxing on technique. Never use extreme settings (1 or 10) for regular training as they compromise proper form and increase injury risk.
Match resistance to your specific workout:
- Endurance sessions: Damper 4-5 for sustainable effort
- Sprint intervals: Damper 3-4 allows faster stroke rates
- Strength focus: Damper 6-7 builds power but requires perfect form
- Technique work: Damper 2-3 reduces load for form practice
Build Effective Beginner Air Rower Workouts
5-Minute Warm-Up Protocol for Injury Prevention
Never skip the warm-up—it prevents injury and improves performance. Start with 2 minutes of easy rowing at 20-22 strokes per minute. Gradually increase to 24-26 SPM, adding 3-5 power strokes every 30 seconds. Focus on smooth form and rhythmic breathing rather than speed. This progressive warm-up prepares your cardiovascular system and activates the specific muscles needed for efficient rowing.
Steady-State Endurance Session for New Rowers
Beginners should master steady-state rowing before attempting intervals. Target 15-30 minutes at 50-60% effort, maintaining 22-26 SPM. Your split time should allow conversation—if you’re gasping for breath, reduce intensity. Progress duration weekly: 15 minutes week 1-2, 20 minutes week 3-4, then 25-30 minutes. This gradual approach builds endurance without overwhelming your cardiovascular system or compromising form.
Technique Focus Sessions for Form Perfection
Dedicate one session weekly to form perfection using the pick drill sequence. Start with 20 strokes using arms only (straight legs, no body swing). Add body swing for 20 strokes, then progress to half-slide rowing (20 strokes), and finally full strokes (20 strokes). Reverse the sequence back to arms-only to reinforce proper sequencing. This structured approach isolates each component of the stroke, helping you build muscle memory for perfect technique.
Prevent Injury and Overtraining on the Air Rower
Recognize Early Warning Signs of Problems
Sharp pain in your lower back or shoulders signals immediate stop. Dizziness, numbness in arms, or knee pain during the drive phase require workout cessation. These symptoms often indicate form breakdown or excessive volume. Rest 24-48 hours and return with reduced intensity and heightened form focus. Never row through pain—the air rower rewards perfect technique and punishes sloppy form.
Implement Smart Weekly Progression
Increase training volume by no more than 10-15% weekly. This conservative approach allows your connective tissues to adapt while preventing overuse injuries. Prioritize form over duration—even 15 minutes of perfect rowing delivers better results than 30 minutes of sloppy technique. Track your metrics weekly: if your split times worsen or your form deteriorates, scale back intensity rather than pushing through fatigue.
Your air rower transforms from intimidating to empowering once you master these fundamentals. The difference between a frustrating workout and an exhilarating session lies in your understanding of the four-phase stroke, proper setup, and progressive programming. Start with technique-focused sessions at moderate intensity, then gradually layer in endurance and interval work as your form solidifies.
Remember: every expert rower started exactly where you are now. Focus on quality over quantity, track your metrics consistently, and celebrate small improvements in form and performance. Within weeks, you’ll experience the unique satisfaction of a perfectly executed rowing stroke—when your entire body moves in harmony, creating speed and power with minimal effort. The erg doesn’t lie—it rewards those who learn how to use air rowing machine correctly with one of fitness’s most efficient full-body workouts.


