
Struggling to feel your glutes working during lower body workouts? You’re not alone. Millions of fitness enthusiasts reach a plateau where traditional exercises stop delivering results, leaving them frustrated and searching for solutions. Booty resistance bands have emerged as the secret weapon for breaking through these plateaus and achieving that coveted rounder, stronger backside. These simple yet powerful tools create constant tension on your glute muscles throughout every movement, forcing them to work harder than with standard bodyweight exercises alone. In this guide, you’ll discover exactly how to position, select, and utilize resistance bands to transform your glute training—whether you’re a beginner just learning to activate dormant muscles or an experienced lifter looking to add those final finishing touches to your physique.
Selecting Your Perfect Resistance Band
Finding the right resistance band makes or breaks your glute development progress. Forget one-size-fits-all approaches—serious booty builders match band tension to specific exercises and fitness levels. Light resistance bands (15-25 lbs) serve as the ideal activation tool before heavy lifting sessions, waking up dormant glute muscles without compromising your main workout performance. Medium tension bands (25-50 lbs) become your go-to for endurance-focused circuits and higher-rep isolation work that creates that satisfying muscle burn. Heavy resistance (50-80 lbs) challenges advanced trainees during compound movements like banded hip thrusts where maximum glute contraction matters most. When you can complete 15 perfect reps with control, it’s time to graduate to the next level—this progressive overload principle separates those who see results from those stuck in fitness limbo.
How Material Quality Impacts Your Results
Cheap bands that snap during lateral walks or roll down your thighs mid-set sabotage your progress before you even begin. Professional trainers recommend natural latex bands with reinforced stitching at connection points—these maintain consistent tension through hundreds of repetitions without losing elasticity. Wider bands (2-3 inches) distribute pressure evenly across your thighs, preventing painful pinching that distracts from proper muscle engagement. Look for textured or silicone-grip bands if you tend to sweat heavily; these maintain their position during intense sets when smooth bands would inevitably slip. The investment in quality pays dividends through consistent tension application and longer lifespan—replacing snapped bands weekly drains both your budget and motivation.
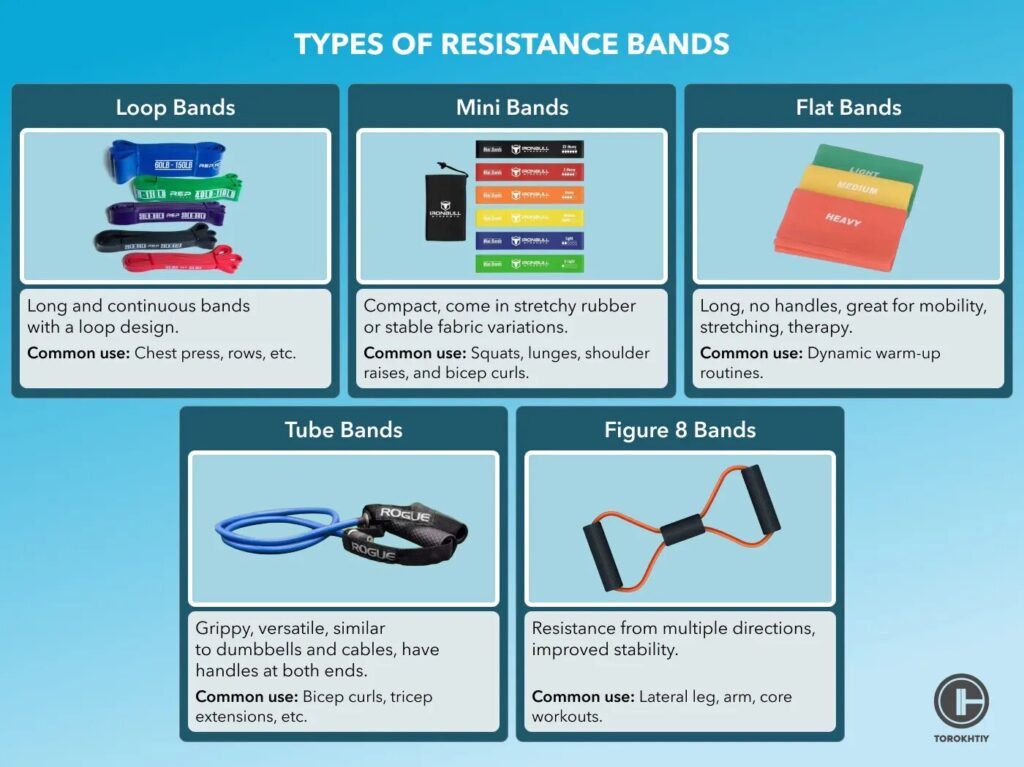
Loop Style vs. Figure-8 Design
The shape of your resistance band dramatically influences which exercises you can perform effectively. Loop-style bands (continuous circles without handles) provide seamless tension during floor-based movements like clamshells and fire hydrants, allowing natural hip rotation without handle interference. Mini loops (12-18 inches in circumference) concentrate resistance higher on the thighs, intensifying gluteus medius activation during lateral movements. Figure-8 bands with padded handles offer better control for standing exercises like banded squats but limit your range of motion during hip thrust variations. Serious glute builders often maintain multiple band types—using mini loops for activation work, standard loops for compound lifts, and figure-8 bands for targeted isolation when traveling or working out in limited space.
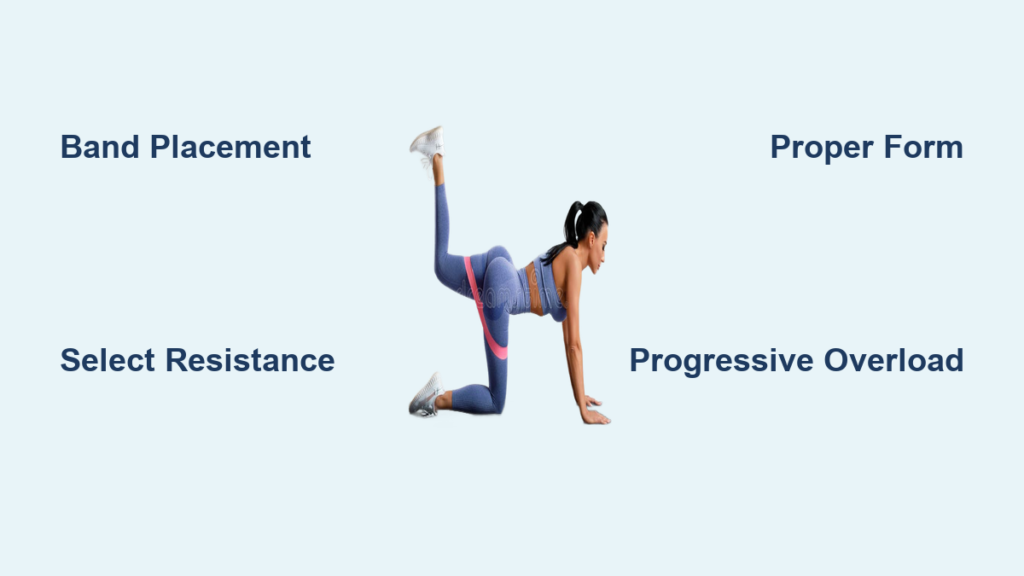
Precise Band Placement Techniques for Targeted Muscle Growth
Where you position the band on your body determines which glute muscles receive maximum stimulation—a critical detail most beginners overlook. Placing the band just above your knees during squats and lateral walks forces your gluteus medius and minimus to fire intensely to prevent knee collapse, building the outer sweep that creates that coveted 3D appearance. This placement also improves knee tracking during traditional lifts, reducing injury risk while enhancing overall lower body power. During lateral walks, maintain constant tension by keeping your feet shoulder-width apart—allowing the band to slack at any point eliminates the resistance precisely when your muscles need it most.
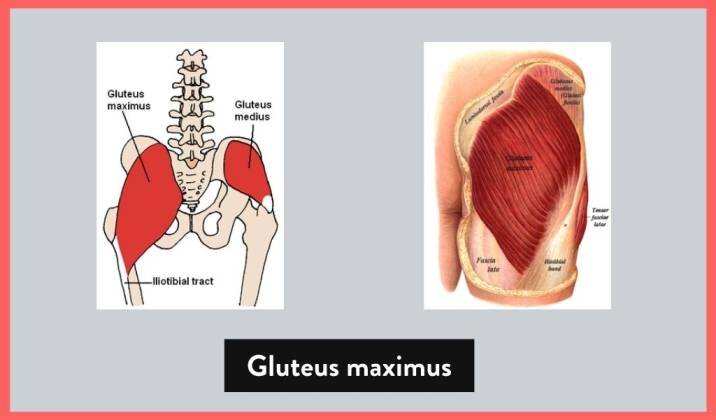
Mid-Thigh Positioning for Gluteus Maximus Development
For maximum gluteus maximus activation during hip thrusts and bridges, position the band at mid-thigh level where it creates optimal resistance during hip extension. This placement mimics the tension curve of heavy barbell work while adding constant resistance through the entire range of motion—unlike free weights that provide minimal tension at the bottom of movements. As you drive your hips upward, focus on squeezing your glutes together as if trying to hold a coin between your cheeks, maintaining this contraction for 1-2 seconds at the top before lowering with control. The band should feel challenging during the final 3-5 reps of each set while still allowing perfect form—this sweet spot maximizes muscle growth without compromising technique.
Ankle Placement for Advanced Activation
When standard knee placement no longer provides sufficient challenge, move the band to ankle level for extreme gluteus medius activation. This advanced technique requires exceptional hip stability as you perform exercises like side-lying clamshells or standing kickbacks. The increased leverage makes even light resistance feel intensely challenging, forcing your smaller hip abductors to work overtime. Many professional athletes use this placement as a finisher after their main workout—just 2-3 sets of 10-15 reps creates a deep burn that signals effective muscle stimulation. If you find yourself leaning or rotating your pelvis to compensate, return to knee placement until your stability improves.
Essential Booty Band Exercises That Deliver Results
The banded hip thrust stands as the undisputed champion for building glute mass, combining hip extension with constant tension that traditional barbell work can’t match. Position yourself with your upper back against a bench, feet flat on the floor hip-width apart, and the band just above your knees. Drive through your heels while squeezing your glutes at the top position—imagine trying to crack a walnut between your cheeks. Perform 3-4 sets of 12-15 reps with 60-90 seconds rest, focusing on the muscle contraction rather than moving heavy weight. Pro tip: Add a 2-second pause at the top of each rep to increase time under tension and maximize growth stimulus.
Clamshells for Sculpted Outer Glutes
This deceptively simple exercise targets the often-neglected gluteus medius responsible for that round, lifted appearance. Lie on your side with knees bent 45 degrees and the band positioned just above your knees. Keeping your feet together, lift your top knee against the band’s resistance while maintaining a stable pelvis—avoid rolling backward as this shifts work to your lower back. Lower with control and repeat for 15-20 reps per side. For increased difficulty, perform this movement with your legs extended straight rather than bent. The controlled tempo creates metabolic stress that promotes muscle growth, particularly when performed as part of your warm-up routine.
Monster Walks for Functional Glute Strength
Monster walks (lateral band walks) build hip stability while creating that deep muscle burn signaling effective glute activation. Place the band above your knees and assume a quarter-squat position with feet hip-width apart. Step laterally with your right foot, followed by your left, maintaining constant tension throughout the movement. Complete 10-15 steps in each direction for 2-3 sets. Critical detail: Keep your toes pointed forward and resist the urge to lean your torso—this cheating technique reduces glute engagement. Advanced trainees can increase difficulty by lowering into a deeper squat position or using a heavier band.
Avoid These Common Booty Band Mistakes
Most beginners make the critical error of allowing the band to go slack during exercises, eliminating resistance precisely when muscles need it most. During hip thrusts, this happens at the bottom position when you should maintain tension through the entire range of motion. The fix? Reduce your range of motion slightly until you can control the band’s tension throughout. Another frequent mistake involves improper band placement—putting the band too low around ankles during exercises designed for knee placement shifts stress to knees rather than glutes. Take 10 seconds before each exercise to adjust positioning for optimal muscle engagement.
Progressive Overload Strategies That Work
Your glutes adapt quickly to consistent stress, making progressive overload non-negotiable for continued growth. Track three key variables: resistance level (band thickness), volume (sets x reps), and time under tension (tempo). When you can complete all prescribed reps with perfect form, increase resistance first—this provides the strongest growth stimulus. If heavier bands aren’t available, increase volume by adding 1-2 reps per set or extending the eccentric (lowering) phase to 3-4 seconds. The most effective glute builders log their workouts religiously, ensuring they systematically challenge their muscles week after week.
Creating Your Glute-Building Band Routine
Design your band workouts around three key movement patterns: hip thrusts for gluteus maximus development, lateral movements for outer glute shaping, and isolation exercises for targeted activation. Start with 2 sets of 15-20 reps of clamshells and monster walks to activate your glutes before heavier work. Follow with 3 sets of 12-15 banded hip thrusts, resting 60 seconds between sets. Finish with 2 sets of 15-20 reps of side-lying kickbacks to fully exhaust your gluteus medius. Perform this routine 2-3 times weekly with at least 48 hours between sessions for optimal recovery and growth.
For maximum results, combine band training with traditional strength work—use bands as activation before heavy squats or deadlifts, then incorporate dedicated band days for metabolic stress and muscle pump. Consistency over months, not weeks, delivers transformative results. Track your progress through measurements, photos, and strength benchmarks rather than daily scale fluctuations. Remember that nutrition and recovery support 80% of your results—aim for 0.8g of protein per pound of bodyweight and prioritize 7-8 hours of quality sleep nightly.
With precise band selection, strategic placement, and consistent progressive overload, you’ll transform your glute development in ways traditional training alone cannot match. Start implementing these techniques today and feel the difference in your next lower body workout—your stronger, rounder, more powerful glutes await.


