
Fabric resistance bands have revolutionized home fitness with their comfortable design and versatile functionality. Unlike traditional rubber bands that pinch and roll during workouts, fabric resistance bands feature a flat, woven construction that stays securely in place while delivering consistent tension. These bands have become essential tools for strength training, rehabilitation, and mobility work, offering a low-impact yet highly effective way to build muscle and improve movement patterns. Whether you’re a beginner starting your fitness journey or an experienced athlete looking to enhance performance, mastering how to use fabric resistance bands properly can significantly boost your training results.
This guide reveals the exact techniques and exercises that deliver optimal strength development with fabric resistance bands. You’ll discover how to select the perfect resistance level for your fitness goals, avoid common mistakes that undermine progress, and implement advanced training strategies that challenge even seasoned lifters. By the end, you’ll have a complete understanding of how to integrate these bands into your routine for stronger glutes, improved hip stability, and enhanced athletic performance.
Why Fabric Resistance Bands Outperform Traditional Options
The unique construction of fabric resistance bands provides distinct advantages that make them superior to latex alternatives for most training applications.
Eliminate Skin Irritation During High-Rep Sets
Fabric bands’ woven material distributes pressure evenly across your skin rather than concentrating force in narrow points like rubber bands. When performing exercises like monster walks or banded squats for multiple sets, this even pressure prevents painful pinching and red marks that often force you to stop sets prematurely. The soft fabric surface feels comfortable even during extended holds or high-repetition work, allowing you to focus entirely on muscle engagement rather than adjusting uncomfortable equipment.
Maintain Position During Dynamic Movements
The textured surface of fabric resistance bands creates superior grip against both skin and flooring surfaces. When placed above your knees during squats, the band stays firmly in position without sliding down your thighs. This stability ensures consistent resistance throughout each repetition, maximizing muscle activation from the first rep to the last. Unlike smooth rubber bands that shift during lateral movements, fabric bands provide reliable tension during exercises like monster walks or side shuffles, making your workout more efficient and effective.
Withstand Thousands of Repetitions Without Degradation
Quality fabric resistance bands maintain their elasticity significantly longer than latex alternatives. While rubber bands develop weak spots and eventually snap after repeated stretching, fabric bands resist environmental factors like sweat, sunlight, and ozone exposure that degrade traditional resistance bands. Properly cared for, a set of fabric resistance bands can last through hundreds of workouts without losing their resistance properties, making them a more economical long-term investment.
Selecting Your Ideal Fabric Resistance Band Setup

Choosing appropriate resistance levels ensures progressive overload without compromising form or increasing injury risk.
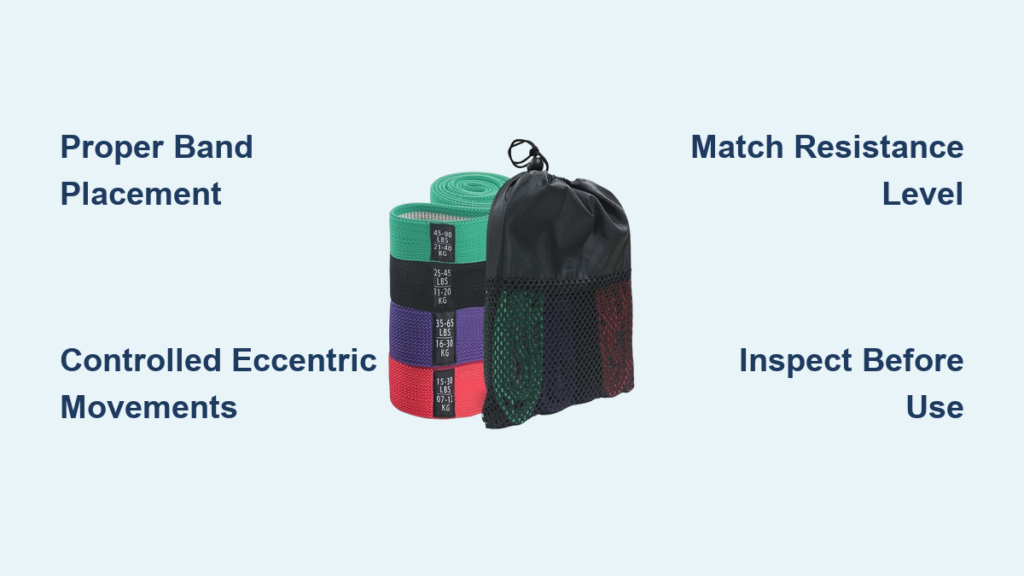
Match Resistance to Your Current Strength Level
Beginners should start with light resistance bands (typically green or yellow) that allow proper form execution through complete ranges of motion. These lighter bands work exceptionally well for activation exercises and rehabilitation protocols. Intermediate exercisers benefit from medium resistance (blue or red) that provides sufficient challenge for strength development while maintaining control. Advanced users seeking significant muscle growth should incorporate heavy and extra-heavy bands (black, purple, or orange) that create substantial tension during compound movements.
Consider Band Length for Exercise Versatility
Longer fabric resistance bands (usually 41-50 inches) offer greater versatility for lower body exercises and allow for more complex movement patterns. Shorter bands (31-40 inches) concentrate resistance differently and work better for upper body exercises or when anchoring to fixed objects. If you primarily target glutes and hips, opt for longer bands that provide adequate tension throughout full ranges of motion. For upper body work, shorter bands often deliver more consistent resistance during pulling and pressing movements.
Essential Fabric Resistance Band Exercises for Strength Development
Master these foundational movements to build a comprehensive training program that targets all major lower body muscle groups.
Banded Glute Bridge for Targeted Glute Activation
Place the fabric band just above your knees while lying on your back with feet flat on the floor. Drive your knees outward against the band’s resistance as you lift your hips toward the ceiling. Squeeze your glutes hard at the top position before lowering with control. This exercise isolates the gluteus maximus while the band adds horizontal resistance that forces greater muscle engagement. Perform three sets of fifteen to twenty repetitions with a two-second hold at the top to maximize glute activation.
Monster Walks for Hip Stability and Power
Step into the band so it rests around your ankles or just above your knees. Take wide lateral steps while maintaining a slight knee bend and keeping your toes pointed forward. Complete fifteen steps in each direction while focusing on pushing against the band’s resistance throughout the movement. This exercise specifically targets the gluteus medius and minimus, muscles critical for knee stability and athletic power. Keep your chest up and core engaged to prevent your knees from collapsing inward during each step.
Squat with Band for Proper Knee Alignment
Position the fabric band just above your knees before descending into your squat. As you lower, actively push your knees outward against the band’s resistance to maintain proper alignment. This external cue teaches your body to engage the hip abductors throughout the movement, preventing knee cave-in that often leads to injury. Perform three sets of twelve to fifteen controlled squats, focusing on maintaining outward pressure against the band during both the descent and ascent phases.
Advanced Fabric Resistance Band Techniques
Once you’ve mastered basic movements, incorporate these advanced techniques to continue building strength and power.
Plyometric Power Development with Bands
Add fabric resistance bands to jump training to enhance explosive power. Place a light-to-medium resistance band around your thighs while performing squat jumps or lateral hops. The added resistance forces your muscles to generate more force during the concentric phase, potentially improving vertical jump height and horizontal power. Use controlled movements and focus on maximum effort during each jump while maintaining proper landing mechanics to protect your joints.
Single-Leg Romanian Deadlifts for Hamstring Strength
Stand on one leg with the band under your foot, holding the handles in your opposite hand. Hinge forward at your hips while extending your free leg behind you for balance. Lower until you feel a stretch in your hamstring, then return to upright while maintaining tension on the band. This unilateral exercise builds hamstring strength, hip hinge mechanics, and balance simultaneously. Perform two sets of ten repetitions per leg with a focus on controlled movement and proper spinal alignment.
Proper Form Techniques That Maximize Results

Implement these technique refinements to ensure you’re getting the most from every fabric resistance band exercise.
Precise Band Placement for Targeted Muscle Activation
Position bands just above your knees for general lower body activation during squats and bridges. For greater gluteus medius engagement during lateral movements, place bands around your ankles. Higher thigh placement increases resistance on the outer hips during abduction exercises. Experiment with different placements to find what best activates your target muscles while maintaining proper joint alignment.
Controlled Eccentric Movements for Muscle Growth
Resist the band’s pull during the lowering phase of each exercise rather than letting it snap back. A two-to-three second eccentric (lowering) phase creates more muscle damage, which stimulates greater strength and hypertrophy adaptations. During glute bridges, for example, take three seconds to lower your hips while maintaining outward pressure against the band throughout the entire descent.
Common Mistakes That Sabotage Your Progress
Avoid these frequent errors to maximize your results and prevent injury when learning how to use fabric resistance bands.
Selecting Excessively Heavy Resistance
Starting with bands that are too challenging forces improper form and reduces exercise effectiveness. If you cannot complete sets with proper technique, the resistance is too heavy. Begin with lighter bands that allow perfect form execution, then progress to heavier resistance only when you can complete all repetitions with control. You should feel challenged during the last few reps, but not to the point of compromising movement quality.
Skipping Band Inspection Before Workouts
Failing to check your fabric resistance bands for wear and tear increases the risk of sudden failure during exercises. Before each use, examine bands for fraying, thinning, or damaged stitching, especially at the connection points. Replace bands showing any signs of deterioration to maintain consistent resistance and prevent potential injury from snapping bands.
Creating Effective Fabric Resistance Band Workouts
Structure your training sessions to maximize strength development and prevent plateaus.
Lower Body Focus Routine
Combine banded squats (3 sets of 12-15 reps), glute bridges (3 sets of 15-20 reps), monster walks (2 sets of 15 steps per direction), and standing hip abductions (2 sets of 15 per leg) for a comprehensive lower body workout. Rest 60-90 seconds between sets to maintain proper form while allowing sufficient recovery for strength development. Perform this routine two to three times weekly with at least one rest day between sessions for optimal muscle recovery.
Progressive Overload Strategies
Track your workouts to ensure consistent progress. Once you can complete all sets and repetitions with perfect form, progress by moving to a heavier resistance band, adding one or two additional repetitions per set, or reducing rest time between sets. For advanced lifters, combining multiple bands creates custom resistance levels that continue challenging your muscles as you grow stronger.
Fabric resistance bands provide an accessible, versatile solution for building strength anywhere. By implementing these precise techniques and avoiding common mistakes, you’ll maximize muscle activation and see tangible results from your training. Start with foundational exercises using appropriate resistance levels, focus on perfect form execution, and progressively challenge your muscles to continue building strength. Whether your goal is stronger glutes, improved athletic performance, or enhanced mobility, mastering how to use fabric resistance bands properly delivers exceptional results with minimal equipment.


