
Foam rolling has transformed from a professional athlete’s secret weapon into a mainstream wellness practice embraced by anyone seeking better mobility, faster recovery, and reduced muscle tension. If you’ve ever watched someone casually rolling on a cylindrical foam tube at the gym and wondered whether you should give it a try, you’re not alone—millions of people now incorporate this simple yet remarkably effective self-massage technique into their daily routines. The beauty of foam rolling lies in its accessibility: with just one affordable piece of equipment, you can address muscle tension, improve flexibility, and enhance recovery without ever scheduling a professional massage appointment.
This comprehensive guide walks you through everything you need to know to start foam rolling with confidence and effectiveness. From selecting the right roller for your needs to mastering fundamental techniques and targeting specific muscle groups, you’ll gain the knowledge to transform this simple practice into a powerful tool for your physical wellness. Whether you’re an athlete looking to optimize performance, a desk worker battling postural tension, or simply someone seeking relief from everyday muscle stiffness, understanding how to use a foam roller properly will help you achieve lasting results.
Select the Perfect Foam Roller for Your Needs

Choosing the right foam roller sets the foundation for successful practice, as using equipment that doesn’t match your experience level or goals can lead to frustration or ineffective sessions. Foam rollers come in various densities, sizes, and surface textures—each designed for different purposes and user experience levels. Understanding these variations ensures you begin with a roller that supports rather than hinders your progress.
Soft density rollers provide gentle pressure ideal for beginners, individuals recovering from injuries, or those with low pain tolerance. These rollers compress easily under body weight, offering a comfortable introduction to foam rolling without overwhelming discomfort. While they may not deliver the deep tissue work that experienced users eventually seek, soft rollers excel at building tolerance and teaching proper technique without causing the bruising or excessive soreness that firmer rollers might produce.
Medium density rollers represent the most popular choice among regular practitioners, striking an effective balance between comfort and tissue release. These rollers provide sufficient pressure to address muscle tension while remaining comfortable enough for daily use. If you’re uncertain which density to choose, medium typically serves most people well and allows for progression to firmer rollers as your tolerance develops.
High density and vibrating rollers cater to experienced users seeking intense, deep pressure or enhanced muscle stimulation. Firm rollers require established tolerance to use effectively, while vibrating models add mechanical stimulation that can accelerate muscle relaxation. These advanced options typically suit athletes or dedicated enthusiasts who have built tissue adaptation through consistent practice.
Master Basic Rolling Technique
Before targeting specific muscle groups, understanding the fundamental foam rolling methodology ensures you reap maximum benefits from every session. The core technique remains consistent across all exercises, though pressure intensity and duration vary based on individual needs and the muscle being addressed.
Begin by positioning the foam roller beneath the target muscle group, then slowly roll your body over the cylinder while maintaining contact with the roller. Move at a deliberate pace of approximately one inch per second—this slow movement allows the pressure to penetrate muscle tissue effectively rather than skimming across the surface. When you encounter a particularly tender or tight spot, pause and hold position for 30-90 seconds, allowing sustained pressure to encourage muscle release.
The direction of rolling matters more than many practitioners realize. Always roll along the length of muscle fibers, following their natural orientation rather than rolling perpendicular to them. For example, when working the quadriceps, position the roller horizontally beneath your thigh and roll from hip toward knee, paralleling the vertical alignment of quad muscles. Rolling across fiber direction can cause unnecessary discomfort and fails to effectively address tension patterns within the tissue.
Pressure application represents perhaps the most critical aspect of effective foam rolling. The goal involves finding a discomfort level that challenges but remains manageable—typically described as a 6-7 on a scale where 10 represents unbearable pain. If pressure causes you to hold your breath, tense your muscles, or experience sharp pain, reduce intensity immediately. Consistent practice gradually increases tolerance, allowing deeper pressure over time as tissues adapt. Remember that breathing deeply throughout the session helps relax the muscles being worked and enhances the release effect.
Roll Your Quadriceps Properly

The quadriceps—those large muscles on the front of your thighs—work constantly during walking, running, sitting, and virtually every lower body movement. Due to their size and continuous use, quads accumulate significant tension, particularly in individuals who spend extended periods sitting or engage in running-based activities. Learning to roll these muscles effectively provides substantial relief from thigh tightness and can even help alleviate referred pain in the knees and lower back.
Position yourself face down with the foam roller positioned horizontally beneath your thighs, just above the knee cap. Support your upper body on your forearms and hands, lifting your torso slightly off the ground. This position allows you to control pressure by adjusting how much body weight transfers to the roller—less weight means lighter pressure, while more weight intensifies the release. Slowly roll from just above the knee toward your hip, pausing when you encounter tight spots that warrant extended attention.
To access different portions of the quadriceps, rotate your legs slightly inward or outward while rolling. Turning your toes inward targets the outer (lateral) quad, while rotating feet outward focuses on the inner (medial) portion. This variation ensures comprehensive coverage of all four quad muscles rather than only working the central portion that contacts the roller in a neutral position.
Common quad rolling mistakes include rolling too quickly past problem areas and placing the roller directly on the knee joint. The knee contains vulnerable structures that should never bear direct pressure from the roller—always keep the cylinder on muscle tissue above and below the joint. Additionally, many beginners rush through the movement, missing the therapeutic benefits of sustained pressure on particularly tense spots. Patience during these pauses distinguishes effective sessions from merely going through the motions.
Release Tight Hamstrings Effectively
The hamstrings—a trio of muscles running along the back of the thigh—frequently develop tightness that contributes to lower back pain, altered gait, and increased injury risk. These muscles bear substantial stress during running, sitting, and countless daily movements, making regular foam rolling essential for maintaining healthy leg function and preventing the cascade of issues that tight hamstrings can trigger.
Sit on the foam roller positioned horizontally beneath your hamstrings, positioned just below the buttocks. Extend your legs straight out and place your hands on the floor behind you for support, keeping your back straight rather than slouching. Slouching reduces rolling effectiveness and can strain the lower back. Slowly roll from directly beneath the buttocks down toward the knee, stopping to hold on any sensitive areas that require extended attention.
The upper hamstring region near the sitting bone often harbors significant tension and trigger points. This area may produce intense sensations during rolling, which is normal but requires careful pressure management. If the pressure becomes unbearable, shift your weight slightly to one side or reduce the amount of body weight transferring to the roller. Some practitioners find relief by crossing one leg over the other, concentrating pressure on a smaller surface area of the hamstrings.
For the outer hamstring muscles, externally rotate the leg so the lateral hamstring contacts the roller while the inner muscles remain elevated. This targeted approach addresses specific hamstring portions that may develop independent tension patterns. The inner (medial) hamstrings receive attention by rotating the leg in the opposite direction, ensuring comprehensive coverage of this muscle group.
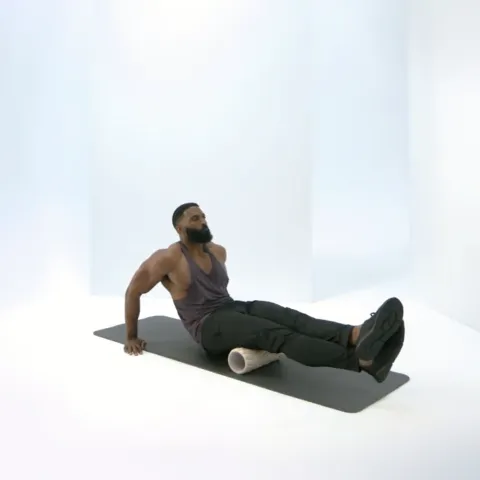
Target Your Calf Muscles for Better Mobility
The calf muscles work continuously throughout daily activities and endure tremendous stress during running, jumping, and athletic movements. Tight calves contribute to Achilles tendon issues, plantar fasciitis, and changes in walking patterns that can ripple up to affect the knees, hips, and lower back. Regular foam rolling of the calves maintains the mobility essential for efficient movement and prevents the cascade of problems that calf tension can create.
Sit with your legs extended and the foam roller positioned beneath your lower legs, just above the Achilles tendon. Place your hands on the floor behind you and lift your hips upward, transferring your body weight onto the roller. Slowly roll from your ankle toward your knee, working the entire gastrocnemius and soleus muscles that comprise the calf complex. When you find a tight spot, pause and allow sustained pressure to encourage release.
The calf muscles feature two distinct heads—the medial (inner) and lateral (outer) heads—and both require attention for complete release. To target the inner head, turn your foot inward, which rotates the muscle and brings the medial portion into contact with the roller. Conversely, turning your foot outward shifts pressure to the lateral head. This targeted technique ensures balanced release of both calf components.
Those with extremely tight calves or beginners new to foam rolling benefit from a gentler approach: place one leg over the other and roll using only the top leg’s weight. This modification reduces pressure by approximately half, allowing comfortable introduction to calf rolling. As tolerance builds, progress to using full body weight for deeper tissue work that addresses chronic tension more effectively.
Avoid These 4 Common Foam Rolling Mistakes
Even dedicated foam rollers often unknowingly undermine their efforts through common technique errors that reduce effectiveness or cause unnecessary discomfort. Recognizing and correcting these mistakes transforms mediocre sessions into highly productive tissue work that delivers meaningful results.
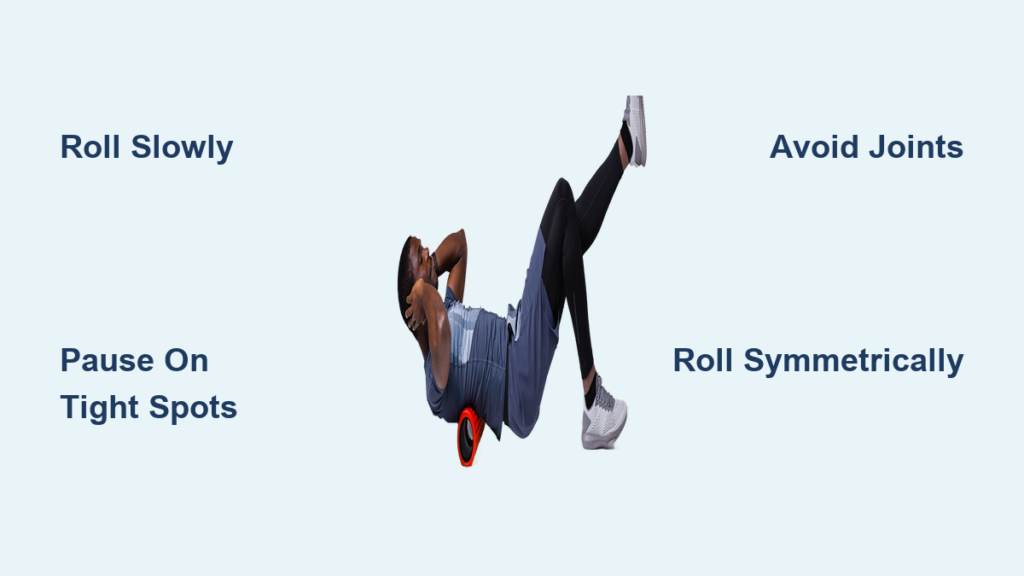
Rolling too quickly represents perhaps the most prevalent mistake. Rapid movement may feel like you’re efficiently covering ground, but brief contact with tight spots fails to apply sufficient pressure for meaningful release. The tissue needs time to respond—aim for approximately one inch per second, and pause 30-90 seconds on particularly tender areas. This patient approach, while less dynamic, produces significantly better tissue changes than hurried rolling.
Applying excessive pressure causes bruising, tissue damage, and protective muscle tension that counteracts rolling benefits. The goal involves finding a discomfort level that challenges but remains manageable—typically a 6-7 on a scale of 1-10. If you find yourself holding your breath, clenching your jaw, or tensing the muscles being rolled, pressure is too intense. Reduce body weight on the roller or switch to a less dense roller. Gradually progress to firmer rollers as your tolerance develops.
Rolling directly on bones and joints causes unnecessary pain and potential injury while providing no therapeutic benefit. The roller should contact muscles and soft tissue only—never bones or joints. When rolling the back, avoid the spine and shoulder blades by positioning the roller to the side of these structures. Similarly, never roll directly on knee, ankle, or elbow joints. If you find yourself on a bony prominence, adjust position slightly to move onto soft tissue.
Neglecting symmetry creates muscle imbalances that undermine your rolling practice. Many people unconsciously focus on the dominant side or the area that feels tighter, neglecting the opposite side. Develop the habit of spending equal time on both sides of your body, even if one side feels significantly tighter. Consistent asymmetry can create or worsen existing imbalances.
Integrate Foam Rolling Into Your Daily Routine
Establishing foam rolling as a consistent practice delivers compounded benefits that occasional sessions cannot match. A daily 10-15 minute session provides greater long-term value than infrequent intensive work, making routine integration essential for meaningful results.
Pre-workout preparation differs from post-workout recovery rolling. Before exercise, spend 30 seconds to 1 minute on each major muscle group using lighter pressure. The goal involves activating muscles, increasing blood flow, and preparing tissue for activity without causing fatigue. This preparation proves particularly valuable for individuals who sit for extended periods before exercising, counteracting stiffness accumulated during sedentary work.
Post-workout recovery capitalizes on increased blood flow and tissue temperature from exercise to accelerate recovery and reduce delayed onset muscle soreness. After exercise, spend 1-2 minutes on each major muscle group, lingering longer on areas feeling particularly tight or fatigued. Research suggests consistent post-workout foam rolling can decrease muscle soreness by up to 30%, helping athletes recover faster for subsequent training sessions.
Morning or evening maintenance provides ongoing tissue care regardless of exercise. A simple 10-minute session addressing major muscle groups maintains mobility and prevents tension accumulation. Many practitioners find pairing foam rolling with existing habits—like morning coffee or evening television—increases consistency by creating behavioral triggers that prompt the practice.
Combining foam rolling with static stretching enhances recovery benefits comprehensively. After rolling, hold stretches for 20-30 seconds to help reset muscle length and maintain flexibility gains. The warm, pliable muscles respond better to stretching after foam rolling, making this combination particularly effective for maintaining range of motion and preventing injury.
Foam rolling offers remarkable benefits for mobility, recovery, and muscle health when practiced correctly. By selecting appropriate equipment, mastering fundamental techniques, targeting muscle groups effectively, and avoiding common mistakes, you can transform this simple practice into a powerful tool for physical wellness. Start with patient, consistent sessions on larger muscle groups, gradually progressing to more advanced techniques as your tolerance develops. The compounded benefits of regular practice far exceed occasional intensive work, making foam rolling a sustainable investment in your long-term physical wellbeing.


