
If you’ve ever struggled to tie your shoes or stand up from a chair due to lower back discomfort, you’re not alone—80% of adults experience lower back pain at some point in their lives. Learning how to use foam roller for lower back pain effectively provides immediate relief without expensive treatments or medication. Foam rolling, or self-myofascial release, applies targeted pressure to tight muscles and connective tissue, reducing tension in your erector spinae, quadratus lumborum, and other key muscle groups responsible for lower back strain. This guide delivers precise techniques you can implement today to alleviate pain, improve mobility, and prevent future episodes—all from the comfort of your home.
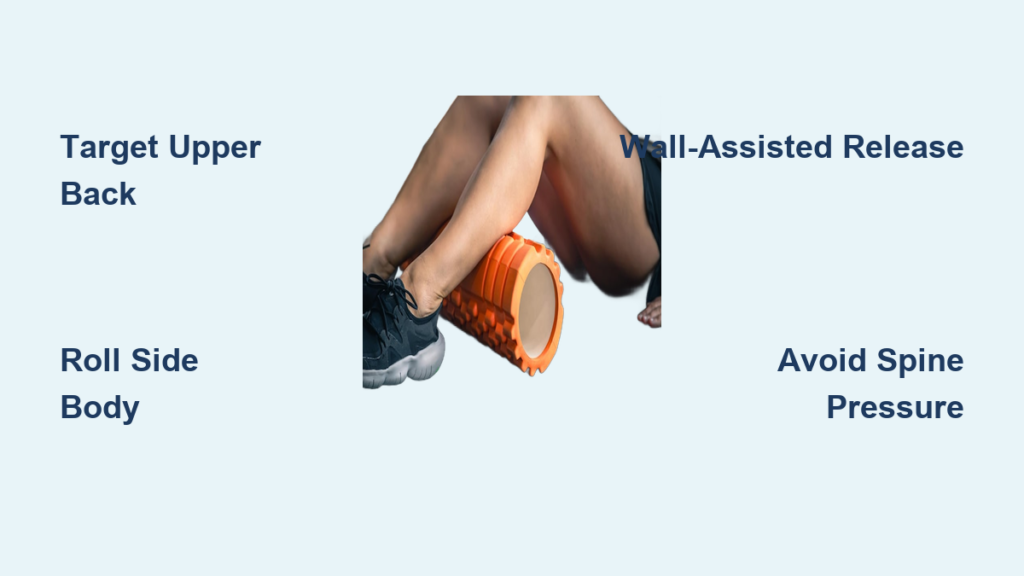
Many people mistakenly believe foam rolling requires direct pressure on the spine, but this approach risks injury and misses the mark. Proper technique focuses on surrounding muscles that pull on your spine when tight. By mastering specific rolling patterns for different areas—including upper back, side body, and hip regions—you’ll address the true sources of your discomfort. In the next few minutes, you’ll learn exactly which foam roller density works best for your sensitivity level, how to position yourself safely on the floor, and step-by-step methods to release tension without aggravating your condition.
Why Foam Rolling Helps Lower Back Pain
Foam rolling delivers relief through multiple physiological mechanisms that directly address lower back pain triggers. When you apply sustained pressure to tight muscles alongside your spine, you stimulate mechanoreceptors that send non-painful signals to your spinal cord, effectively “closing the gates” to pain signals. This neurological effect provides immediate relief while you roll, explaining why many people feel better within minutes of starting their session.
Beyond pain gate theory, foam rolling physically releases fascial restrictions—the web-like connective tissue surrounding your muscles. When this fascia becomes stiff from prolonged sitting or repetitive movements, it creates abnormal tension patterns that increase stress on your lumbar spine. The pressure from foam rolling helps restore normal tissue length, reducing the mechanical forces contributing to your pain. You’ll notice improved flexibility in daily movements like bending and twisting as these restrictions release.
Choose the Right Foam Roller

Selecting the appropriate foam roller makes the difference between effective pain relief and frustrating discomfort. For lower back treatment specifically, medium-density rollers provide the ideal balance for most users—firm enough to penetrate muscle tissue but soft enough to avoid bruising sensitive areas. Beginners should avoid firm-density rollers that can cause excessive discomfort in tender lower back regions.
The surface texture significantly impacts your experience:
– Smooth rollers glide easily across skin and provide consistent pressure
– Textured rollers with bumps or grids target specific fibers but may be too intense for lower back beginners
– Vibrating rollers enhance blood flow but cost significantly more
For size, standard 18-24 inch rollers work best for lower back treatment as they provide adequate coverage while remaining portable. Avoid short 12-inch rollers that require constant repositioning during back sessions. If you have limited storage space, consider a full-length roller that doubles as a yoga mat.
Prepare Your Space and Body
Creating the right environment prevents frustration and maximizes your foam rolling results. Start by clearing a 3×6 foot area on a hard floor—carpet creates uneven pressure that reduces effectiveness. Place a yoga mat or thin blanket underneath for cushioning, but avoid thick padding that diminishes pressure transmission to your muscles.
Before rolling, perform a 3-minute warm-up to increase blood flow to your lower back tissues:
1. Gentle cat-cow stretches on hands and knees (1 minute)
2. Standing torso rotations (1 minute)
3. Hip circles while standing (1 minute)
This preparation makes your muscles more responsive to rolling. Never attempt foam rolling when cold or immediately after intense exercise when tissues are already inflamed. For optimal results, schedule sessions when you’re relaxed—morning stiffness or evening tension from sitting all day provide ideal opportunities.
Master Basic Foam Rolling Techniques
Upper Back Rolling Along the Spine
Your thoracic spine (upper back) significantly impacts lower back health—restrictions here force your lumbar region to compensate. Lie on your back with knees bent, placing the roller horizontally beneath your shoulder blades. Keep your hips on the floor and interlace fingers behind your head for support.
Roll slowly upward toward your neck and downward toward your mid-back, covering 4-6 inches of movement. When you find a tender spot, pause for 30-60 seconds while taking deep breaths. Focus on relaxing your muscles into the roller rather than tensing against it. Complete 5-6 rolls over 1-2 minutes, then reposition the roller slightly higher to cover the entire upper back region.
⚠️ Critical mistake to avoid: Never roll directly over your lumbar spine—the bony vertebrae lack protective muscle padding. Keep all rolling above your bottom rib cage.
Side Body Rolling for QL Release
The quadratus lumborum (QL) muscle frequently causes lower back pain but is often overlooked. Lie on your side with the roller positioned vertically beneath your lower ribs. Bend your top knee and place your foot on the floor in front of you for stability.
Gently roll from your bottom rib cage to the top of your hip bone, spending extra time on any tight spots. Breathe deeply into your side to help release tension—exhaling fully as you roll over tender areas increases effectiveness. Spend 60-90 seconds on each side, adjusting your position slightly to cover different angles of the QL muscle.
Advanced Foam Rolling Methods

Wall-Assisted Lower Back Release
This technique provides controlled pressure without lying on the floor. Stand with your back against a wall, placing the roller horizontally behind your lower back just above your hip bones. Slowly slide up and down 2-3 inches while maintaining contact with the wall.
Apply only 30-50% of your body weight to the roller—more pressure risks spinal compression. Move in small increments, pausing for 20-30 seconds on tight spots. This method works particularly well after sitting all day when floor rolling feels too intense.
Supported Piriformis Release
Tight piriformis muscles often refer pain to the lower back. Sit on the roller with it positioned beneath one buttock. Cross the ankle of your treated side over the opposite knee, then gently lean toward the treated side.
Roll slowly forward and backward 2-3 inches, focusing on the deep gluteal region. This should feel like deep pressure, not sharp pain—if you experience radiating leg pain, stop immediately. Spend 45-60 seconds per side, using your hands for support as needed.
Safety Precautions and Contraindications
Stop foam rolling immediately if you experience any sharp pain, numbness, or tingling—these indicate potential nerve irritation. Individuals with herniated discs, osteoporosis, or recent back surgery should consult a physical therapist before attempting self-rolling. Never roll directly over your spine or bony landmarks—always target the muscle tissue alongside your vertebrae.
The ideal pressure level falls in the “discomfort zone”—you should feel tension release without tensing your muscles or holding your breath. If you find yourself grimacing or unable to relax, reduce pressure by using a softer roller or supporting more body weight with your hands.
Build Your Foam Rolling Routine
Start with this beginner-friendly protocol for lower back pain relief:
- Frequency: 2-3 times weekly with rest days between sessions
- Sequence:
– Upper back rolling: 2 minutes
– Side body rolling: 90 seconds per side
– Wall-assisted lower back: 60 seconds - Progression: After 2 weeks, add 15 seconds to each section and incorporate piriformis release
Track your pain levels before and after each session using a 1-10 scale. Most people notice measurable improvement within 3-4 weeks of consistent practice. If pain worsens or doesn’t improve after 6 weeks, consult a physical therapist for personalized guidance.
Troubleshoot Common Issues
Excessive discomfort? Reduce pressure by placing both feet on the floor during upper back rolling or using a softer roller. No improvement after 4 weeks? You’re likely missing key areas—add piriformis and hip flexor rolling to your routine. New pain after sessions? You’re rolling too aggressively—cut session duration in half and focus on gentle pressure.
Remember that foam rolling works best as part of a comprehensive approach. Combine it with daily walking, core strengthening exercises, and proper lifting mechanics for lasting lower back pain relief. The most successful users treat foam rolling as maintenance—not a cure—and incorporate it into their regular self-care routine.
Long-Term Back Pain Management
Sustainable lower back health requires integrating foam rolling with lifestyle modifications. Set up your workstation to encourage frequent position changes—stand for 10 minutes every hour if possible. When lifting objects, bend at your knees and hips rather than your waist to protect your lumbar spine. Before bed, spend 5 minutes foam rolling to release tension accumulated during the day.
Track your progress with a simple journal noting:
– Daily pain levels (1-10 scale)
– Foam rolling duration and areas treated
– Activities that aggravate or relieve pain
– Sleep quality improvements
Most importantly, be patient—chronic lower back issues develop over years and require consistent effort to resolve. With proper foam rolling technique combined with movement awareness, you’ll gradually reclaim pain-free movement for everyday activities. If symptoms persist despite consistent effort, consult a physical therapist who specializes in spinal health for personalized guidance.


