
You’re standing in your living room with a large resistance band in hand, wondering how to actually use this simple piece of equipment to build real strength. You’ve heard resistance bands can replace gym equipment, but without proper guidance, you’re just guessing at exercises and risking ineffective workouts or even injury. Learning how to use large resistance bands correctly transforms them from simple rubber strips into powerful training tools that deliver measurable strength gains anywhere. This guide cuts through the confusion with precise techniques that activate the right muscles while protecting your joints—no gym membership required.
Large resistance bands provide variable resistance that challenges muscles differently than free weights, creating tension throughout the entire movement range. Unlike dumbbells that offer consistent weight, resistance bands increase tension as they stretch, matching your body’s natural strength curve. Whether you’re rehabbing an injury, building athletic power, or simply wanting effective home workouts, mastering large resistance band techniques delivers results that surprise even seasoned gym-goers. Let’s dive into the exact methods that make these bands work for your specific fitness goals.
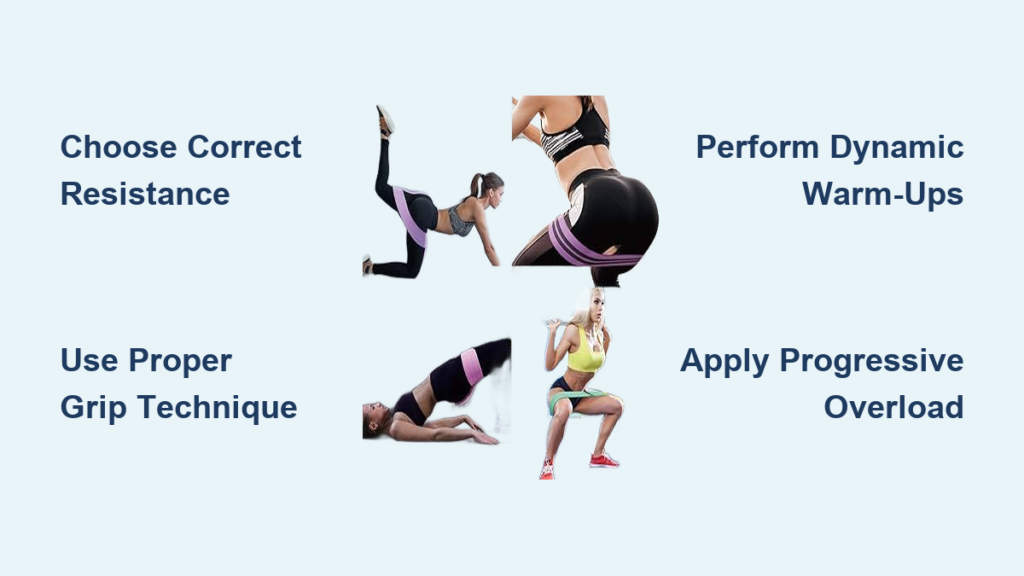
Select Your Perfect Resistance Band Strength
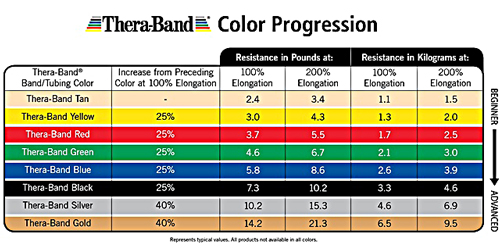
Choosing the right resistance level separates effective training from frustrating workouts. Large resistance bands come in color-coded resistance levels—yellow for light (10-15 lbs), green for medium-light (20-30 lbs), blue for medium (30-40 lbs), red for medium-heavy (40-50 lbs), and black for heavy (50-60+ lbs). Your ideal starting point depends on your current strength: if you complete 15 repetitions with minimal effort, the band is too light. The proper resistance should challenge your muscles by the final 3-5 repetitions while maintaining perfect form.
Don’t overlook band construction quality when learning how to use large resistance bands effectively. Natural latex bands provide superior elasticity but may cause reactions for sensitive users—opt for synthetic alternatives if you have latex allergies. Check for reinforced stitching at connection points, as frayed handles compromise grip security during high-tension exercises. Higher-quality bands include protective sleeves where the band meets handles, preventing premature snapping that sends handles flying toward your face. Investing in durable bands pays off through consistent resistance and safer training sessions.
Execute Proper Grip Techniques for Every Exercise

Your grip technique determines whether resistance bands activate target muscles or create joint strain. For pulling movements like rows and face pulls, use an overhand grip with palms facing away from your body—this naturally engages your back muscles while keeping wrists neutral. Wrap the handle completely around your palm rather than just gripping with fingers, preventing slippage when tension peaks. Many beginners squeeze handles too tightly, causing forearm fatigue that steals energy from primary muscle groups.
Switch to an underhand grip (palms facing your body) for bicep-focused exercises like curls and certain row variations. This grip position creates a more natural elbow alignment that reduces strain while maximizing bicep activation. When performing shoulder exercises like upright rows, use a neutral grip with palms facing each other to minimize shoulder impingement risk. Test each grip style during band pull-aparts to feel how subtle hand position changes shift muscle engagement across your upper back and shoulders.
Perform Dynamic Warm-Up Exercises with Bands
Band pull-aparts should be your go-to warm-up when learning how to use large resistance bands. Stand with feet shoulder-width apart, hold the band with straight arms at chest height, and pull handles apart until hands reach your sides. Squeeze shoulder blades together for one second at full extension, feeling the burn in your upper back. Complete two sets of 15-20 repetitions to activate muscles that prevent shoulder injuries during overhead movements. This simple exercise counters the rounded-shoulder posture many develop from desk work.
Band walks wake up dormant glute and hip muscles critical for lower body power. Place the band above your knees, assume a quarter-squat position, and take 10 controlled steps sideways. Maintain tension throughout by pushing knees outward against the band’s resistance. Return 10 steps in the opposite direction without standing up between movements. This warm-up specifically targets your gluteus medius—the often-neglected muscle that stabilizes your pelvis during running and jumping. Perform three sets in each direction before lower body workouts to reduce knee injury risk.
Build Chest and Shoulder Strength with Band Presses
The standing band chest press develops functional pressing power without a bench. Anchor the band behind you at shoulder height, grip handles with palms down, and press forward until arms fully extend. Focus on squeezing your chest at peak contraction rather than just moving your arms—the band’s increasing tension at full extension makes this especially effective. Complete 3 sets of 10-15 repetitions with controlled tempo, taking 2 seconds to press and 3 seconds to return.
For shoulder development, perform seated band overhead presses that eliminate momentum cheating. Sit on the floor with legs extended, loop the band under your feet, and grip handles at shoulder height. Press upward while keeping your core tight to prevent arching your lower back. Lower handles slowly to feel maximum tension during the eccentric phase—this builds more muscle than rushing through repetitions. The band’s variable resistance perfectly matches your shoulder strength curve, providing less tension at the bottom where shoulders are weakest.
Maximize Lower Body Power with Banded Squats and Deadlifts
Banded squats create intense glute and quad activation that traditional bodyweight squats can’t match. Position the band just above your knees and stand with feet slightly wider than shoulder-width. As you descend into a squat, actively push your knees outward against the band’s resistance. This engages your hip abductors throughout the movement, building strength that protects your knees during athletic movements. Drive through your heels to stand while maintaining outward knee pressure—complete 3 sets of 12-15 repetitions for optimal muscle growth.
Banded deadlifts build posterior chain strength with reduced spinal loading compared to barbell versions. Stand on the band with feet hip-width apart, hinge at your hips to grasp handles just outside your legs. Keep your back flat as you drive through your heels to stand, feeling the band’s increasing tension at the top of the movement. Lower with control by pushing your hips back, maintaining tension throughout. This exercise develops the hip hinge pattern essential for lifting safety while building powerful glutes and hamstrings—perform 3 sets of 10-12 repetitions with perfect form.
Implement Progressive Overload Strategies
Progressive overload separates plateaus from consistent strength gains when learning how to use large resistance bands. Every 2-3 weeks, increase resistance by switching to a heavier band once you complete all prescribed repetitions with proper form. Advanced lifters can double up bands for exercises like rows and presses—stack a medium and light band to create custom resistance levels between standard options.
Manipulate tempo to intensify workouts without heavier bands. Slow the lowering phase to 4 seconds during bicep curls, creating more muscle damage that stimulates growth. Add a 2-second pause at the stretched position of band pull-aparts to maximize time under tension. These technique variations often produce better results than simply increasing resistance, especially for building muscle endurance and joint resilience.
Prevent Common Band Training Injuries
Inspect bands before each use for tiny nicks or thinning spots that could cause sudden snapping. Replace bands showing visible wear—using damaged equipment risks serious injury from recoiling rubber. Always anchor bands securely to stable objects rated for the resistance level; door anchors must be fully closed and latched to prevent sudden release.
Never anchor bands above head height for overhead exercises—this creates dangerous downward force if the band snaps. Maintain control during explosive movements like band slams—release tension gradually rather than letting the band recoil violently. If you feel sharp joint pain during any exercise, stop immediately and reassess your form before continuing.
Extend Band Lifespan with Proper Care
Clean bands monthly with mild soap and water to remove sweat and skin oils that degrade rubber. Dry completely before storage to prevent mold growth in humid environments. Some trainers lightly dust bands with talcum powder after cleaning to prevent sticking during storage.
Store bands hanging loosely or laid flat in a cool, dark place—never in direct sunlight or hot cars that accelerate material breakdown. Rotate between multiple bands for different exercises to distribute wear evenly across your collection. Even high-quality bands last 6-12 months with regular use; replace them before they lose consistent resistance or show visible damage.
Large resistance bands deliver gym-quality strength training anywhere when used correctly. By selecting appropriate resistance levels, mastering precise techniques, and implementing smart progression strategies, you’ll build functional strength that transfers to real-world activities. Start with foundational movements, prioritize perfect form over heavy resistance, and watch your strength increase workout after workout. The portability and versatility of resistance bands make them essential tools for anyone serious about fitness—now that you know how to use large resistance bands properly, your home gym just became infinitely more powerful.


