
Latex resistance bands have become essential fitness tools for home gyms, physical therapy, and on-the-go training. When your dumbbells aren’t accessible or you need variable resistance for rehabilitation, these stretchy powerhouses deliver consistent tension throughout every movement. Unlike free weights that rely on gravity, resistance bands create constant muscular engagement from start to finish of each exercise—making them perfect for building strength with less joint stress. If you’ve ever wondered why your workouts plateau or how to add variety without expensive equipment, mastering latex resistance band techniques could be your missing link. This guide reveals exactly how to use latex resistance bands properly across fitness levels, from anchoring techniques to progressive overload strategies that deliver real results.
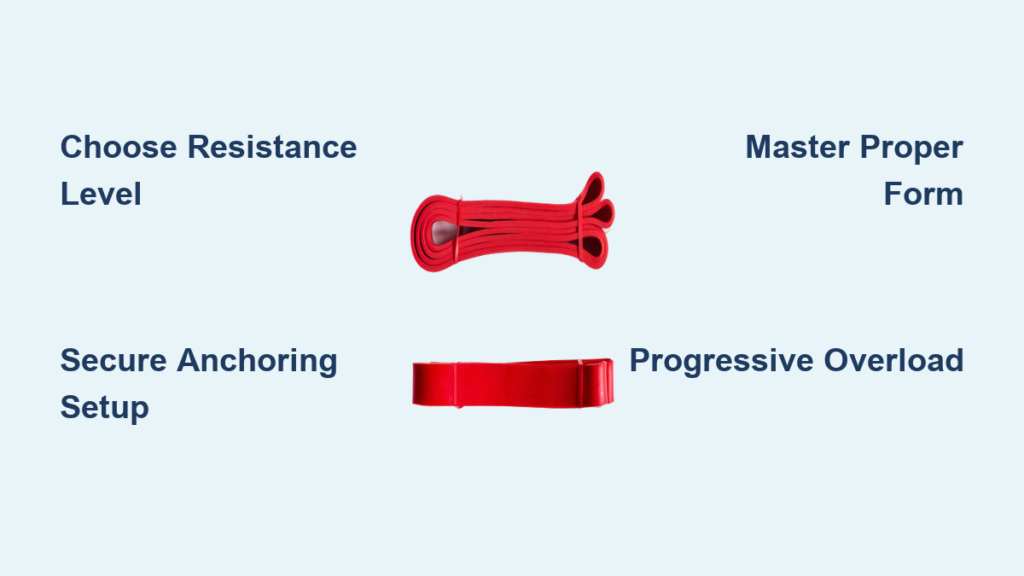
Choosing the Right Latex Resistance Band for Your Fitness Level
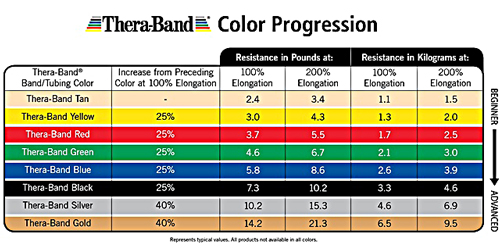
Selecting appropriate resistance is critical for effective training and injury prevention. Latex bands typically come in color-coded resistance levels ranging from extra light (yellow) to extra heavy (purple), with each color representing a specific poundage range.
How to Determine Your Starting Resistance Level
Beginners should start with lighter resistance to establish proper form before progressing. Stand with feet shoulder-width apart, step on the band’s center, and pull both ends upward. If you can complete 15-20 controlled repetitions with perfect form while feeling moderate muscle fatigue by the last few reps, you’ve selected the right starting level.
Common resistance color guide:
– Yellow: Extra light (10-15 lbs)
– Red: Light (20-30 lbs)
– Green: Medium (30-40 lbs)
– Blue: Heavy (40-50 lbs)
– Black: Extra heavy (50-60+ lbs)
Signs You Need to Upgrade Your Band Resistance
Your muscles adapt quickly to resistance training. Watch for these progression indicators:
– Completing all prescribed repetitions feels too easy
– You can perform additional sets without resting
– Movement speed increases significantly without losing control
– You experience no muscle fatigue during or after workouts
When two of these signs appear consistently, it’s time to move up one resistance level. Never sacrifice form for heavier resistance—maintain proper technique even with lighter bands for better muscle activation.
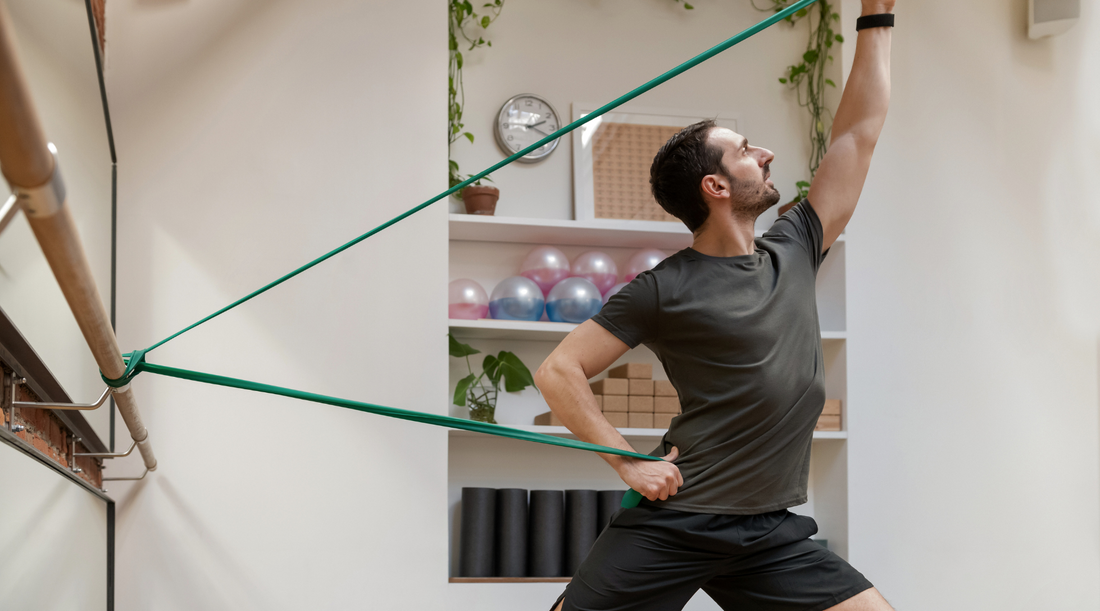
Proper Anchoring Techniques for Latex Resistance Band Exercises
Secure anchoring transforms simple bands into versatile gym replacements. How you anchor your band determines exercise effectiveness and safety.
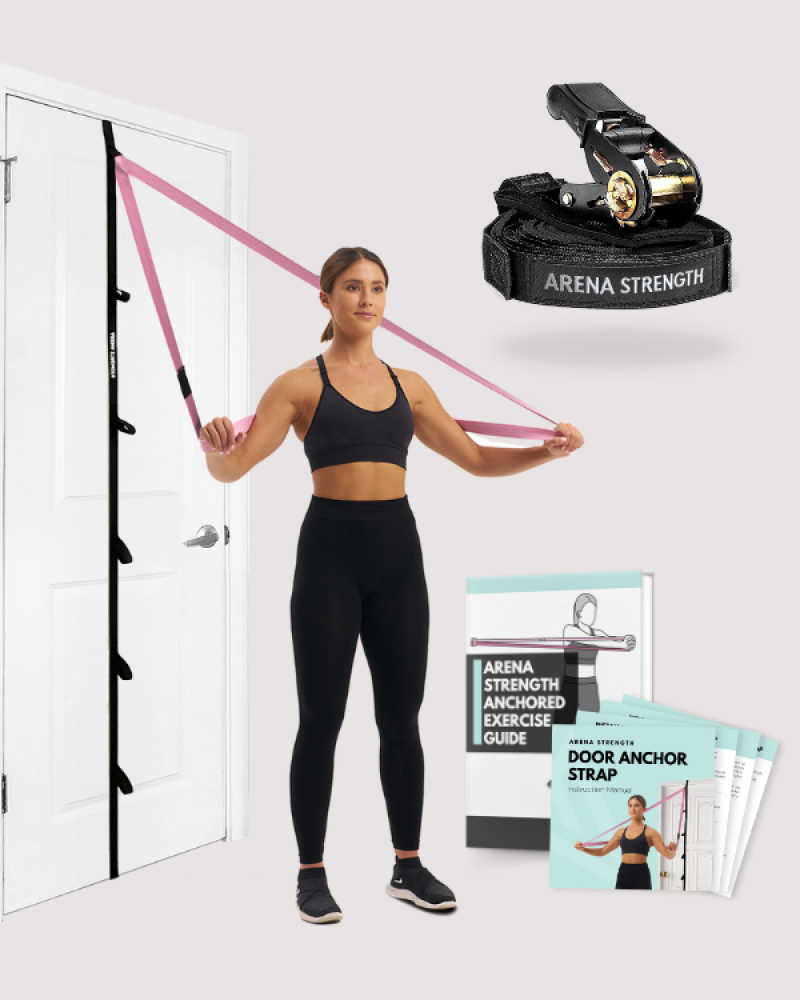
Door Anchor Setup for Upper Body Exercises
For chest presses, rows, and shoulder movements, use a door anchor properly:
1. Insert the anchor sleeve through your door’s closed position
2. Pull the band through the anchor loop until tension holds it secure
3. Close the door firmly on the anchor point
4. Test stability by gently pulling before adding tension
Critical safety check: Always ensure the door is locked in place and won’t accidentally open during your workout. Position the anchor at appropriate heights—chest level for presses, waist level for rows.
Floor Anchoring Methods for Lower Body Training
Secure floor anchoring creates stable resistance for squats, lunges, and leg presses:
– Step firmly on the band’s center with both feet for bilateral exercises
– For single-leg work, place your foot near the band’s midpoint
– Ensure your foot covers at least 3 inches of the band to prevent slippage
– Distribute weight evenly across your foot rather than on toes
Never wrap bands around unstable objects or use damaged anchors. Check band integrity before each use—latex degrades over time, especially with frequent anchoring.
Essential Latex Resistance Band Exercises by Muscle Group
Target every major muscle group effectively with proper band positioning and movement patterns. Each exercise requires specific band placement to maximize muscle engagement.
Upper Body Resistance Band Techniques
Chest Press: Anchor band behind you at chest height. Hold handles with palms facing down, step forward to create tension, and press hands forward until arms extend fully without locking elbows. Return slowly against resistance.
Common mistake: Allowing shoulders to creep up toward ears during the press. Keep shoulder blades pulled back and down throughout the movement.
Banded Rows: Anchor band at waist height. Hold both handles with palms facing each other, step back to create tension. Pull handles toward lower ribs while squeezing shoulder blades together. Maintain a straight spine—don’t round your back.
Pro tip: For greater back engagement, slightly lean forward from the hips while keeping your spine neutral.
Lower Body Resistance Band Workouts
Squats with Band Above Knees: Place loop band just above knees. As you descend into your squat, actively push knees outward against the band’s resistance. This engages gluteus medius muscles often neglected in standard squats.
Time-saving variation: Perform 10-15 squats, then immediately switch to banded glute bridges for a lower body superset.
Lateral Walks: Position loop band above knees. Assume athletic stance with slight knee bend. Take 10-15 controlled steps sideways against band resistance, then repeat in opposite direction. Maintain tension throughout—don’t let the band go slack.
Warning: Avoid taking excessively wide steps that compromise knee alignment. Keep steps small enough to maintain proper form.
Advanced Latex Resistance Band Training Strategies
Once you’ve mastered basic techniques, implement these progression methods to continue building strength and muscle.
Progressive Overload Techniques with Bands
Unlike weights where you simply add plates, resistance band progression requires strategic adjustments:
– Increase resistance level when you can complete all sets with perfect form
– Slow tempo on eccentric (lengthening) phase—try 4 seconds down, 2 seconds up
– Reduce rest periods between sets from 90 seconds to 60 seconds
– Add repetitions within proper form parameters
– Combine bands for heavier resistance when progressing to next color isn’t enough
Incorporating Isometric Holds for Strength Gains
Stop at peak contraction points during exercises and hold for 5-10 seconds:
– During bicep curls: Hold with arms fully bent
– At bottom of squat: Hold for 5 seconds before rising
– Midway through rows: Squeeze shoulder blades and hold
These isometric pauses increase time under tension, triggering greater muscle fiber recruitment than standard repetitions alone.
Safety Guidelines and Maintenance for Latex Resistance Bands
Latex bands require specific care to maintain effectiveness and prevent injury from snapped bands.
Critical Safety Checks Before Every Workout
Always inspect your bands for these damage indicators:
– Visible nicks, tears, or thinning sections
– Discoloration or chalky texture (latex degradation)
– Loss of elasticity (band doesn’t return to original length)
– Oily residue (sign of polymer breakdown)
Never use bands with any of these defects. Latex bands typically last 3-6 months with regular use before needing replacement.
Proper Storage to Extend Band Lifespan
Maximize your investment with correct storage:
– Keep bands away from direct sunlight (UV rays degrade latex)
– Store in cool, dry place—not in hot cars or damp basements
– Avoid contact with oils, lotions, or chemicals
– Don’t store bands stretched or knotted
– Keep bands separated—don’t let colors touch when stored
Important warning: Latex allergies affect approximately 4-6% of the population. If you experience itching, redness, or swelling after handling latex bands, discontinue use immediately and consult a healthcare provider.
Troubleshooting Common Latex Resistance Band Problems
Even with proper technique, you may encounter these frequent issues during band training.
Why Your Resistance Band Slips During Exercises
Slippage usually stems from improper foot placement or worn bands:
– Solution for floor exercises: Place band under arch of foot rather than toes
– Solution for door anchors: Use a thicker door anchor sleeve or double-loop the band
– Solution for handles: Wipe hands dry and ensure proper grip technique
Pro tip: Lightly sandpaper the area where your foot contacts the band to create temporary texture (only for fabric-covered bands).
How to Fix Uneven Resistance During Movements
If one side feels harder than the other:
– Check that both band ends are equal length when anchored
– Ensure door anchor is centered in the door frame
– For loop bands, verify no twists exist in the band
– Stand centered between anchor points for bilateral exercises
Creating Complete Latex Resistance Band Workout Routines
Design effective full-body sessions using strategic band combinations and exercise sequencing.
20-Minute Full Body Resistance Band Circuit
Complete 3 rounds with 60 seconds rest between rounds:
1. Banded squats (15 reps)
2. Chest press (12 reps)
3. Bent-over rows (12 reps)
4. Overhead press (10 reps)
5. Glute bridges (15 reps)
6. Bicep curls (12 reps)
Time-saving modification: Reduce rest between exercises to 15 seconds for metabolic conditioning.
Progressive Weekly Resistance Band Training Schedule
Structure your week for balanced development:
– Monday: Upper body push focus
– Wednesday: Lower body and core
– Friday: Upper body pull emphasis
– Sunday: Active recovery with light resistance
Key progression rule: Only increase resistance when you can complete all sets with perfect form for two consecutive workouts.
Final Note: Latex resistance bands deliver gym-quality results anywhere when used correctly. Focus first on mastering form with lighter resistance before progressing, always inspect bands for damage before use, and implement progressive overload techniques to continue building strength. By anchoring properly, selecting appropriate resistance levels, and incorporating advanced training strategies, you’ll maximize your band workouts while minimizing injury risk. For best results, combine band training with consistent progressive resistance increases and proper recovery between sessions.


