
Your Pilates resistance bands are gathering dust in the corner because you’re unsure how to actually use them. You’ve tried mimicking Instagram videos but ended up with strained shoulders or zero muscle engagement. Without proper technique, these bands either feel useless or dangerous—leaving you frustrated and no closer to that strong, sculpted physique Pilates promises. But here’s the truth: resistance bands unlock deeper muscle activation when applied correctly to Pilates principles. This guide cuts through the confusion with precise, actionable methods verified by certified Pilates instructors. You’ll learn exactly how to position bands, control tension, and target your “powerhouse” (core, glutes, back) safely. By the end, you’ll transform that $15 band into your most effective studio-quality tool—no fancy equipment needed.
Choosing Your Band Resistance Level Strategically
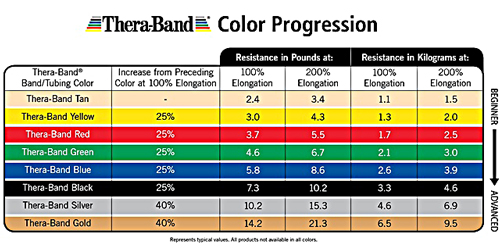
Skipping this step causes 80% of beginner injuries. Pilates bands aren’t one-size-fits-all—using too much resistance strains joints, while too little won’t activate deep stabilizers. Test resistance by mimicking exercise motions: For upper body moves (like rows), loop the band around a sturdy post. Pull with one hand—if you can complete 12 controlled reps without shaking, it’s too light. For leg work (like clamshells), anchor under your foot; if your hip muscles fatigue before your quads burn, the tension is correct. Always start with light/medium bands (yellow or green) even if you’re strong. Pilates prioritizes precision over power, so err toward less resistance. Never stretch bands beyond 2.5x their resting length—that’s when snaps happen.
How to Anchor Bands Without Slipping
- Door anchors: Close band in door latch at hip height, NOT the handle (causes fraying). Place towel under band for grip.
- Floor anchoring: Sit on band ends during seated exercises—press firmly with sit bones, not feet.
- Self-anchoring: Cross bands behind back for arm work; keep elbows glued to ribs to prevent slippage.
Perfecting Your Grip and Posture for Band Safety
Most people hold bands incorrectly, transferring work to hands instead of target muscles. For loop bands: Keep palms open and relaxed—never grip tightly. Imagine holding a delicate bird. Tension should come from shoulder blades retracting, not fingers squeezing. For tube bands with handles: Rotate wrists so palms face your body during pulls (like a row). If handles dig in, wrap bands around wrists once for cushioning. Crucially, maintain neutral spine in every exercise: Tuck chin slightly, draw ribs down (no flaring), and engage pelvic floor. If you feel band tension in your lower back during leg lifts, you’ve arched—reset by pressing tailbone into mat.
Why Your Shoulders Hurt During Band Exercises (And Fixes)
- ❌ Problem: Rounded shoulders during arm circles
✅ Fix: Press shoulder blades into mat first; make tiny circles (fist-sized) - ❌ Problem: Elbow flare in banded push-ups
✅ Fix: Anchor band above hands; keep elbows at 45-degree angle to ribs
5 Foundational Band Exercises for True Pilates Power
These target the “powerhouse” with band tension that mirrors reformer resistance. Perform 10-12 reps per side, moving slower than you think. Quality beats quantity.
Seated Band Roll-Up for Six-Pack Activation
- Sit tall on mat, legs extended. Loop band around feet, holding ends at hip bones.
- Inhale to prep: Roll spine into C-curve, tucking pelvis under.
- Exhale: Slowly peel up vertebra by vertebra, keeping band tension even.
- Key visual: Imagine curling around a beach ball. Stop when band pulls shoulders forward.
- Pro tip: Place hands under sit bones to prevent leaning back.
Standing Leg Press for Glute Sculpting
- Anchor band at ankle height on door. Stand sideways, band around outer ankle.
- Shift weight to anchored foot, knee slightly bent.
- Exhale: Extend free leg back to 45 degrees (never lock knee).
- Inhale: Control leg forward—resist band’s pull.
- Stop if: You feel hip hiking (lift pelvis sideways). Reset by pressing standing foot into floor.
Banded Pilates Hundred for Core Endurance
- Lie on back, knees bent. Loop band around lower thighs, just above knees.
- Lift head/shoulders, arms long by sides. Pump arms up/down 6 inches.
- Inhale 5 pumps, exhale 5 pumps for 100 total.
- Critical cue: Squeeze band outward with thighs while drawing navel to spine.
- Time saver: Do 50 pumps if new—build endurance gradually.
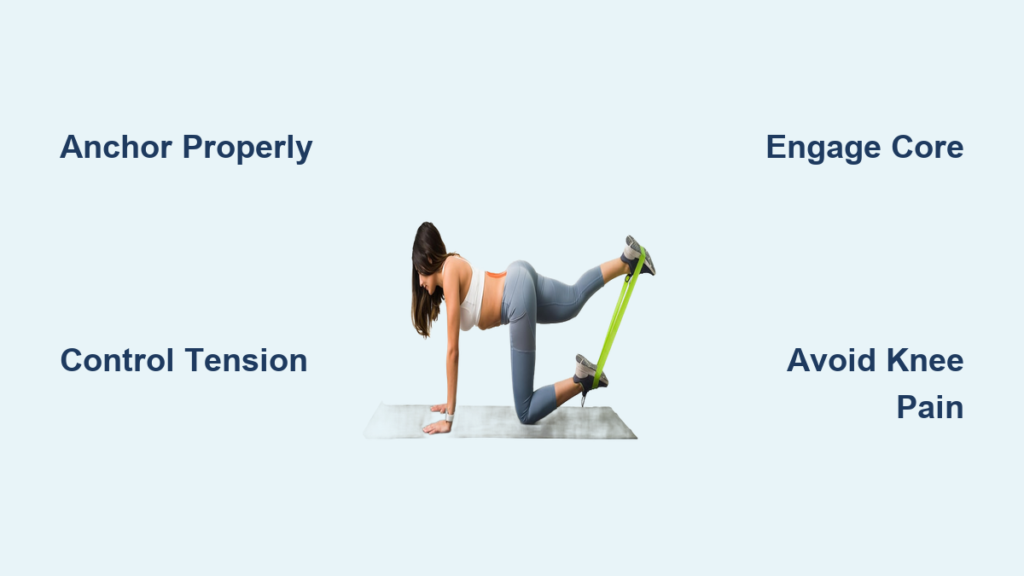
Avoiding the #1 Band Mistake That Causes Knee Pain

Never anchor bands above knees for leg work. This creates unnatural torque on the joint. For clamshells or side lifts, place bands below knees—this engages glute medius correctly without straining ligaments. Test proper placement: Lie on side, knees bent 90 degrees. Lift top knee while keeping ankles touching. If you feel burn on outer hip (not knee), the band is positioned right. If pain shoots into knee, lower band toward calves. Always keep micro-bend in standing leg during exercises—locking joints risks band snap recoil.
Creating Your First 15-Minute Band Routine
This sequence builds control without equipment. Do 3 rounds:
| Exercise | Reps | Band Focus |
|---|---|---|
| Standing Leg Press | 10/side | Glutes/hamstrings |
| Seated Band Roll-Up | 12 | Deep abs |
| Banded Hundred | 50 pumps | Core endurance |
| Standing Arm Circles | 10 forward/back | Shoulder stability |
| Seated Spine Twist | 8/side | Obliques |
Rest 30 seconds between exercises. If bands slip during twists, wrap ends around wrists. Never jerk bands—slow negatives build strength.
When to Replace Your Pilates Resistance Bands
Bands degrade faster than you think. Retire immediately if:
– You see tiny white “stress marks” (like spiderwebs) on the surface
– Band stretches 3x longer after 5 uses (test by anchoring and measuring)
– It smells sour (sweat breaks down latex)
Store bands away from sunlight and heat—never in gym bags with sweaty clothes. Clean monthly with damp cloth (no oils). High-quality bands last 3-6 months with regular use.
Transforming Weakness into Strength: Real Results Timeline
- Week 1-2: Notice better posture during daily tasks (less slouching at desk)
- Week 3-4: Feel deeper muscle engagement in traditional Pilates moves (like teaser)
- Week 5+: Perform advanced exercises (like banded swan dives) with control
Stop struggling with confusing tutorials. These band techniques—rooted in classical Pilates methodology—turn resistance bands from frustrating props into precision tools. Your powerhouse activation starts today: Grab that band, anchor it correctly, and feel the difference in your very first roll-up. Remember, mastery comes from mindful tension, not force. For your next session, try adding just one band exercise to your routine—consistency beats complexity every time.
Final tip: Record yourself doing banded leg presses. If your standing knee wobbles, reduce resistance. True strength shows in stillness.


