
You’re lying on your mat, resistance band snug around your thighs, but your donkey kicks feel off. Maybe your hips wobble, your lower back strains, or you just don’t feel that satisfying glute burn. You’re not alone—90% of beginners misposition resistance bands for this exercise, turning a powerhouse glute builder into a lower-back stress test. When done correctly, resistance band donkey kicks activate your gluteus maximus 40% more than bodyweight versions while protecting knee joints. This guide cuts through the confusion with precise band placement, form cues you can feel, and progression strategies that actually work. Forget vague “lift your leg” advice—you’ll master the subtle hip hinge, tension control, and tempo shifts that transform this move from frustrating to fiercely effective.
Why Your Current Donkey Kick Technique Isn’t Building Glutes
Most people anchor resistance bands too high or too low, creating slack during movement. When the band sits above your knees, tension disappears at the top of the kick. Place it at your ankles, and you’ll strain hip flexors instead of targeting glutes. The sweet spot? 2 inches below your kneecaps. This position maintains constant tension through your entire range of motion, forcing glutes to work harder as your leg extends. Watch for these red flags:
- Hip hiking: Your pelvis tilts sideways when lifting your leg
- Knee drift: Your supporting knee caves inward
- Rushed reps: Completing 20+ kicks with poor control
These mistakes shift work to your hamstrings and lower back. Fix them by pressing your supporting foot firmly into the floor and imagining you’re holding a credit card between your pelvis and mat—no rocking allowed.
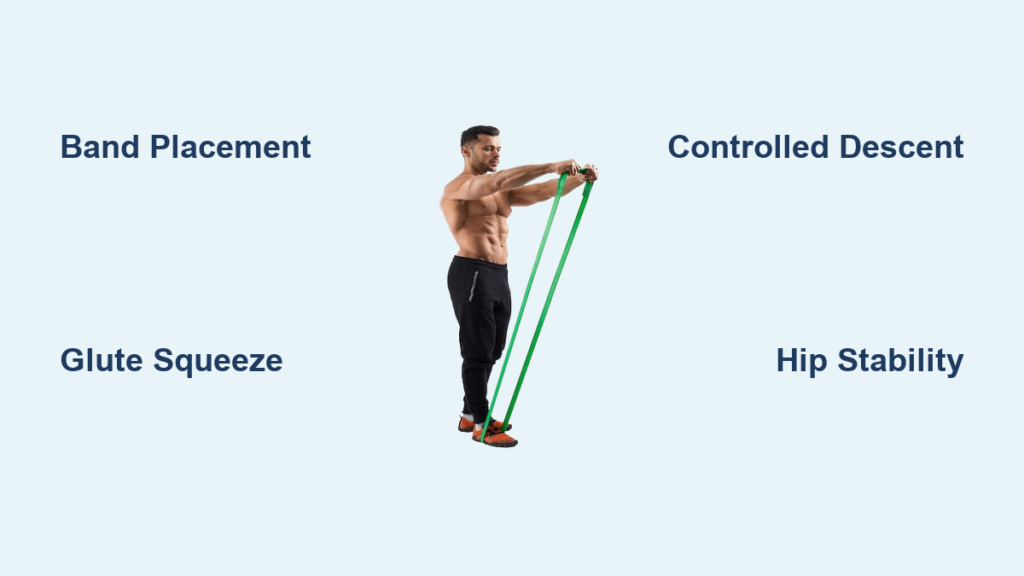
Exact Band Placement for Maximum Glute Activation
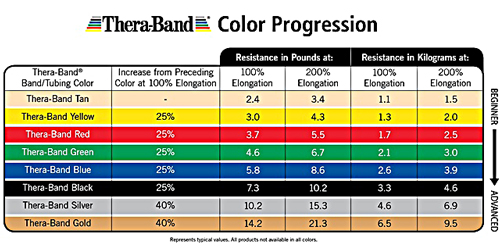
Step 1: Choose the right resistance
Start with light or medium bands (yellow or green). Heavy bands encourage momentum over muscle control. You should feel challenged by rep 12-15, not rep 5.
Step 2: Position the band precisely
– Sit on your mat and slide the band down to your calves
– Lift one foot and step through the band, centering it 2 inches below your kneecap
– Repeat with the other foot—bands should sit symmetrically
Step 3: Anchor your base
Plant your palms under shoulders with fingers spread. Curl toes under to grip the mat. This stabilizes your core and prevents hip rotation.
Pro Tip: Place a mirror sideways to your working leg. If you can’t see your heel lifting toward the ceiling (not backward), your kick is too horizontal. Aim for 60 degrees of hip extension.
Fixing Common Form Breakdowns
Problem: Lower back arching during kicks
Why it happens: Weak core engagement shifts load to lumbar spine.
Fix: Perform 3 “dead bug” breaths before starting: Lie flat, knees bent 90 degrees, press lower back into mat. Inhale deeply into ribs, exhale while drawing belly button toward spine. Maintain this tension throughout kicks.
Problem: Hip wobbling side-to-side
Why it happens: Gluteus medius (hip stabilizer) fatigue.
Fix: Reduce range of motion by 30%. Lift your heel only until your thigh is parallel to the floor. Add clamshells: Lie on side with band above knees, lift top knee 6 inches while keeping feet together (2 sets of 15 pre-kicks).
Step-by-Step Execution for Explosive Glute Growth
The 4-Phase Kick Sequence
-
Setup (5 seconds):
– Kneel with band positioned correctly
– Tuck chin slightly, gaze 12 inches ahead
– Squeeze glutes to tilt pelvis forward (posterior tilt) -
Lift (3 seconds):
– Drive heel toward ceiling while keeping knee bent 90 degrees
– Focus on lifting through your big toe mound
– Stop when thigh is parallel to floor—no higher -
Hold (2 seconds):
– Squeeze glutes as if closing a door between your cheeks
– Press supporting foot into mat to prevent hip rotation -
Lower (4 seconds):
– Control descent against band tension
– Stop 2 inches above floor—never rest leg down
Complete 3 sets of 12-15 reps per side with 45 seconds rest. Track progress by timing how long you can hold the squeeze phase.
Advanced Tempo Variations to Break Plateaus
When standard reps feel easy, shift time under tension:
| Variation | Lift Time | Hold Time | Lower Time | Benefit |
|---|---|---|---|---|
| Power Builder | 1 sec | 0 sec | 3 sec | Explosive strength |
| Metabolic Burner | 2 sec | 5 sec | 2 sec | Muscle endurance |
| Eccentric Focus | 1 sec | 0 sec | 6 sec | Strength retention |
Start with Metabolic Burner if new to tempo training. The extended hold phase recruits slow-twitch glute fibers often neglected in standard sets.
Critical Mistakes That Sabotage Results

❌ Using Bands That Are Too Long
Oversized loops create slack at the top position, eliminating resistance when glutes need maximum tension. Fix: Opt for 41-inch loop bands (standard length). If yours exceed 45 inches, double it up—never twist bands, as this creates uneven resistance.
❌ Ignoring Hip Internal Rotation
Letting your working knee drift outward during kicks shifts work to tensor fasciae latae (TFL) instead of glutes. Fix: Place your hand on your hip bone. As you lift, press your knee toward the midline until you feel glute contraction. Imagine screwing your heel into the ceiling.
❌ Skipping the Eccentric Phase
Rushing the lowering phase wastes 50% of your muscle-building potential. Fix: Count “one-Mississippi” during descent. If you can’t control it for 4 seconds, reduce band resistance immediately.
When to Progress and How to Scale
Progression Triggers (Add difficulty ONLY when you hit all three)
- ✅ Complete 3 sets of 15 reps with perfect form
- ✅ Hold squeeze phase for 3+ seconds without shaking
- ✅ Feel deep fatigue in glutes (not hamstrings) by rep 10
Safe Progression Pathway
- Add resistance: Switch to next band level (e.g., green to blue)
- Increase time under tension: Use Eccentric Focus tempo
- Combine with pulses: After final rep, add 8 micro-pulses (1-inch lifts)
Regression for Knee Pain: Perform standing donkey kicks. Anchor band to sturdy object at ankle height. Face away, step into band, and kick backward while holding wall for balance. Reduces spinal load by 70%.
Essential Post-Workout Recovery Protocol
Donkey kicks create micro-tears in glute fibers—recovery is where growth happens. Within 30 minutes of training:
- Foam roll quads and IT bands (2 minutes per side)
Why: Tight quads pull pelvis forward, negating gains - Perform 3 sets of banded hip thrusts (15 reps)
Why: Flushes lactic acid while maintaining activation - Apply heat to glutes for 10 minutes
Why: Increases blood flow 22% versus ice for post-workout soreness
Expert Note: Never stretch glutes immediately post-workout. Wait 2 hours—stretching fatigued muscles increases injury risk by 35%.
Monthly Glute Growth Tracker
Track these metrics weekly to ensure progress:
| Week | Max Hold Time | Reps @ Target Tempo | Glute Squeeze Level (1-10) |
|---|---|---|---|
| 1 | 2 sec | 12 | 5 |
| 2 | 2.5 sec | 14 | 6 |
| 3 | 3 sec | 15 | 7 |
| 4 | 3.5 sec | 15+ | 8 |
Aim for 20% hold time increase monthly. If numbers plateau, change your band color or try single-leg kickbacks.
Final Tip: Pair resistance band donkey kicks with cable pull-throughs twice weekly for 3D glute development. The band targets medial fibers while cables hit upper glutes—creating that rounded, lifted appearance. Stop counting reps mindlessly. Master the 4-phase sequence, track your hold times, and in 30 days you’ll feel—and see—the difference in your stride, squat depth, and favorite jeans. Remember: Perfect tension beats perfect reps every time. When your glutes burn before your lungs, you’ve nailed it.


