
Weak hamstrings sabotage your running speed, compromise lifting power, and increase injury risk—but you don’t need a gym to fix them. Resistance bands deliver constant tension through the entire movement range, activating more muscle fibers than traditional weights while protecting your knees. This portable solution transforms hotel rooms, park benches, or living rooms into effective hamstring training zones. You’ll discover exactly how to anchor bands properly, avoid the #1 form mistake that causes back strain, and build resilient hamstrings in just 15 minutes daily. Forget confusing tutorials—this guide cuts through the noise with step-by-step instructions verified by physical therapists.
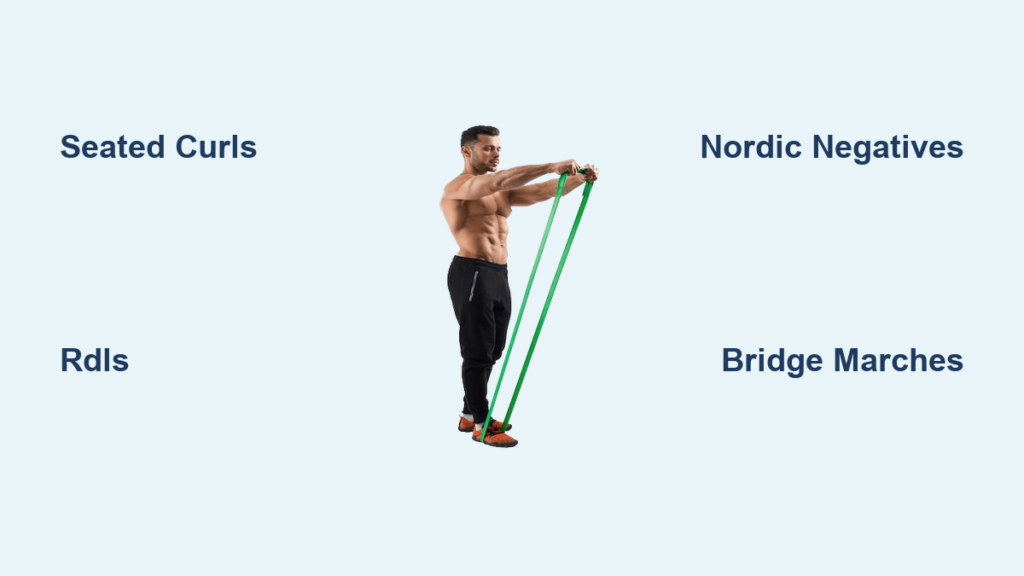
Choosing Your Resistance Band for Hamstring Training
Selecting the Perfect Band Strength and Type
Hamstring exercises require moderate to heavy resistance—light bands won’t provide enough challenge. Start with a medium (blue) or heavy (black) loop band (15-30 lbs resistance) for standing exercises, and a heavy tube band with handles (30-50 lbs) for seated movements. Loop bands should sit snugly above your knees without pinching; tube bands need secure anchor points. Avoid cheap latex bands that snap—opt for fabric-wrapped options that maintain tension throughout the movement. Test your band by performing a seated curl: if you complete 15+ reps without muscle burn, step up to the next resistance level immediately.
Critical Anchor Point Setup for Maximum Tension
Your anchor height determines muscle engagement. For standing exercises, secure loop bands under both feet or anchor tube bands at ankle height (use a door anchor 2 inches off the floor). For seated movements, attach tube bands to a sturdy object at knee height. Never anchor above waist level—that shifts focus to glutes. Verify stability by tugging hard before starting; a wobbling anchor ruins tension and risks injury. Pro tip: Wrap tube band anchors in a towel to prevent door scratches while maintaining grip.
Master Hamstring Activation Before Lifting
The 90-Degree Hip Hinge Test (Avoid Back Strain)
Most people unknowingly engage their lower back instead of hamstrings during deadlifts. Fix this with the wall hip hinge drill: Stand 6 inches from a wall, feet shoulder-width. Push hips straight back until fingertips touch the wall while keeping spine neutral. If you bend at the waist or lose balance, your hamstrings aren’t firing properly. Perform 10 reps daily before band work. When using resistance bands, maintain this hinge position—your torso should form a 45-degree angle to the floor during Romanian deadlifts, not 90 degrees.
Band-Assisted Glute Squeeze Activation
Weak glute activation overloads hamstrings. Place a loop band just above knees and lie on your back with knees bent. Press knees outward against the band while lifting hips into a bridge. Squeeze glutes hard at the top for 3 seconds before lowering. Complete 2 sets of 15 before hamstring exercises. You should feel deep tension in the back of thighs—not lower back—during band movements. If back pain occurs, stop immediately and revisit this activation drill.
5 Resistance Band Hamstring Exercises That Deliver Results
Seated Hamstring Curls (Best for Muscle Growth)

Anchor setup: Secure tube band handles to a low anchor point. Sit on a bench facing the anchor, band under feet. Loop band behind ankles.
Execution:
1. Lean slightly forward, chest up, hands on thighs
2. Slowly bend knees to pull heels toward glutes (3 seconds)
3. Pause when calves touch hamstrings
4. Extend legs against resistance (2 seconds)
Key visual cue: Knees should stay aligned over ankles—never let them splay outward. Perform 3 sets of 12-15 reps. Stop if you feel knee pressure; reduce band tension immediately.
Standing Hamstring Curls (Functional Strength Builder)
Setup: Step on loop band center with both feet. Loop band behind one ankle. Hold wall for balance.
Execution:
1. Slightly bend support leg (not the working leg)
2. Keep torso upright—no forward lean
3. Lift heel straight up toward glutes using hamstrings (not momentum)
4. Lower slowly against band resistance
Critical mistake fix: If you sway or use hip flexors, place hand on lower back—thumb should stay stationary. Do 3 sets of 10-12 per leg.
Resistance Band Romanian Deadlifts (Strength Foundation)
Setup: Stand on loop band center, feet hip-width. Hold band ends at thighs.
Execution:
1. Soft knees, chest up, shoulders back
2. Push hips straight back while lowering hands toward shins
3. Stop when torso is parallel to floor or hamstrings tighten
4. Drive hips forward to stand, squeezing glutes
Pro tip: Place a foam roller vertically behind you—touch it with your butt at the bottom position to ensure proper hip hinge. Complete 4 sets of 8-10 reps with controlled 3-second lowers.
Nordic Curl Negatives (Advanced Tendon Strength)
Setup: Kneel on mat, loop band anchored overhead. Wrap band around lower back.
Execution:
1. Lock ankles under stable object or have partner hold feet
2. Slowly lower chest toward floor using hamstrings (5 seconds)
3. Catch yourself with hands when fatigued
4. Use hands to return to start position
Safety note: Only attempt if you can do 3 full negatives without band assistance. Start with light band tension (green band). Do 3 sets of 4-6 reps.
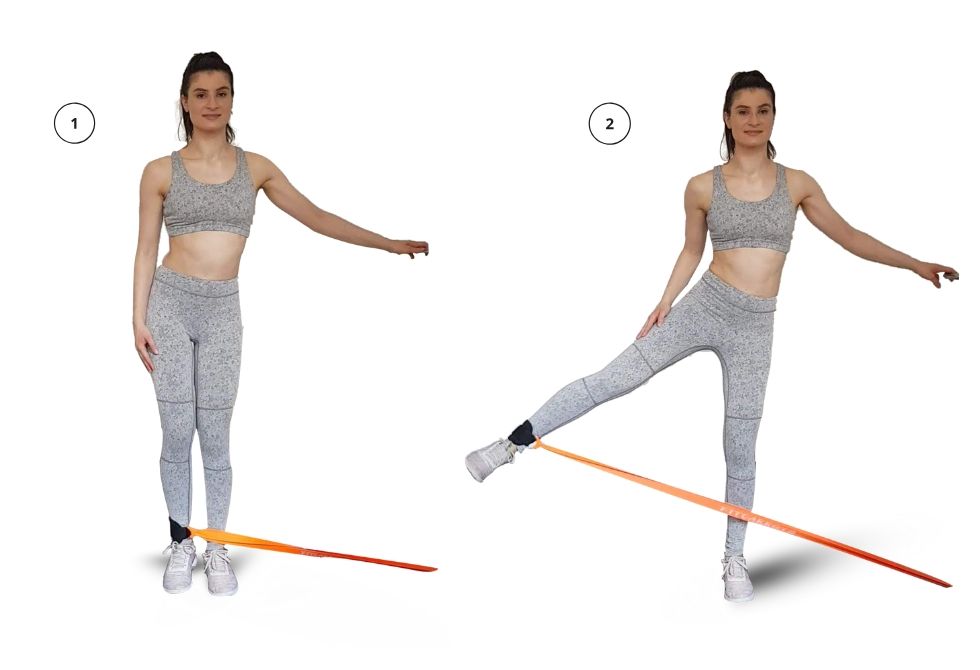
Glute-Hamstring Bridge Marches (Stability Killer)
Setup: Lie on back, loop band above knees. Feet flat, hip-width.
Execution:
1. Lift hips until body forms straight line
2. Alternate lifting one foot 2 inches off floor
3. Keep hips level—no rocking side-to-side
4. Complete 10 marches per side without lowering hips
Visual check: Place a water bottle on your pelvis—it shouldn’t tip during marches. Do 3 sets.
Critical Form Mistakes That Cause Injury
The Knee Lock Trap (Destroys Joint Health)
Straightening knees completely during curls transfers stress to ligaments. Fix: Maintain 5-10 degree knee bend at full extension. During seated curls, imagine “pulling the band apart” with your hamstrings rather than just bending knees. You should feel the burn behind thighs—not in knee joints. If pain occurs, reduce range of motion by 20%.
Hip Hike Compensation (Creates Imbalances)
Lifting the hip on the working side during standing curls shifts load to lower back. Fix: Place hands on hip bones—both thumbs must stay level during movement. Perform exercises in front of a mirror initially. If you catch yourself hiking, drop to a lighter band and master the pattern before progressing.
Building Your Hamstring Band Routine
12-Minute Home Workout Protocol
Frequency: Train hamstrings 2x weekly with 48 hours rest between sessions
Structure:
– Warm-up: 5 min dynamic stretches + activation drills (above)
– Workout:
– Seated Curls: 3×12
– RDLs: 4×8
– Bridge Marches: 3×10/side
– Cool-down: 30-second band-assisted hamstring stretch (loop band around foot, gently pull leg up)
Progression: Add 1 rep per set weekly. When hitting top rep range comfortably, increase band resistance. Never skip the cool-down stretch—tight hamstrings increase injury risk 300%.
When to Use Resistance Bands vs. Weights
Resistance bands excel for rehabilitation (providing less stress at joint endpoints) and muscle endurance (constant tension through full range). But for pure strength, switch to weights after 8 weeks. Use bands when:
– Traveling or limited on equipment
– Recovering from hamstring strain
– Needing to activate muscles pre-workout
– Training around knee pain
Red flag: If bands cause sharp knee pain, stop immediately—this indicates underlying injury requiring medical evaluation.
Final Note: Unlock Hamstring Power Anywhere
Strong hamstrings aren’t just about speed—they’re your body’s first line of defense against ACL tears and lower back pain. By mastering these resistance band techniques, you’ve gained a portable solution that builds resilient posterior chains without gym access. Remember to prioritize perfect form over resistance level, especially during the eccentric (lowering) phase where 80% of muscle growth occurs. Implement the 12-minute routine twice weekly, and within 6 weeks you’ll notice explosive power in sprints and stairs. For continued progress, pair this with glute activation work—strong hamstrings need strong glutes as partners. Now go put these band techniques to work: your fastest, most injury-proof stride starts today.


