
Struggling to complete your first pull-up or looking to add explosive power to your upper body routine? Resistance bands provide the perfect solution for pull-up progression at any fitness level. These versatile tools offer scalable assistance that adapts to your strength, making them essential for building the foundational power needed for unassisted pull-ups. Whether you’re a beginner working toward your first repetition or an advanced athlete seeking to increase training volume, resistance bands transform pull-ups from an intimidating challenge into an achievable daily exercise. This guide reveals exactly how to use resistance bands for pull-ups effectively, covering band selection, proper attachment techniques, form mastery, and progressive training strategies that deliver real results.
Select the Perfect Resistance Band for Your Pull-Up Level

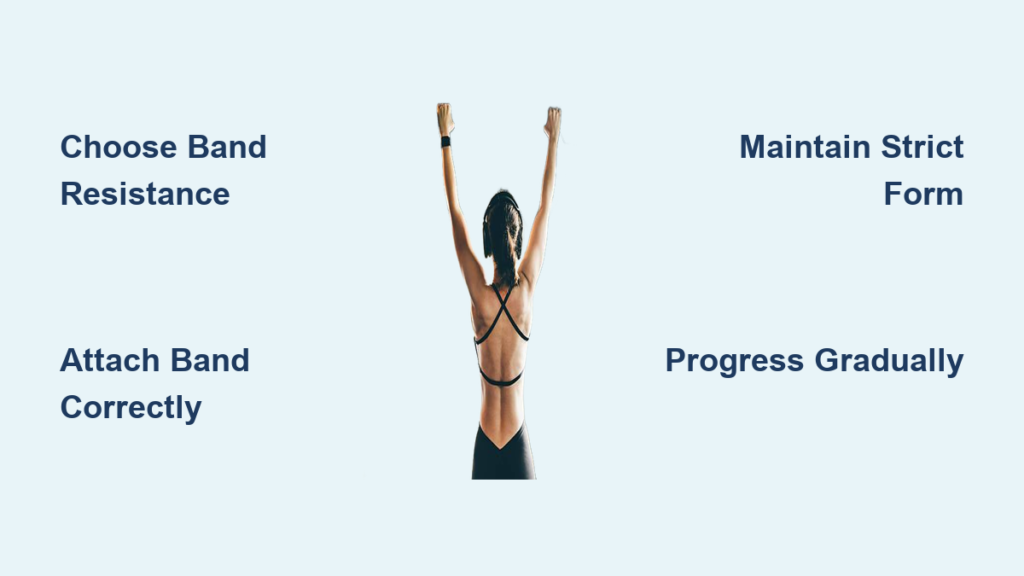
Choosing the right resistance band makes the difference between effective training and wasted effort. Bands come in color-coded resistance levels that correspond to specific assistance amounts, and selecting appropriately ensures you’re challenged without compromising form. Light resistance bands (typically yellow or green) provide 10-20 pounds of assistance and work best for those who can already complete 2-5 strict pull-ups but need help building endurance. These bands create ideal conditions for high-rep sets that strengthen the lockout position while maintaining proper technique.
Medium resistance bands (usually blue or black) deliver 20-40 pounds of assistance and represent the sweet spot for most beginners working toward their first unassisted pull-up. If you can complete 1-2 partial pull-ups with assistance, this band level provides enough support to complete full range-of-motion repetitions while still requiring significant muscular engagement. Heavy resistance bands (often red or orange) offer 40-60+ pounds of assistance and serve those newer to pull-up training who need substantial support to initiate movement. When testing bands, stretch them to approximately 2-3 times their resting length—this indicates proper tension for effective pull-up assistance without making the movement too easy.
How Band Material Affects Performance and Safety
The construction quality of your resistance band significantly impacts both training effectiveness and safety. Natural latex bands provide consistent tension throughout the stretch but may degrade faster with frequent use, while high-quality synthetic bands offer greater durability at the cost of slightly less progressive resistance. Look for bands with reinforced stitching at connection points, as these areas experience the most stress during pull-up training. Bands with integrated carabiners or heavy-duty loops attach more securely to pull-up bars and reduce the risk of sudden detachment mid-repetition. Before each use, inspect your band for micro-tears, fraying, or discoloration that indicates material fatigue—safety should always outweigh convenience when equipment failure could result in falls.
Perfect Your Band Attachment Technique for Maximum Effectiveness
The way you attach your resistance band determines how assistance is distributed throughout the pull-up movement. The most effective method involves securely looping the band over your pull-up bar and positioning yourself to maximize assistance where you need it most—typically at the bottom of the movement where leverage works against you.
Single-Foot vs. Double-Foot Attachment Methods
Single-foot attachment creates dynamic assistance that decreases as you pull yourself upward, mimicking the natural strength curve of pull-ups. Place one foot in the band loop while keeping your other foot grounded, allowing the band to provide maximum assistance at the bottom position and gradually less as you approach the top. This technique better replicates unassisted pull-up mechanics and helps build strength through the entire range of motion. Double-foot attachment provides more consistent assistance throughout the movement and works well for absolute beginners who need maximum stability. Position both feet securely in the band loop, keeping your knees slightly bent to maintain balance without excessive swinging. Regardless of method, always test the band’s attachment by gently pulling downward before committing to a full repetition—this simple check prevents dangerous mid-set failures.
Master Band-Assisted Pull-Up Form to Build Real Strength
Proper form separates effective pull-up training from counterproductive movement patterns that limit progress. The resistance band’s assistance can mask technique flaws, making deliberate attention to form even more critical than with unassisted pull-ups.
The Complete Pull-Up Movement Breakdown
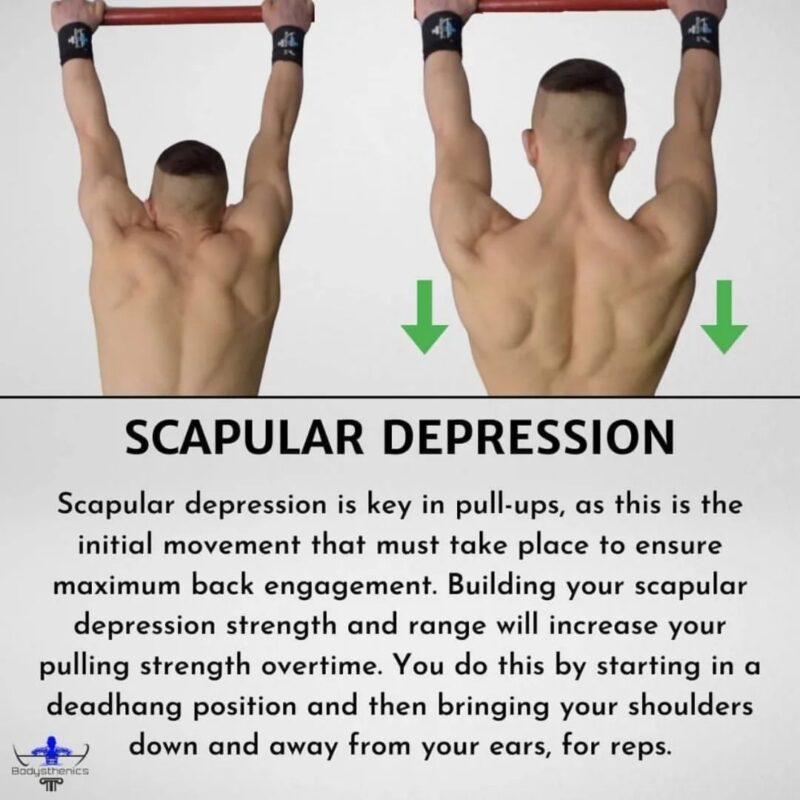
Start with a shoulder-width grip on the pull-up bar, palms facing away (overhand grip), and wrap your thumbs around the bar for security. Engage your lats by externally rotating your shoulders slightly before initiating the pull. As you begin the upward phase, focus on pulling your elbows down toward your hips rather than simply pulling your chin toward the bar—this activates the correct muscle groups and prevents bicep dominance. At the top of each repetition, ensure your chin clears the bar while keeping your shoulders depressed (not shrugged toward your ears). The descent phase is equally important: lower yourself slowly over 2-3 seconds to maximize muscle engagement and tendon strength development. Fully extend your arms at the bottom position while maintaining slight tension in your lats—completely relaxing between repetitions wastes valuable training time and reduces effectiveness.
Implement Progressive Training Strategies That Deliver Results
Random pull-up attempts won’t build consistent strength—structured progressions create the systematic adaptation your muscles need to advance to unassisted repetitions. Begin with 3 sets of 5-8 repetitions using a band that allows perfect form throughout each set. Train pull-ups 2-3 times weekly with at least one full rest day between sessions to allow for adequate recovery and strength adaptation.
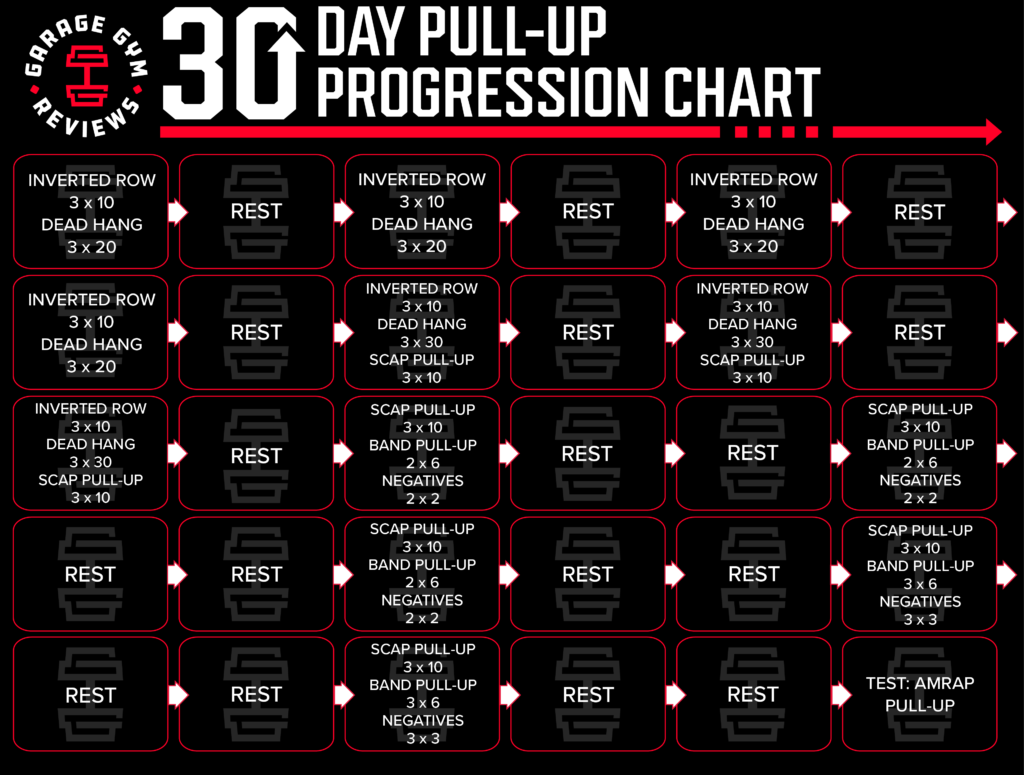
The Three-Phase Pull-Up Progression System
Weeks 1-4 focus on building movement familiarity and neuromuscular connection. Use a medium resistance band and prioritize strict form over quantity—stop sets when technique begins to deteriorate. Weeks 5-8 introduce progression by either increasing repetitions (adding one rep per set weekly) or reducing band resistance (switching to the next lighter band when you can complete 3 sets of 10 clean repetitions). Weeks 9-12 implement transition training where you perform some repetitions with the band and some without during the same set. Start with band-assisted reps, then remove the band and attempt unassisted repetitions as you fatigue—this builds confidence while challenging your strength at various points in the rep range.
Avoid These Five Critical Pull-Up Training Mistakes
Even with resistance band assistance, common errors can derail your pull-up progress and increase injury risk. Using excessive band resistance is the most prevalent mistake—when pull-ups feel too easy, you’re building momentum rather than strength. Test yourself weekly by attempting pull-ups without assistance; if you can’t complete at least one strict repetition, you’re likely using too much band support. Kipping or swinging eliminates the strength-building tension that makes pull-ups effective—focus on strict, controlled movements where your body travels in a straight vertical line. Neglecting the eccentric (lowering) phase cheats you of up to 40% of potential strength gains; count to three on every descent. Training pull-ups too frequently without adequate recovery prevents adaptation—limit intense pull-up sessions to 2-3 times weekly. Finally, improper grip width (too wide or too narrow) creates shoulder strain—maintain a grip approximately 6-8 inches wider than shoulder width for optimal biomechanics.
Essential Safety Practices for Band-Assisted Pull-Ups
Safety considerations should guide every aspect of your resistance band pull-up training. Always inspect bands for signs of wear before each session—replace any band showing fraying, micro-tears, or significant stretching that indicates material fatigue. Position a crash mat or stable platform beneath your training area to minimize injury risk in case of unexpected band failure. Before beginning each set, visualize your response to potential failure—typically this means slowly lowering yourself under control rather than releasing the bar suddenly. Warm up thoroughly with 5-10 minutes of light cardio followed by scapular activation exercises like band pull-aparts and dead hangs to prepare your shoulders and lats for the demands of pull-up training.
Sample Pull-Up Training Program for Beginners
Implement this three-day weekly program to build consistent pull-up strength:
| Day | Exercise | Sets | Reps | Rest |
|---|---|---|---|---|
| Monday | Medium Band Pull-Ups | 3 | 6-8 | 90 sec |
| Band Rows | 3 | 10-12 | 60 sec | |
| Dead Hangs | 3 | 20-30 sec | 60 sec | |
| Wednesday | Same as Monday | 3 | 6-8 | 90 sec |
| Friday | Same as Monday | 3 | 6-8 | 90 sec |
Perform each pull-up with strict form, focusing on controlled movement throughout the entire range. As you progress, gradually reduce band resistance while maintaining proper technique—this systematic approach builds the foundational strength needed for unassisted pull-ups within 8-12 weeks of consistent training.
Resistance bands transform pull-ups from an impossible challenge into an achievable daily exercise when used correctly. By selecting appropriate resistance, attaching bands properly, maintaining strict form, following structured progressions, and prioritizing safety, you’ll build the upper body strength that makes unassisted pull-ups possible. Remember that consistency matters more than intensity—showing up regularly with proper technique creates the cumulative adaptations that lead to real progress. Start implementing these strategies today, track your improvements weekly, and within months you’ll accomplish what once seemed impossible: multiple strict pull-ups with perfect form.


