
When your grandkids ask for help carrying groceries or you struggle to rise from your favorite armchair, weak muscles could be the culprit. Resistance bands offer seniors a joint-friendly solution to rebuild strength without heavy weights or expensive equipment. These elastic tools provide progressive resistance that adapts to your current fitness level while improving functional movements essential for daily independence. By learning how to use resistance bands for seniors properly, you’ll gain the confidence to tackle everyday tasks that have become increasingly difficult.
Unlike traditional weights that only challenge muscles at certain points in a movement, resistance bands create tension throughout your entire range of motion. This continuous resistance builds functional strength specifically tailored to real-world activities like lifting objects, climbing stairs, or maintaining balance. The best part? You can start with minimal equipment in the comfort of your home, making consistent strength training accessible regardless of mobility limitations or health concerns.
Selecting Your First Senior-Friendly Resistance Band
Choosing the right resistance band prevents frustration and ensures safe progression. Flat bands and therapy bands work best for beginners due to their simplicity and versatility—no complicated setup required. Look for bands specifically labeled for senior fitness or physical therapy, as these often include helpful exercise guides tailored to older adults’ needs.
Color-coded resistance levels vary slightly between manufacturers but generally follow this pattern:
– Yellow: Extra light (2-5 pounds resistance)
– Green: Light (5-8 pounds)
– Red: Medium (8-12 pounds)
– Blue: Heavy (12-15+ pounds)
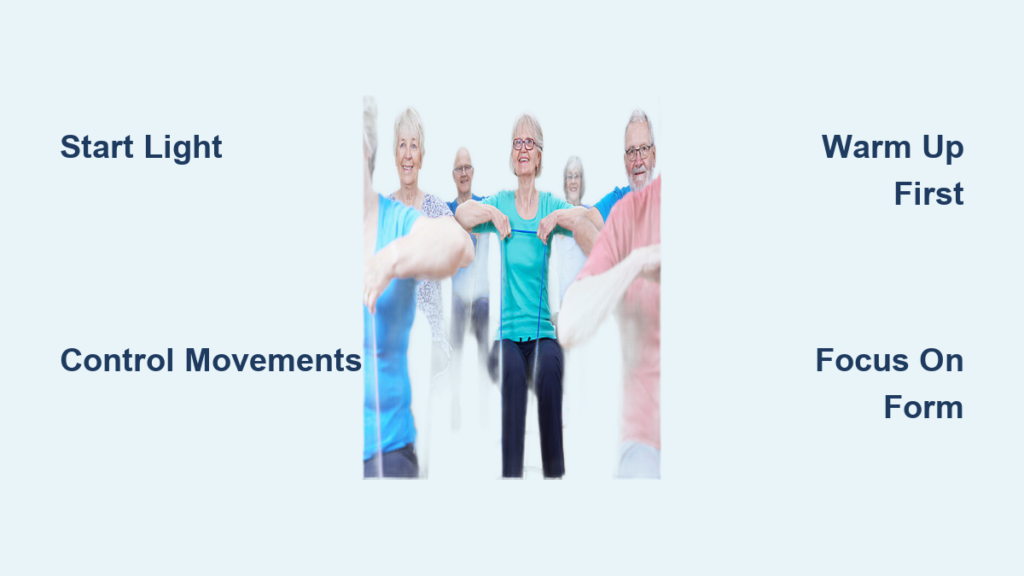
Start with yellow or green bands even if they feel too easy initially. Proper form matters more than resistance level when beginning. As strength improves over 4-6 weeks, gradually progress to the next resistance level. Always inspect bands for cracks or thinning before use, replacing them every 3-6 months with regular use to maintain safety.
Critical Safety Steps Before Your First Band Workout
Skipping safety checks turns a beneficial exercise into a potential hazard. Before each session, verify your band shows no signs of damage by holding it up to light—replace immediately if you spot any nicks or uneven thickness. Never anchor bands to unstable objects like doorknobs; use door anchor kits or sturdy furniture legs designed for resistance training.
Control every movement phase to prevent injury. Letting bands snap back quickly can cause bruises or eye injuries—always release tension slowly. If you feel joint pain during exercises, stop immediately and reduce resistance. Begin with just 5-8 repetitions per exercise, gradually increasing as your body adapts to the new stimulus. Never push through sharp pain; mild muscle fatigue is normal, but joint discomfort indicates improper form or excessive resistance.
Essential Band Warm-Up Exercises for Seniors
Cold muscles increase injury risk during resistance training. Start each session with 5 minutes of gentle joint rotations: circle your arms forward and backward while marching in place, then perform slow ankle circles while seated. These simple movements increase blood flow to your major joints without straining your body.
Next, incorporate band-assisted stretches to prepare muscles for resistance work. Hold a light band with hands wider than shoulder width and gently raise arms overhead, feeling a mild stretch across your chest and shoulders. Hold for 15 seconds, repeating 2-3 times with smooth, controlled movements. Finish with light band pulls: anchor a band at chest height and pull both ends toward your waist, squeezing shoulder blades together for 10-15 repetitions. This activates postural muscles weakened by prolonged sitting.
Must-Do Upper Body Exercises with Resistance Bands
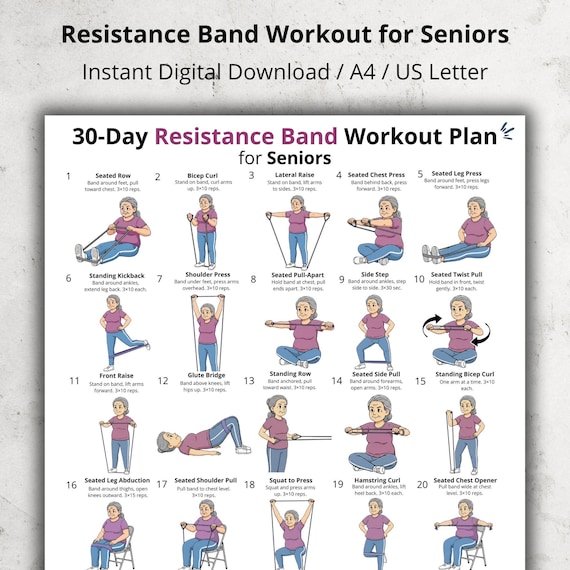
Band-Assisted Chair Press builds strength for pushing movements like opening doors. Sit upright in a sturdy chair, loop a band behind your upper back, and hold both ends at chest height with elbows bent outward. Press hands forward until arms nearly extend, then slowly return. Complete 8-12 repetitions for 1-2 sets, focusing on smooth motion without leaning forward.
Seated Band Rows counteract rounded shoulders from daily screen use. Loop the band around your feet while sitting tall, holding both ends with palms facing inward. Pull hands toward your waist while squeezing shoulder blades together, then extend arms forward slowly. Perform 10-15 controlled repetitions to strengthen back muscles essential for good posture.
Standing Bicep Curls restore arm strength for carrying groceries or lifting grandchildren. Stand on the band center with feet hip-width apart, holding both ends with palms facing forward. Curl hands toward shoulders while keeping elbows still, then lower slowly against resistance. Complete 8-10 repetitions, ensuring you control the band’s pull during the lowering phase.
Lower Body Strength Builders for Senior Mobility

Supported Band Squats improve leg strength for rising from chairs and climbing stairs. Stand on the band with feet shoulder-width apart, holding both ends at shoulder height. Lower as if sitting in a chair while holding onto a countertop for balance, keeping knees tracking over toes. Rise slowly, squeezing glutes at the top. Perform 6-10 repetitions to build functional leg strength safely.
Band-Assisted Deadlifts strengthen the posterior chain that supports spinal health. Stand on the band center, holding both ends with a slight knee bend. Hinge at hips (not waist), lowering your torso toward the floor while keeping your back straight. Return to standing by driving hips forward. Complete 8-10 controlled repetitions to build safe lifting mechanics.
Seated Leg Extensions target quadriceps without knee strain. Sit in a chair with the band looped around one ankle and anchored under your opposite foot. Straighten the banded leg against resistance, hold briefly, then lower slowly. Complete 8-10 repetitions per leg to rebuild strength for stair climbing and standing from chairs.
Balance and Core Stability Band Exercises
Standing Band Pallof Press builds anti-rotation strength to prevent back injuries. Anchor a band at chest height, grasp one end with both hands, and step back until tension develops. Press hands forward while resisting the band’s pull to rotate your torso. Hold for 5-10 seconds, completing 6-8 repetitions per side to strengthen deep core muscles.
Seated Band Twists maintain rotational mobility for daily activities like looking behind while driving. Sit with legs extended, band looped behind your back and held in both hands. Rotate torso to one side while following with your eyes, then return to center before twisting the opposite direction. Perform 6-8 controlled twists per side without rounding your lower back.
Single-Leg Balance with Band Pull combines stability training with upper body work. Stand near a counter for support, holding the band with both hands extended forward. Lift one foot slightly while pulling the band apart, engaging your core to maintain balance. Hold for 10-15 seconds per leg to improve real-world stability.
Creating Your First 15-Minute Band Workout
Start with this beginner-friendly routine performed 2-3 times weekly with rest days between sessions:
- Band-assisted chair press: 2 sets of 8-10 reps
- Seated band rows: 2 sets of 10-12 reps
- Supported band squats: 2 sets of 6-8 reps
- Seated leg extensions: 1 set of 8 reps per leg
- Standing Pallof press: 1 set of 6 holds per side
Rest 45-60 seconds between sets. As strength improves over 3-4 weeks, add repetitions before progressing to the next resistance level. Always end with 5 minutes of gentle stretching for the muscles worked.
Three Common Band Mistakes That Sabotage Senior Progress
Using excessive resistance forces poor form that strains joints—start lighter than you think you need. Many seniors mistakenly believe harder equals better, but proper technique with lighter bands delivers superior results with less injury risk.
Releasing bands too quickly during the lowering phase wastes training potential and increases injury likelihood. Control every movement phase: count to 2-3 seconds when returning to starting position to maximize muscle engagement and joint protection.
Holding your breath during exertion creates dangerous blood pressure spikes. Exhale during the effort phase (pushing, pulling, standing up) and inhale during the return phase to maintain stable blood pressure and core engagement.
Making Resistance Band Training Stick for Long-Term Success
Schedule workouts at the same time daily to build habit consistency—morning sessions before other commitments often work best for seniors. Track your progress in a simple notebook noting resistance levels, repetitions completed, and how exercises felt to recognize improvements you might otherwise miss.
Combine band training with other low-impact activities like walking or water aerobics for comprehensive fitness. While bands build strength effectively, cardiovascular exercise and flexibility work provide complementary benefits that resistance alone cannot deliver.
Consult a physical therapist specializing in senior fitness if you have specific health concerns or movement limitations. They can assess your individual needs and modify exercises to address your unique challenges while maximizing safety and effectiveness.
Resistance bands provide seniors with an accessible path to reclaiming strength and independence. By starting with appropriate resistance, prioritizing proper form, and building consistent habits, you’ll notice meaningful improvements in daily function within weeks. The modest investment in bands and time yields invaluable returns in confidence, capability, and quality of life—making everyday activities easier and more enjoyable as you age gracefully.


