
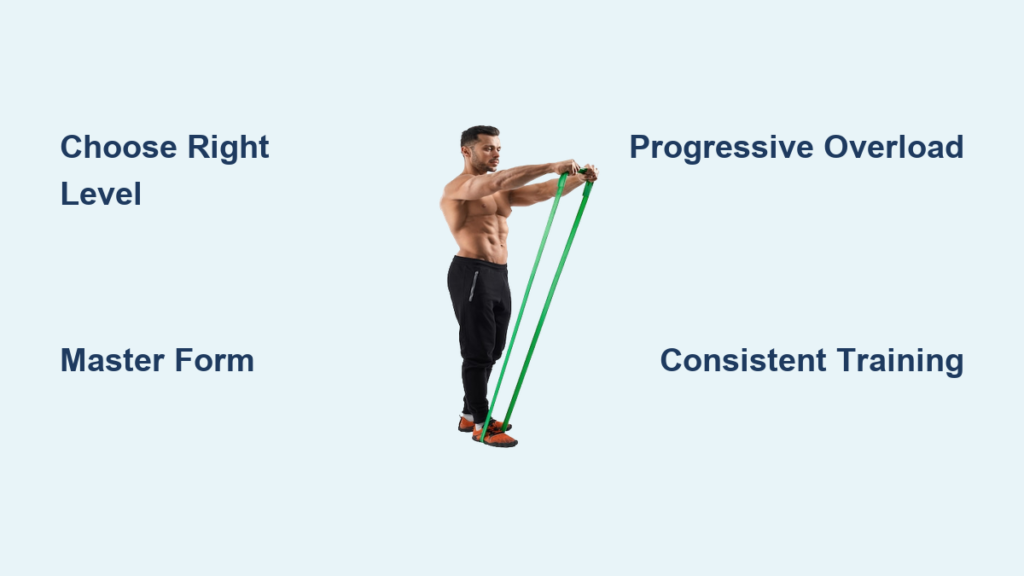
If your arms feel less firm than you’d like and you’re tired of doing endless bicep curls with the same dumbbells, resistance bands might be your solution. This affordable, portable fitness tool delivers impressive arm toning results through variable resistance that challenges muscles throughout each movement. Unlike traditional weights, resistance bands create tension at every point in the exercise, forcing your biceps, triceps, and shoulders to work harder as you move through the full range of motion. Many users see visible improvements in arm definition within just 4-6 weeks of consistent resistance band training. In this guide, you’ll discover exactly how to use resistance bands to tone arms effectively with proper form, the right resistance levels, and a targeted workout plan that delivers real results.
Choosing the Right Resistance Band for Arm Toning
Selecting Appropriate Resistance Levels
Start with lighter resistance bands (10-15 lbs of tension) when learning arm exercises to ensure proper form before progressing. As your muscles adapt, move to medium resistance (20-30 lbs) for continued challenge. The ideal resistance level allows you to complete 12-15 repetitions with the last 2-3 reps feeling challenging but still maintaining good form. Using bands that are too heavy leads to improper technique and potential shoulder strain, while bands that are too light won’t provide enough stimulus for muscle toning.
Band Types and Their Arm Toning Benefits
Loop bands work exceptionally well for arm exercises as they stay securely in place during movements. Tube bands with handles provide comfortable grip options for traditional curling motions. Figure-8 bands offer dual resistance points perfect for compound arm movements. For targeted arm toning, 12-15 inch loop bands or 48-inch tube bands with multiple resistance levels give you the versatility needed for a complete arm workout.
Essential Arm Toning Exercises with Resistance Bands
Bicep Curls That Actually Build Definition
Stand with feet shoulder-width apart, stepping on the center of the resistance band with both feet. Hold the ends of the band with palms facing forward, keeping elbows tucked at your sides. Slowly curl your hands toward your shoulders while maintaining constant tension on the band, then control the movement as you lower back down. Complete 3 sets of 12-15 repetitions, focusing on squeezing your biceps at the top of each curl. Pro tip: Slightly leaning forward engages more muscle fibers for better definition.
Overhead Tricep Extensions for Back-of-Arm Tightening
Secure the resistance band under both feet, holding one end with both hands behind your neck. Keep your upper arms stationary as you extend your elbows straight up toward the ceiling, feeling the contraction in the back of your arms. Slowly return to the starting position without letting the band lose tension. Perform 3 sets of 12 repetitions, ensuring your elbows point forward throughout the movement. Warning: Avoid flaring elbows out to the sides, which reduces tricep engagement.
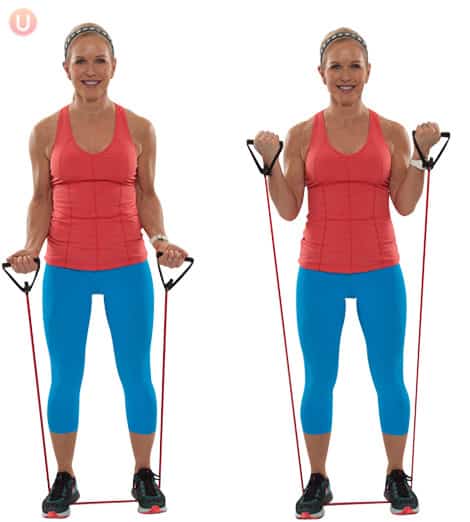
Resistance Band Hammer Curls for Arm Sculpting
Stand on the center of the band with feet hip-width apart, holding the ends with palms facing your body (neutral grip). Curl the band upward while keeping your elbows stable at your sides, maintaining the neutral grip throughout. Lower with control to complete one repetition. This variation targets the brachialis muscle, creating that coveted “peak” in your biceps. Complete 3 sets of 10-12 reps for optimal arm sculpting.
Creating an Effective Arm Toning Routine

Building Your Weekly Resistance Band Arm Workout
Dedicate two non-consecutive days per week specifically for arm toning with resistance bands. On each arm day, perform 3-4 different exercises targeting all arm muscle groups. Allow at least 48 hours between arm workouts for proper muscle recovery. A sample weekly schedule might include Monday for biceps-focused work and Thursday for triceps and shoulder emphasis. Each session should last 15-20 minutes of focused arm work following proper warm-up procedures.
Progressive Overload Techniques for Continued Results
Track your resistance band workouts by recording which band color/level you use and how many repetitions you complete with good form. Every 2-3 weeks, increase the resistance level or add 1-2 repetitions per set to continue challenging your muscles. When you can comfortably complete 15 repetitions with perfect form, it’s time to step up to the next resistance level. Expert note: Small, consistent progressions prevent plateaus and keep your arms continually improving.
Proper Form Techniques to Maximize Arm Toning
Avoiding Common Resistance Band Mistakes
Many people anchor resistance bands incorrectly, causing the band to slip during exercises. Ensure your foot placement creates stable tension without the band sliding. Another frequent error is using momentum instead of muscle control—avoid swinging your body during curls. Keep your core engaged and movements deliberate. Critical warning: Never release a stretched resistance band, as it can snap back and cause injury.
Breathing Patterns for Optimal Muscle Engagement
Inhale during the easier phase of the movement (lowering the band) and exhale forcefully during the muscle contraction (lifting phase). Proper breathing increases oxygen flow to working muscles and helps maintain core stability. Holding your breath during resistance band exercises elevates blood pressure unnecessarily and reduces your ability to perform quality repetitions.
Preventing Injury While Toning Arms with Bands

Safe Resistance Band Handling Practices
Always inspect your resistance band for nicks, tears, or weak spots before each use. Hold bands securely but avoid gripping too tightly, which can cause wrist strain. When performing overhead movements, ensure you have at least 3 feet of clearance above you. Safety must: Never stretch resistance bands beyond 2.5 times their resting length, as this dramatically increases the risk of snapping.
Recognizing Warning Signs of Overexertion
Sharp pain, joint discomfort, or tingling sensations mean you should stop the exercise immediately. Mild muscle fatigue is normal, but persistent pain indicates potential injury. If you experience elbow or shoulder pain during resistance band exercises, reduce the resistance level and check your form before continuing. Allow adequate rest days between arm workouts to prevent overuse injuries.
Maximizing Results with Complementary Strategies
Nutrition Support for Visible Arm Definition
Resistance band arm workouts build muscle, but visible definition requires proper nutrition. Consume adequate protein (0.8-1 gram per pound of body weight) to support muscle recovery. Stay hydrated, as even mild dehydration reduces muscle performance. Remember that reducing body fat percentage through proper nutrition makes toned arms more visible, regardless of muscle development.
Tracking Progress Beyond the Mirror
Take weekly progress photos in consistent lighting and clothing to objectively track arm changes. Measure your upper arm circumference monthly with a tape measure. Note improvements in your ability to use higher resistance levels or complete more repetitions with the same band. These concrete metrics keep you motivated when visual changes seem slow to appear.
When to Expect Visible Arm Toning Results
Most users notice improved muscle firmness within 2-3 weeks of consistent resistance band training. Visible definition typically appears between 4-8 weeks when combining proper resistance band workouts with appropriate nutrition. Significant arm transformation usually takes 12-16 weeks of dedicated effort. Realistic expectation: Genetics influence where your body loses fat first, so arm definition may appear later than other areas for some individuals.
Final Note: Consistent resistance band arm workouts deliver impressive toning results without bulky equipment. By selecting the right resistance level, performing exercises with proper form, and progressively increasing difficulty, you’ll develop stronger, more defined arms in just weeks. Remember that visible arm definition requires both muscle development and appropriate body fat levels, so combine your resistance band routine with balanced nutrition for best results. Start with lighter resistance to master form, track your progress, and enjoy watching your arms transform with this accessible, effective training method.


