
Ever found yourself struggling to break through a strength plateau despite consistent gym sessions? Rogue resistance bands might be the missing element in your training regimen. These durable, versatile tools provide variable resistance that challenges muscles throughout the entire range of motion, making them invaluable for home and gym workouts alike. Whether you’re building foundational strength as a beginner or enhancing explosive power as an advanced athlete, learning how to use Rogue resistance bands properly transforms your training effectiveness. This guide delivers precise, actionable techniques that turn simple rubber bands into serious strength-building equipment—no generic advice, just proven methods that deliver real results.
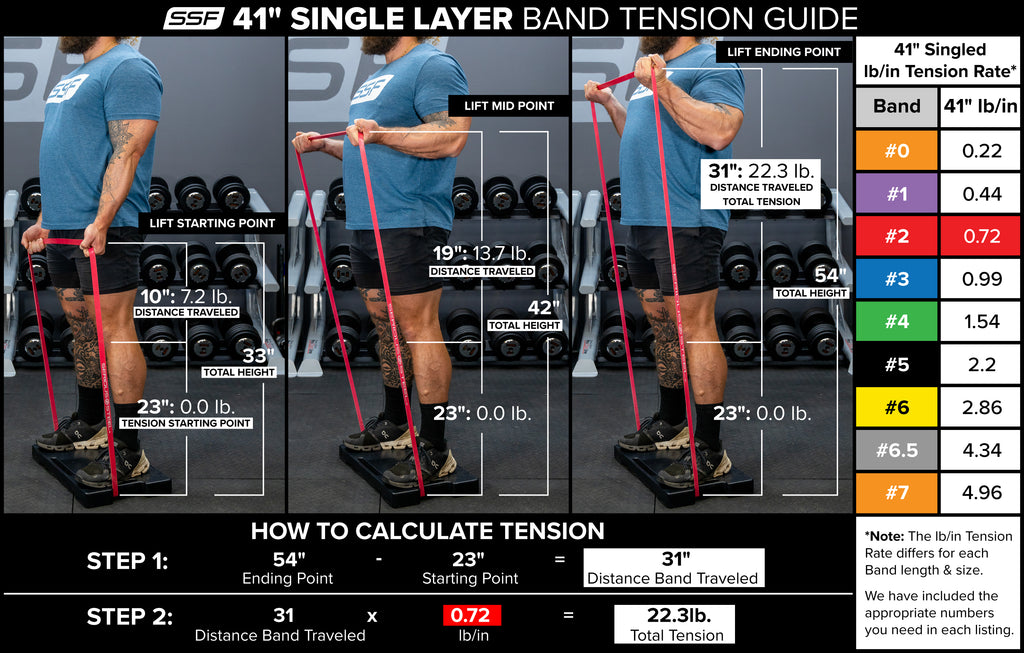
Rogue resistance bands stand apart from flimsy alternatives with their multi-layer latex construction that withstands intense training without snapping or losing elasticity. Their color-coded resistance system clearly identifies tension levels from 5-150+ pounds, allowing you to precisely match band strength to your current fitness level and specific exercises. Unlike cheaper bands that degrade after a few uses, Rogue’s quality ensures consistent resistance session after session, letting you accurately track progress. This guide cuts through the confusion surrounding resistance band training by providing specific anchoring techniques, exercise protocols, and progression strategies that maximize your investment in these powerful training tools.
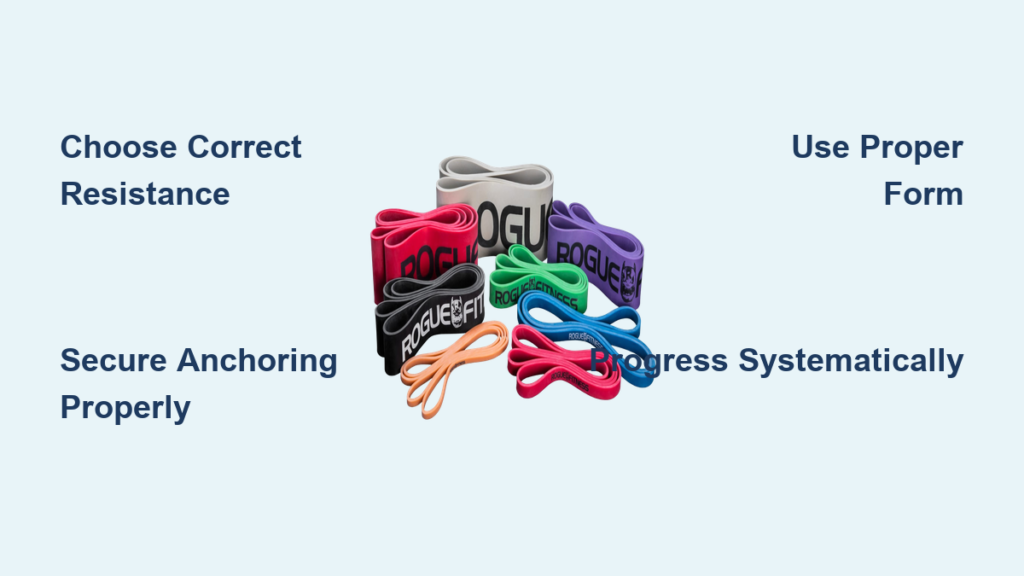
Select Your Optimal Rogue Band Resistance Level
Choosing the correct resistance band determines whether your training builds strength or merely creates frustration. Rogue’s color-coded system eliminates guesswork: yellow and green bands (5-35 lbs) work best for shoulder rehabilitation and warm-up activation; red and blue bands (40-95 lbs) challenge intermediate lifters during compound movements; black and silver bands (100-150+ lbs) provide extreme tension for advanced strength development. Never select bands based solely on color—always test resistance by stretching the band to your exercise’s full range of motion to ensure appropriate challenge at the hardest point of each movement.
Critical selection mistakes to avoid:
– Using bands that are too heavy for proper form
– Selecting only one resistance level for all exercises
– Ignoring how resistance increases dramatically at full extension
– Not accounting for body position relative to anchor point
For optimal results, own at least three resistance levels to accommodate different exercises and training phases. During a single workout, you might use a light yellow band for shoulder activation before pressing movements, switch to a medium blue band for chest presses, and finish with a heavy black band for explosive squat variations. This strategic resistance selection ensures each muscle group receives appropriate tension throughout its entire movement pattern.
Secure Your Bands With Professional-Grade Anchoring Techniques

Improper anchoring causes most resistance band injuries and training failures. Rogue’s door anchor system provides the safest home solution when installed correctly—close the door completely, insert the anchor through the top gap, and test by applying gradual pressure before attaching bands. Never anchor bands to doorknobs, as these can break under tension and send handles flying toward your face. For power rack training, use Rogue’s band pegs that screw directly into the rack posts at multiple heights for precise exercise positioning.
Outdoor training requires special considerations:
– Test tree or pole stability by applying body weight before attaching bands
– Wrap bands multiple times around stationary objects to prevent slippage
– Always position yourself so the band pulls away from your body
– Maintain at least 10 feet of clearance in case of accidental release
The ultimate safety rule: your anchor point must remain completely immovable when you apply maximum force. If the anchor shifts even slightly, select a different attachment point before proceeding. Proper anchoring transforms Rogue bands from unpredictable equipment into precision training tools that deliver consistent resistance exactly where you need it.
Execute Upper Body Exercises With Perfect Form
Rogue resistance bands excel for upper body training when you understand their unique resistance curve. For chest presses, anchor the band behind you at nipple height, step forward to create tension, and press handles forward while keeping wrists straight. The band provides maximum resistance at full extension—exactly where you’re strongest—making each repetition significantly more effective than traditional dumbbell presses. Key form cue: squeeze handles together at the top position to fully engage your pectoral muscles.
Back training with Rogue bands requires precise scapular control. Perform seated rows by anchoring bands at knee height, sitting tall with slight torso lean, and pulling handles toward your lower ribs while squeezing shoulder blades together. Avoid the common mistake of bending only at the elbows—true back development comes from initiating the movement with your shoulder blades. For face pulls (critical for shoulder health), anchor the band at eye level, separate hands wider than shoulders, and pull toward your forehead while externally rotating your shoulders.
Build Lower Body Power With Strategic Band Placement

Lower body training with Rogue resistance bands delivers exceptional glute and hamstring activation when positioned correctly. For banded squats, stand on the center of the band with feet shoulder-width apart, pull handles up to shoulder height, and descend while maintaining tension throughout the movement. The band’s increasing resistance as you rise forces explosive power development precisely where traditional barbell squats provide less challenge.
Most effective lower body band placements:
– Above knees for lateral walks and glute activation
– Under feet for added squat and deadlift resistance
– Around hips for resisted sprints and hip thrusts
– Anchored behind body for resisted lunges
For deadlift variations, stand on the band center with feet hip-width apart, thread the band through the barbell, and perform conventional deadlifts while the band adds tension at lockout. This accommodates your natural strength curve, making the exercise more challenging where you’re strongest. Single-leg exercises like banded RDLs dramatically improve balance while targeting hamstrings more effectively than bilateral movements.
Avoid These 3 Costly Band Training Mistakes
Most lifters unknowingly sabotage their band training progress through preventable errors. First, using bands that are too heavy forces momentum-based cheating that shifts work to secondary muscles rather than targeting the intended movement pattern. Start with lighter resistance than you think you need—when you can complete all reps with perfect form and still have 2-3 reps remaining in reserve, then increase resistance.
Second, improper band storage destroys longevity. Never leave Rogue bands in direct sunlight, extreme temperatures, or folded with sharp creases. Store them loosely coiled in a cool, dry place away from sharp objects. Always inspect bands before use for tiny nicks or separation at attachment points—damaged bands can snap without warning under tension.
Third, neglecting the eccentric (lowering) phase of each repetition wastes 40% of your potential muscle-building stimulus. Control the band’s return to starting position for 2-3 seconds minimum, maintaining tension throughout the movement. This deliberate negative work builds significantly more muscle than simply releasing tension between repetitions.
Progress Systematically With Rogue Band Training
Progressive overload with resistance bands requires different strategies than traditional weight training. Track your progress by documenting which bands you use for each exercise and how many quality reps you complete. When you can perform your target rep range with perfect form and still have 2-3 reps remaining, it’s time to progress by:
- Moving to the next resistance level
- Decreasing rest between sets
- Increasing time under tension with slower tempos
- Adding isometric holds at peak contraction
- Performing unilateral variations
Combine bands for hybrid resistance—wrap a lighter band around a heavier one to create intermediate tension levels that precisely match your strength curve. For strength development, perform 3-5 sets of 3-6 explosive reps with heavy bands. For hypertrophy, use medium bands for 3-4 sets of 8-15 controlled reps. This systematic progression ensures continuous adaptation without plateaus.
Integrate Rogue Bands Into Your Existing Routine
Rogue resistance bands work best as complementary tools within your broader training program. Add band-resisted bench press at the end of your chest day to strengthen the lockout portion where most lifters fail. Use band pull-aparts between sets of overhead pressing to maintain shoulder health. Before heavy squats, perform banded lateral walks to activate glute medius for better knee tracking.
For home workouts with limited equipment, design complete circuits that rotate through upper body pushes, upper body pulls, lower body pushes, and lower body pulls with minimal rest. A sample full-body band circuit: band chest press (10 reps), band rows (12 reps), banded squats (15 reps), and banded hip thrusts (20 reps)—repeat 3-4 times with 60 seconds rest between rounds. This approach builds strength and cardiovascular fitness simultaneously while keeping sessions under 30 minutes.
When properly implemented using these precise techniques, Rogue resistance bands become indispensable training tools that deliver measurable strength gains regardless of your experience level or equipment access. The key lies not in owning the bands, but in implementing these specific protocols that transform simple rubber loops into serious strength-building equipment.


