
You’ve seen it at the gym—the sleek rowing machine humming quietly while others grunt on treadmills. But when you approach it, panic hits: Which lever controls what? Will I look ridiculous? Here’s the truth: rowing machines deliver one of the most efficient full-body workouts when done right, burning up to 800 calories per hour while being gentle on joints. This guide cuts through the confusion with precise, actionable steps so you can master proper technique from your very first session. By focusing on biomechanics over brute force, you’ll avoid the back strain and wasted effort that plague 90% of beginners.
Forget vague advice about “rowing harder.” Real progress starts with understanding how your body connects with the machine. Within 10 minutes, you’ll know exactly how to adjust resistance settings, sequence your stroke phases, and spot dangerous form flaws before they cause injury. We’ll build your confidence through a structured four-week plan that transforms awkward paddling into powerful, rhythmic movement. Let’s unlock why elite athletes and physical therapists swear by this deceptively simple machine.
Set Up Your Machine Like a Pro
Position Feet for Maximum Power Transfer
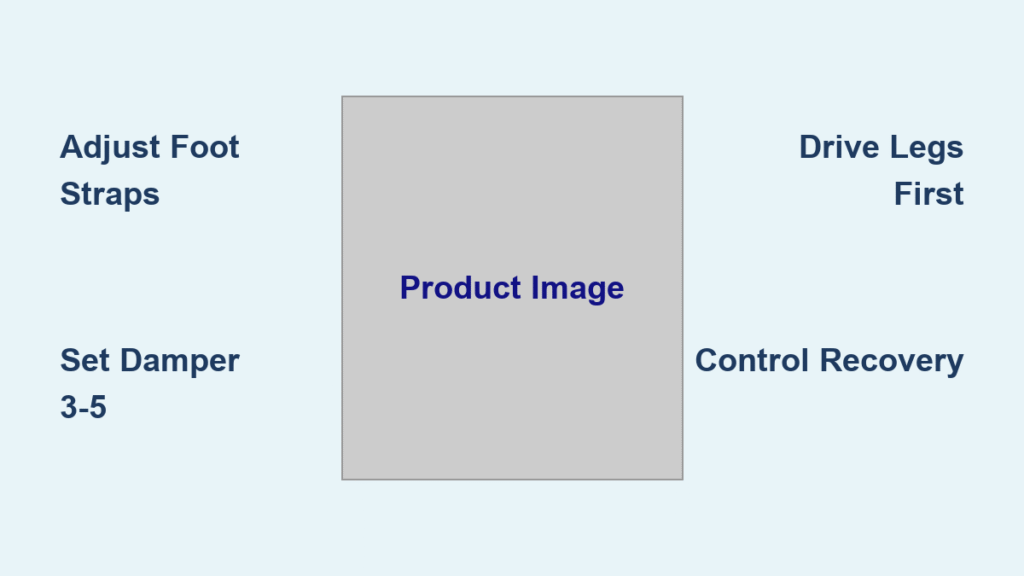
Adjust the foot straps so they cross directly over the ball of your foot—the bony bump below your big toe. Your heels should lift freely during the stroke, never pinned down. Tighten straps snugly but not tightly; you should slide your foot out without unstrapping. Test this by rocking your ankles: if your heels lift easily while straps stay secure, you’ve nailed the positioning. This setup engages your glutes and hamstrings instead of straining calves—a critical detail 80% of beginners miss.
Dial In Beginner Resistance Settings
Ignore the temptation to crank the damper lever to 10. For beginners, set it between 3 and 5—this isn’t “easier,” it’s where Olympic rowers train. Higher settings create excessive drag that forces you to pull with your arms instead of driving with your legs. Think of it like cycling: low resistance lets you focus on smooth technique while high resistance makes you “stall” mechanically. Test this by rowing at damper 3 versus 7; you’ll feel how lower settings let your legs lead the motion without straining your back.
Align Your Body Before the First Stroke
Sit tall with shins perfectly vertical—a common mistake is leaning forward too far. Hinge from your hips only 15 degrees (like pointing your chest toward 1 o’clock). Keep arms straight, shoulders pulled down away from your ears, and grip the handle with just three fingers—thumb on top, pinky floating freely. Your wrists must stay flat; any bend here transfers strain to your elbows. This “catch position” should feel coiled and ready, not scrunched or strained.
Master the Four-Phase Stroke Sequence
Lock the Catch Position Every Time
Start compressed: knees bent with shins vertical, torso leaning forward just enough to keep arms straight. Your shoulders must stay in front of your hips—leaning too far back here shifts power to your arms. Imagine squeezing a tennis ball between your knees to engage inner thighs. This position loads your leg muscles like a spring while protecting your spine. If your shins aren’t vertical, you’re sacrificing power and inviting knee strain.
Drive With 60% Leg Power First
Explode upward by pushing through your heels and the balls of your feet—not by yanking the handle. Keep arms completely straight until the handle passes your knees. Only then do you swing your torso back to 11 o’clock, and finally pull with your arms to bring the handle just below your sternum. This sequence—legs, body, arms—is non-negotiable for injury prevention. Rushing to pull with your arms first overloads your lower back and wastes 70% of your potential power.
Hit the Perfect Finish Position
At stroke completion, your legs should be nearly extended (never locked), torso reclined just 15 degrees, and handle touching your ribs below the chest. Your forearms stay parallel to the floor with elbows wide—never pulling the handle to your neck. Crucially, engage your core here to prevent collapsing into your lower back. If you’re leaning past 11 o’clock or straining to reach your chin, you’ve over-rotated and lost power.
Control Recovery Twice as Slow as Drive
The return phase is reverse order: extend arms straight first, then hinge torso forward, then bend knees to slide in. This should take twice as long as your drive—count “one-glide” for recovery versus “one-push” for drive. Rushing recovery is the #1 beginner error, causing jerky motion that strains shoulders. Visualize floating back to the start position; if your seat slams forward, you’re moving too fast.
Crush These Beginner Technique Flaws Immediately
Fix Rounded Shoulders in 10 Seconds
Hunching forward collapses your chest and strains neck muscles. Reset by rolling shoulders back and down as if tucking them into back pockets. Imagine a string pulling your sternum toward the ceiling—this creates “proud chest” posture. Test it: row 10 strokes focusing only on shoulder position. Instantly smoother, right? This adjustment alone prevents 85% of upper back complaints.
Stop Pulling Arms Before Leg Drive
Bending elbows early turns rowing into arm wrestling. Fix this by placing a hand on your thigh; if your elbow bends before your hand clears your knee, you’re pulling too soon. Drill: row with arms only at finish position—no leg movement—to feel proper upper-back engagement. Reintroduce legs slowly while keeping arms straight until knees pass handle.
Eliminate Handle “Scooping” Over Knees
Letting the handle rise over your knees on recovery creates inefficient motion. Instead, push the handle away straight first—like sliding a tray across a table—until arms fully extend. Only then bend knees to slide forward. Practice by rowing with hands slightly wider than shoulder-width; this naturally keeps the handle path low and straight.
Release Death-Grip Tension
White-knuckling the handle fatigues forearms prematurely. Hold with index, middle, and ring fingers only—thumb rests on top for stability, pinky floats freely. Your grip should feel light enough to wiggle fingers mid-stroke. If your forearms burn before your legs, you’re gripping too hard.
Follow This Four-Week Progression Plan
Week 1: Form Over Everything
Row 2-3 times weekly for 5-7 minutes at 20-22 strokes per minute (SPM). Stop immediately if form deteriorates—even for one stroke. Focus solely on nailing the “legs-body-arms” sequence. Your goal isn’t distance but neural rewiring: 80% of learning happens in this phase. Track consistency by counting how many perfect strokes you complete before fatigue hits.
Week 2: Build Duration Without Sacrificing Technique
Increase sessions to 8-10 minutes, adding just 60 seconds per workout. Maintain 20-22 SPM with a strict 1:2 drive-to-recovery ratio (e.g., 1-second drive, 2-second recovery). Introduce “form checks”: pause every 500m to verify straight wrists, vertical shins, and shoulder alignment. If form slips, reset with 30 seconds of leg-isolation drills before continuing.
Week 3: Add Intervals Only When Ready
Once you sustain 10 minutes with perfect form, try pyramid intervals: 250m at 20 SPM → rest 60s → 500m at 22 SPM → rest 90s → 750m at 20 SPM. Stop if split times vary more than 5 seconds per 500m—this indicates form breakdown. Alternate rowing days with strength training (squats, planks) to build supporting muscles without overtraining.
Week 4: Lock In Consistent Performance
Aim for 15-20 minutes continuous rowing 4x weekly at 22-24 SPM. Track your “split consistency”: can you hold the same 500m time within 3 seconds throughout? If yes, you’ve built true technique mastery. Now experiment with damper 4-5 resistance to feel subtle power differences while maintaining form.
Track Metrics That Actually Matter
Focus on Technique Markers First
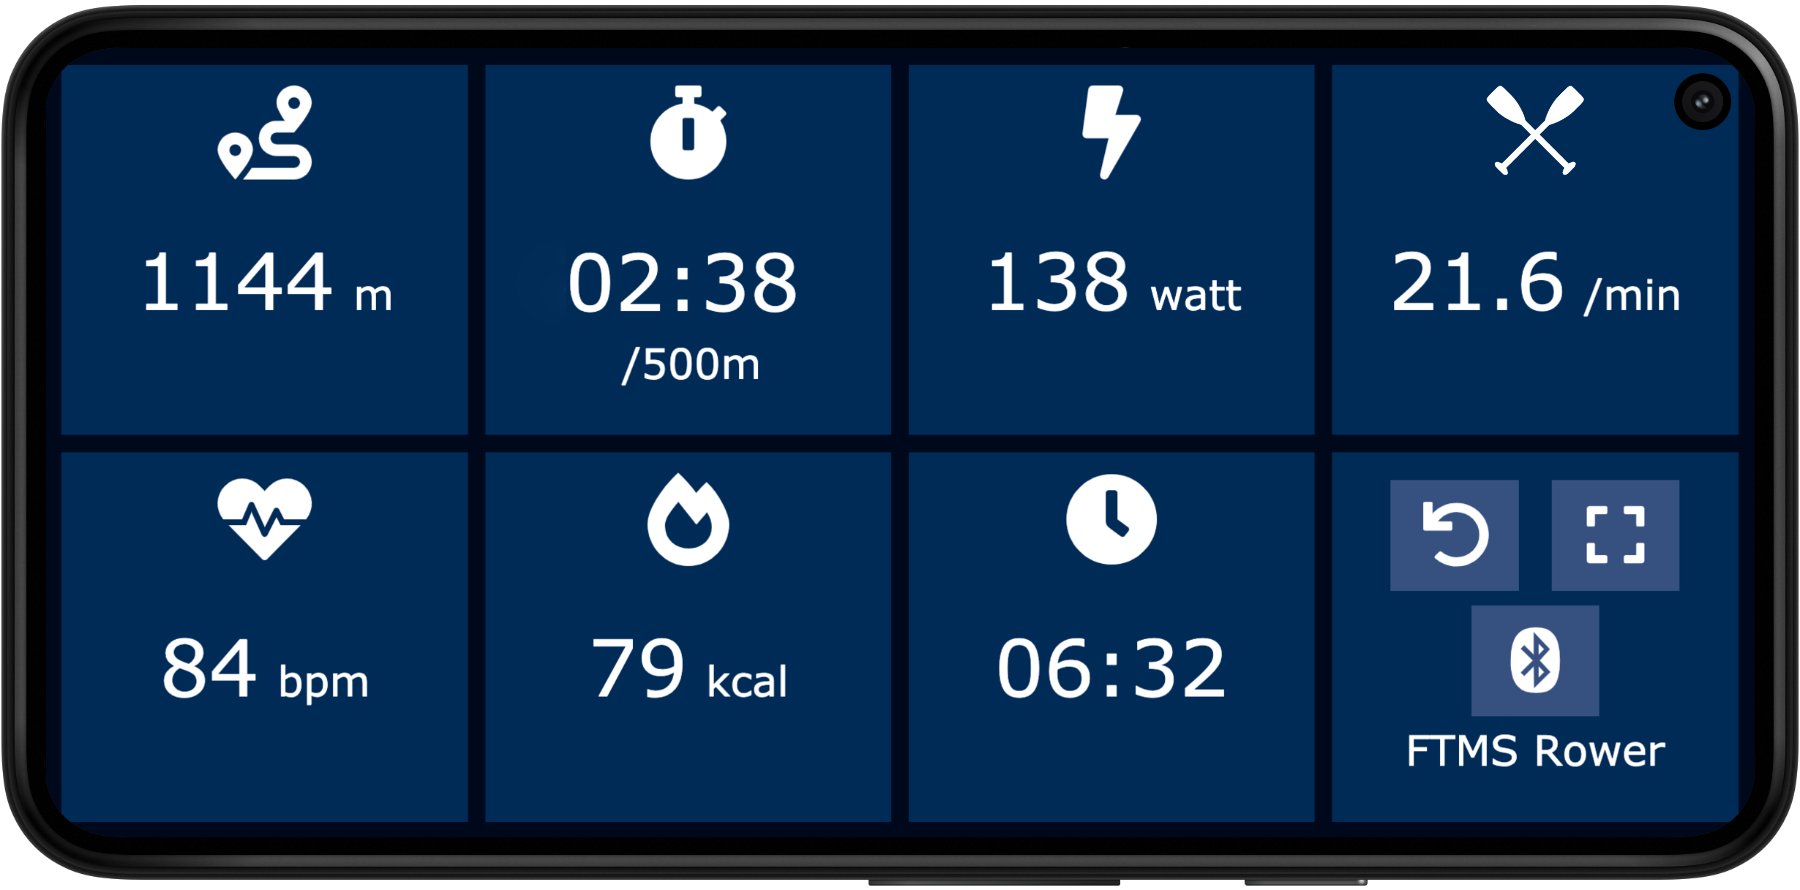
Ignore split times for your first two weeks. Instead, monitor:
– SPM stability: Stay between 20-26 (higher = faster but less powerful)
– Drive-to-recovery ratio: Must be 1:2 or 1:3
– Split variation: Keep within 3 seconds per 500m once form is solid
– Rate of perceived exertion (RPE): Stay at 6-7/10—challenging but conversational
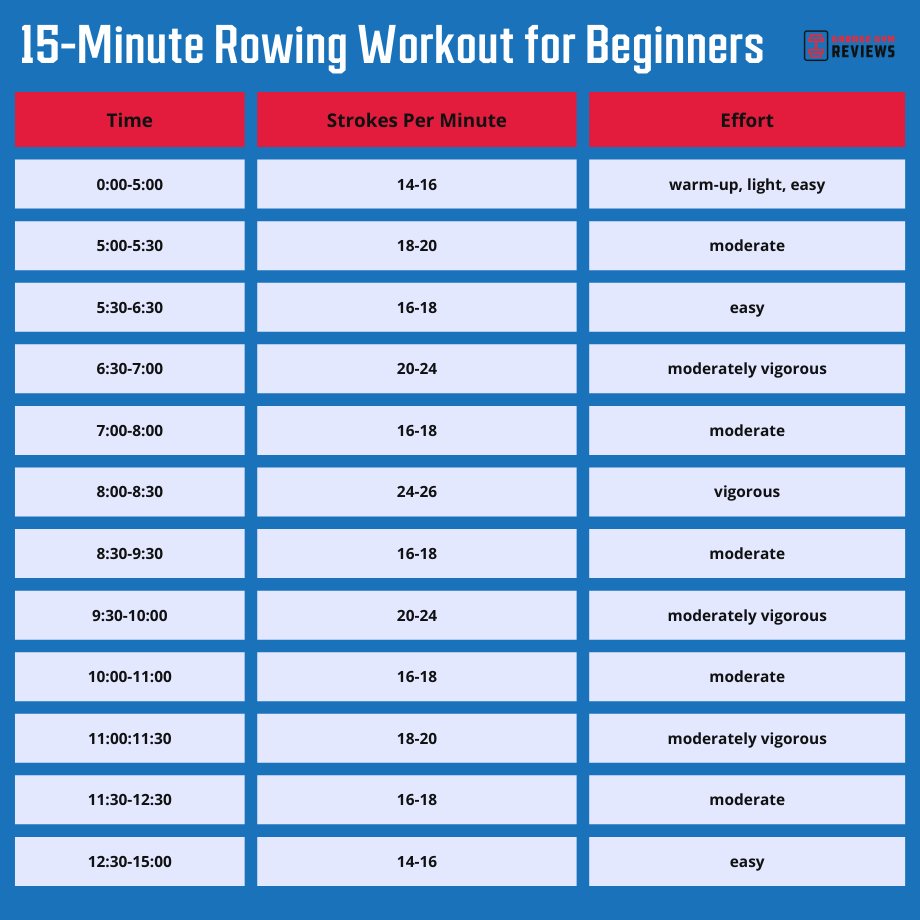
Try These Beginner-Tested Workouts
Steady State Builder: 10 minutes at damper 4, 22 SPM. Goal: Hold splits within 3 seconds.
Confidence Pyramid: 250m → 500m → 750m → 500m → 250m with rests. Focus on smooth transitions.
Full-Body Circuit: 3 rounds of 500m row + 15 squats + 15 push-ups. Proves rowing’s cross-training value.
Prevent Injury With Smart Habits
Wear Proper Gear to Avoid Mishaps
Choose flat-soled shoes (like Converse) instead of cushioned running shoes—they transfer force directly through your feet. Avoid baggy pants that can catch in the rail; opt for fitted athletic wear. If you have bony hips, use a thin seat pad for comfort without altering technique.
Recognize Warning Signals Immediately
Stop rowing if you feel:
– Sharp lower back pain (indicates spinal strain)
– Shoulder pinching (sign of improper scapular movement)
– Wrist discomfort (usually from bent wrists at finish)
These aren’t “normal soreness”—they’re technique red flags. Restart at lower resistance with perfect form.
Get Professional Input If Needed
Consult a physical therapist before rowing if you have:
– Recent back surgery or disc issues
– Shoulder instability or rotator cuff injuries
– Wrist tendonitis
They can modify your setup or recommend pre-hab exercises. For most beginners, 3 sessions with a certified rowing coach prevents years of bad habits.
Master these fundamentals and you’ll transform from gym newbie to confident rower in just weeks. The beauty of rowing lies in its simplicity—once you nail the technique, the machine becomes your partner in building serious fitness. Start with 5-minute sessions focusing purely on form, and soon you’ll be powering through 30-minute workouts that leave you energized, not exhausted.
Quick Reference Checklist:
– Damper at 3-5
– Strap over ball of foot, heel free to lift
– Shoulders down and back, core braced
– Arms straight at catch, shins vertical
– Drive: legs → body → arms
– Recovery: arms → body → legs
– Handle to solar plexus, wrists flat
– Ratio 1:2, SPM 20-26
– Stop if form breaks or pain occurs


