
Short resistance bands—compact powerhouses measuring just 6 to 12 inches—deliver targeted muscle activation that transforms strength training anywhere. Unlike traditional weights, these portable tools provide variable resistance that intensifies as you stretch, perfectly matching your muscles’ natural strength curve. Whether you’re rehabbing an injury, traveling for work, or supplementing your gym routine, short bands offer unparalleled versatility for building functional strength. Discover why fitness professionals increasingly rely on these unassuming tools that fit in your pocket but deliver maximum muscle engagement.
The magic of short resistance bands lies in their ability to maintain constant tension through your entire range of motion—something free weights can’t achieve. As you move through an exercise, the resistance increases when your muscles are strongest (at peak contraction) and decreases when they’re weakest (at full stretch). This creates optimal muscle fiber recruitment while reducing joint stress. Their portability means you can activate your glutes before a run, strengthen your rotator cuff during a work break, or add finishing intensity to your home workout—all without bulky equipment. Understanding how to properly implement these bands separates effective training from wasted effort.
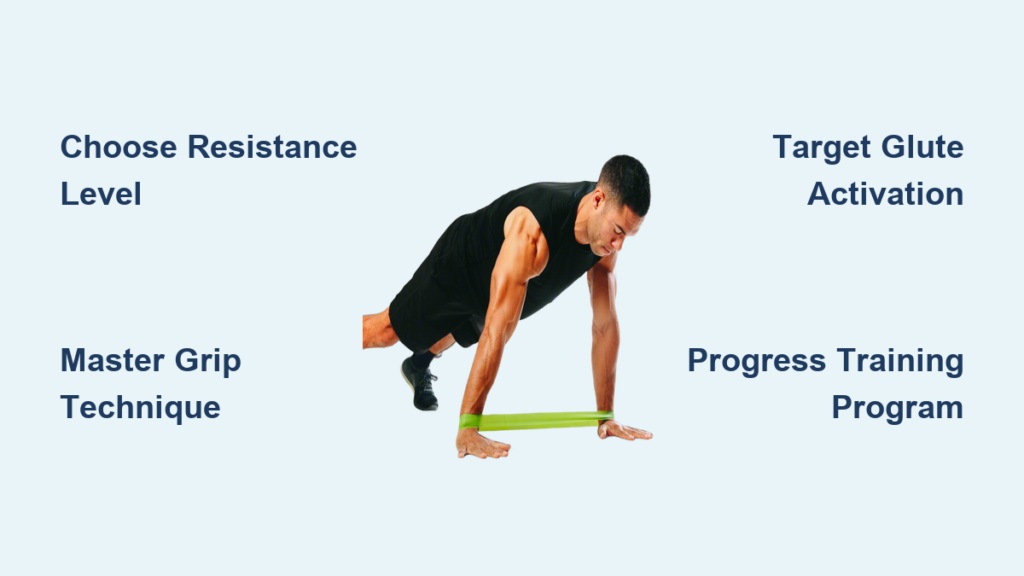
Selecting Your Perfect Resistance Level
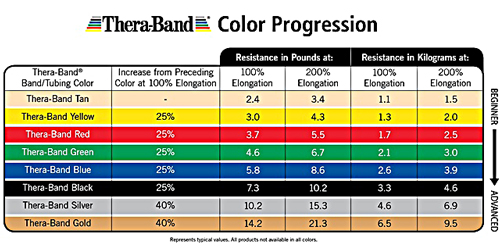
Choosing the right band resistance directly impacts your training effectiveness and injury prevention. Short bands typically come in color-coded resistance levels: light (yellow/green, 5-15 lbs), medium (blue/red, 15-30 lbs), heavy (black/orange, 30-50+ lbs), and extra heavy (purple, 50+ lbs). The critical test? Stretch your potential band to three times its resting length—the tension should challenge your target muscle without compromising form. During upper body exercises, you should complete your target repetitions with perfect technique while feeling significant muscle fatigue on the final reps.
Material composition significantly affects performance and durability. Natural latex bands offer superior elasticity and progressive resistance but degrade faster with sun exposure and may cause allergic reactions. Synthetic options like Thera-Band provide hypoallergenic alternatives with better longevity, though they may feel slightly stiffer initially. Width matters too—wider bands (0.75-1 inch) distribute pressure more comfortably across your hands and body, reducing the risk of pinching during high-tension exercises. For most users, starting with a medium resistance band provides the greatest exercise versatility across upper and lower body movements.
How to Test Band Resistance Properly
Stand with feet shoulder-width apart and step on the band’s center with one foot. Pull both ends upward while maintaining neutral spine alignment. The band should provide noticeable tension at the bottom of your movement range but allow you to complete full range of motion without straining. For isolation exercises like shoulder rotations, light resistance often suffices, while compound movements like squats typically require medium to heavy bands. Remember: proper form trumps resistance level—beginners often select bands that are too heavy, compromising technique and limiting muscle activation.
Precision Grip Techniques for Maximum Muscle Engagement
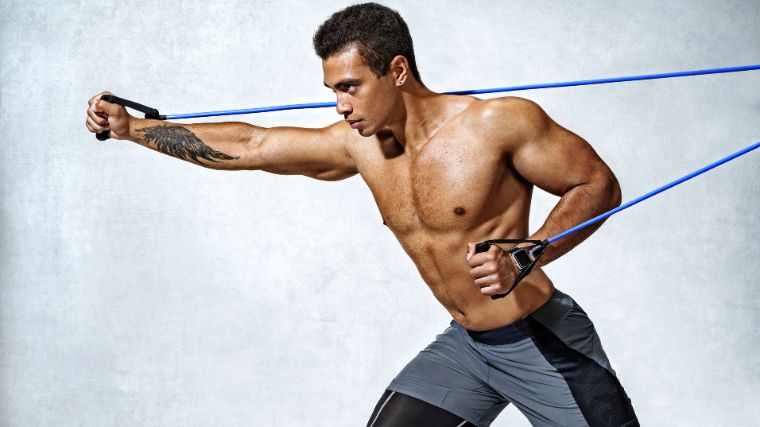
Your grip technique determines whether short resistance bands effectively target your intended muscles or create joint strain. For upper body pulling exercises like rows and pull-aparts, the overhand grip (palms facing down) creates optimal back muscle activation. Wrap the band securely around your palm with fingers beneath and thumb across the top—this prevents slippage while maintaining wrist neutrality. During high-tension movements, consciously keep your wrists straight to avoid transferring work from your back to your forearms.
The underhand grip (palms facing up) shifts emphasis toward biceps and lower chest muscles while reducing shoulder strain. This grip proves particularly valuable for beginners struggling with proper shoulder positioning during rows. For lower body exercises, grip technique transforms into band positioning strategy—wrap the band once around your hand for better control during glute bridges, or fold the band to reduce effective length and increase resistance for squats. When anchoring bands around legs, create a secure loop that maintains consistent tension without migrating during movement.
Troubleshooting Common Grip Problems
If your bands consistently slip from your hands during exercises, you’re likely gripping too high on your fingers rather than wrapping them securely around your palm. If you experience wrist pain, check for excessive bending—your wrist should form a straight line from hand to forearm throughout movement. For persistent slippage during high-sweat sessions, consider wearing thin workout gloves or using bands with textured surfaces designed for better grip security.
Essential Upper Body Exercises for Strength and Posture
Short resistance bands revolutionize upper body training by providing constant tension where traditional weights offer minimal resistance. The band pull-apart specifically targets your rear deltoids and upper back—the muscles responsible for counteracting rounded shoulders from daily computer use. Stand tall with feet hip-width apart, step on the band’s center, and hold both ends at shoulder height with arms extended. Pull the band apart while squeezing shoulder blades together, maintaining a slight elbow bend throughout. Complete 3 sets of 15 repetitions daily to dramatically improve posture and reduce neck pain.
For rotator cuff strengthening—a critical but often neglected component of shoulder health—perform external rotations with a small band loop. Create a fist-sized loop by tying a simple overhand knot, insert one hand, and keep your elbow pinned to your side at 90-degree bend. Rotate your forearm outward against resistance while maintaining perfect elbow position. This exercise prevents shoulder impingement and builds the stability needed for overhead pressing movements. Perform 20 controlled repetitions per side before any shoulder workout.
Transform Your Push-Ups with Band Resistance
Place a short band across your upper back, holding both ends securely beneath your palms in push-up position. As you lower, the band provides minimal resistance; as you push up, tension increases at the top where your muscles are strongest. This accommodates your natural strength curve, creating superior chest and triceps activation compared to standard push-ups. Complete 3 sets to failure, focusing on maintaining core tension throughout each repetition.
Lower Body Power Development with Short Bands
Short resistance bands create extraordinary lower body activation through strategic placement. For glute bridges, position the band just above your knees and lie on your back with feet flat. As you lift your hips, press knees outward against band tension—this subtle abduction movement increases glute activation by 35% compared to standard bridges. Squeeze glutes hard at the top position for two seconds before lowering. Perform 20 repetitions for three sets to build the powerful posterior chain essential for running, jumping, and daily movement.
Banded squats transform this fundamental movement by adding horizontal resistance that forces knee stability. Stand on the band with feet slightly wider than shoulder-width, holding the band at hip level. As you descend, actively push knees outward against resistance throughout the entire movement. This builds the lateral hip strength critical for athletic performance and knee injury prevention. Complete four sets of 15 repetitions, ensuring knees track in line with second and third toes throughout.
Hip Abduction for Injury Prevention
Anchor the band to a sturdy object at ankle height and attach the other end to your working leg. Stand sideways to the anchor point and lift your outer leg outward, leading with your heel. This targets the gluteus medius—the often-weak muscle responsible for hip stability during walking and running. Perform 15 controlled repetitions per side for three sets, maintaining perfect torso alignment without leaning away from the movement direction.
Program Design for Visible Results
Beginners should start with two full-body sessions weekly, allowing 48 hours between sessions for recovery. Each session needs just four exercises: band pull-aparts (back), bicep curls (arms), glute bridges (posterior chain), and banded squats (quads/glutes). Complete two sets of 15 repetitions per exercise with two minutes rest between sets. Focus on perfect form rather than resistance level during these foundational sessions.
Intermediate trainees benefit from three sessions weekly with muscle group specialization: upper body day (push/pull exercises), lower body day (squats/bridges), and full body day. Increase to three sets per exercise with 90 seconds rest between sets. Add resistance by progressing to heavier bands or incorporating tempo variations—four seconds lowering, one second pause, two seconds lifting.
Advanced athletes should use short bands as finishers after weight training or for active recovery days. Perform high-repetition “pump sets” (25-30 reps) of isolation exercises like shoulder rotations to maximize muscle growth, or use bands for explosive plyometric variations like resisted lateral jumps to develop power.
Maintenance and Safety Essentials
Inspect bands before each use for nicks, tears, or thinning areas by holding them up to light—any visible light through the band indicates structural weakness. Store bands away from direct sunlight, heat sources, and ozone-producing electronics to prevent premature degradation. Clean monthly with mild soap and water, drying thoroughly before storage in a dark drawer or dedicated storage bag.
Never anchor bands to unstable objects like door handles—use purpose-built door anchors that secure properly without risk of detachment. For skin protection during high-repetition sets, wear thin gloves or ensure band contact occurs over clothing rather than bare skin. When in doubt about band integrity, replace immediately—sudden failure during high-tension exercises can cause injury.
Short resistance bands deliver professional-grade strength training in a pocket-sized package. By selecting appropriate resistance, mastering precise techniques, and implementing structured programming, you’ll build functional strength, improve posture, and enhance athletic performance anywhere. Start with perfect form using lighter resistance, progress systematically, and let these compact powerhouses transform your training results. Your journey to stronger muscles and better movement begins with a single band—and the knowledge to use it effectively.


