
If your muscles feel tight after workouts or you’re constantly battling stiffness from daily activities, learning how to use vibrating foam roller properly could transform your recovery routine. Unlike traditional foam rollers, vibrating models combine mechanical pressure with high-frequency vibrations that penetrate deeper into muscle tissue, helping you reduce soreness faster and improve flexibility with less effort. Many users waste money on these devices simply because they don’t understand the proper technique—this guide gives you the exact steps to maximize your results from the very first session.
Vibrating foam rollers work by delivering targeted oscillations that disrupt pain signals, relax tense muscles, and increase blood flow to treated areas. When you know how to use vibrating foam roller effectively, you’ll spend less time rolling while achieving better results than with conventional methods. Whether you’re a competitive athlete or someone who just wants to move more comfortably through daily life, mastering these techniques will help you unlock the full potential of your recovery tool.
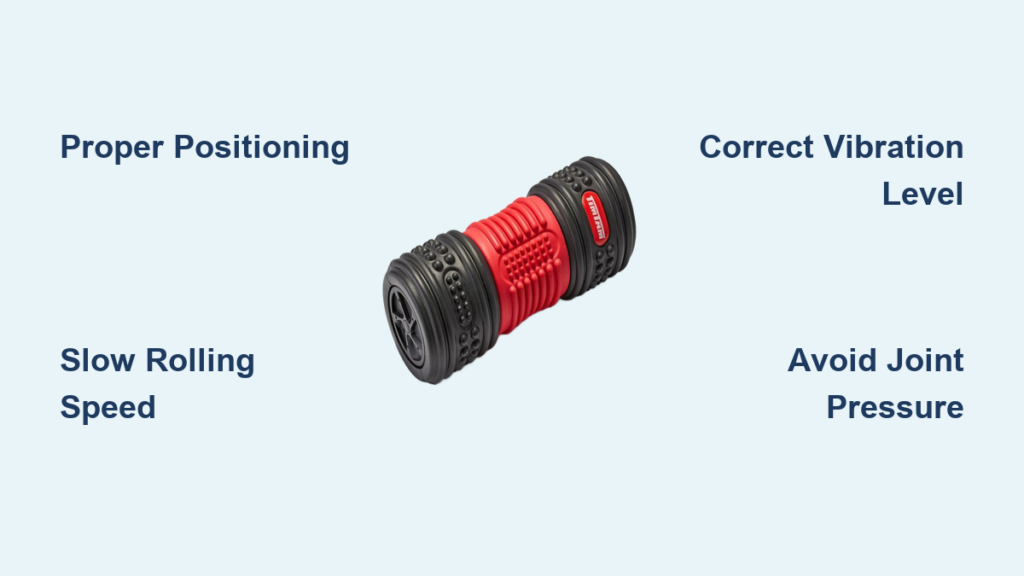
Stop Wasting Time: Why Proper Vibrating Roller Technique Matters
Most people sit on their vibrating foam roller and expect magic to happen, but without proper technique, you’re barely scratching the surface of what this tool can do. Traditional foam rolling relies solely on your body weight to apply pressure, while vibrating models add oscillations that create neurological relaxation in your muscles. This means you should use less body weight than you would with a standard roller—the vibration does much of the work for you.
The most effective sessions last 5-15 minutes per muscle group, with the roller operating at 30-50 Hz, the frequency range proven to enhance muscle recovery without causing discomfort. If you’re rolling for more than 20 minutes per area or experiencing sharp pain, you’re likely using improper technique that could actually hinder your recovery. Understanding this fundamental difference transforms your approach from random rolling to targeted, efficient recovery sessions.
How vibration technology accelerates muscle recovery
Vibrating foam rollers work through three key mechanisms that traditional rollers can’t match. First, the oscillations interrupt pain signals traveling to your brain, allowing you to tolerate deeper tissue work with less discomfort. Second, the vibrations trigger neurological relaxation in your muscles, making them more receptive to pressure without triggering protective tension. Third, increased blood flow delivers more oxygen and nutrients to fatigued muscles while flushing out metabolic waste products that cause soreness.
This trifecta of benefits means you can achieve similar results in half the time compared to conventional foam rolling. For instance, where you might need to hold pressure on a tight spot for 60 seconds with a standard roller, the vibrating version often produces results in 20-30 seconds. This efficiency makes regular rolling feasible even with a busy schedule—just 10 minutes daily can significantly improve your recovery.
Essential Setup for Effective Vibrating Roller Sessions
Your results depend heavily on proper setup before you even touch the roller. Start by choosing a hard, flat surface like hardwood, tile, or concrete—carpet absorbs vibration and reduces effectiveness. Lay down a yoga mat only if the floor is uncomfortably cold, but avoid thick padding that dampens the vibrations. Wear form-fitting athletic clothing that allows the roller to make direct contact with your muscles; loose fabrics can bunch up and create uneven pressure points.
Timing your sessions strategically enhances their impact. Use your vibrating foam roller before workouts as part of your dynamic warm-up to increase blood flow and prepare muscles for activity. Post-workout sessions work best after your cool-down when muscles are warm and more responsive to pressure. Many users also benefit from evening sessions to address daily tension, but avoid rolling too close to bedtime as the stimulation might interfere with sleep. Start with 5-10 minute sessions per muscle group, gradually increasing duration as your body adapts.
Positioning yourself for maximum muscle targeting
Proper body alignment separates effective sessions from wasted effort when learning how to use vibrating foam roller. When rolling large muscle groups like quads or back, position the roller perpendicular to muscle fibers and move slowly along their length. Support your weight with your hands or opposite leg to control pressure—remember, the vibration does much of the work, so you need less body weight than with traditional rollers.
For smaller muscles, modify your position to maintain control. When targeting calves, sit with legs extended and place the roller under your lower legs, then slowly flex and point your toes to shift pressure along the muscle. Your core should remain gently engaged throughout to stabilize your spine and prevent joint strain. Most importantly, move slowly—rolling too quickly prevents sustained pressure that allows tissues to release. Breathe deeply and steadily; holding your breath increases tension and reduces effectiveness.
Targeting Major Muscle Groups with Precision
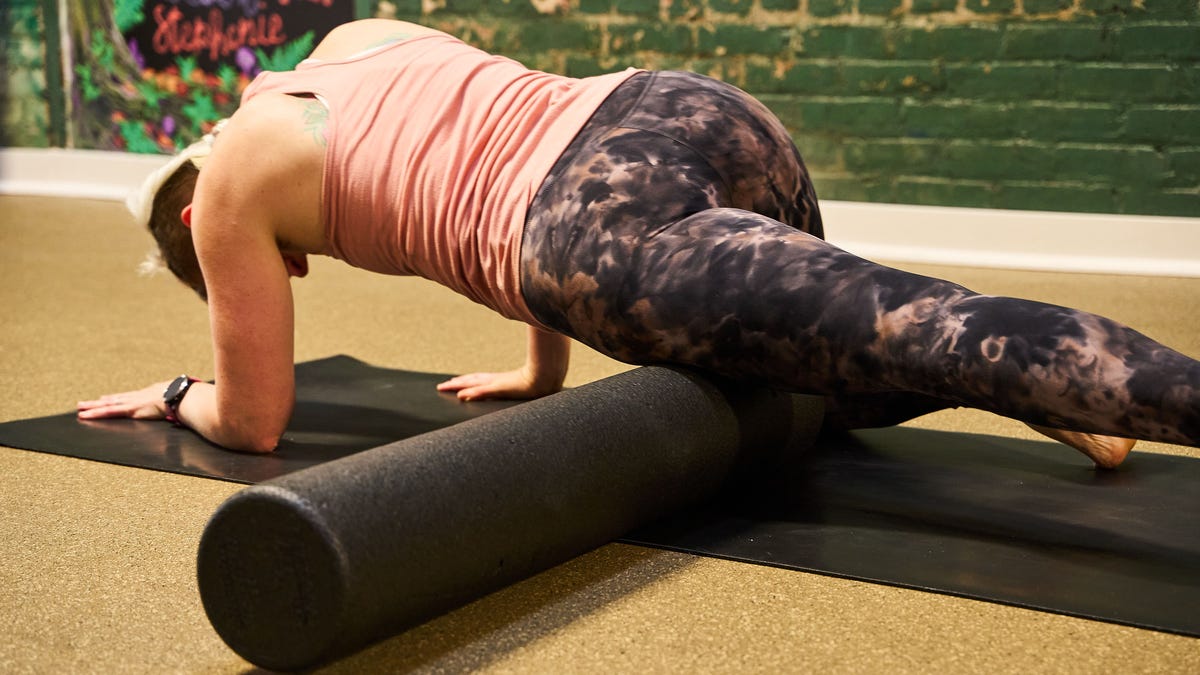
Your legs absorb the most impact during daily activities and workouts, making them prime candidates for vibrating foam roller work. For your quadriceps, lie face-down with the roller positioned beneath your thigh, using your forearms and opposite leg to lift and control your movement. Roll slowly from just above your knee toward your hip, pausing 20-30 seconds on any particularly tight spots. The vibration amplifies pressure effectiveness, so you’ll likely need less time per spot than with traditional rolling.
Lower body rolling techniques that deliver results
For hamstrings, sit on the floor with the roller beneath your thighs and hands supporting your weight behind you. Roll slowly from knees toward glutes, keeping your feet flexed to protect your knees. Glutes respond well to sitting directly on the roller and making small circular motions with your hips—this targets different portions of the muscle group. When working on calves, place the roller under your lower legs while seated, crossing one ankle over the other for concentrated pressure. For the IT band along your outer thigh, lie on your side with the roller positioned from hip to knee, supporting your upper body with your forearm.
Avoid rolling directly on joints or bones—always position the roller on muscle tissue. If you can’t feel muscle beneath you, adjust your position. Never roll immediately on areas of acute pain; start on surrounding muscles and approach painful spots gradually with lighter pressure. Consistency matters more than intensity—aim for at least three sessions weekly, even if brief, to see meaningful improvements in flexibility and recovery.
Upper Body Recovery Techniques You’re Probably Missing

Upper body rolling requires more precise positioning since these muscles are smaller and closer to joints. For your upper back, position the roller horizontally across your shoulder blades, keeping your head supported and avoiding direct pressure on the spine. Cross your arms in front of your chest to open your thoracic spine, and slowly roll from shoulder blades toward mid-back. This area often harbors significant tension from desk work and poor posture.
Shoulders and arms benefit from wall-supported techniques—place the roller against a wall and lean into it to target lats, triceps, and forearms. Your chest responds well to lying face-up with the roller positioned beneath the pectoral muscles, though use caution to avoid excessive pressure on ribs. Start with lower vibration intensities for upper body work, as thinner muscle coverage makes higher settings feel more intense. The vibration helps release tension that traditional stretching often misses, improving shoulder mobility and posture.
Choosing the Right Vibration Level for Your Needs
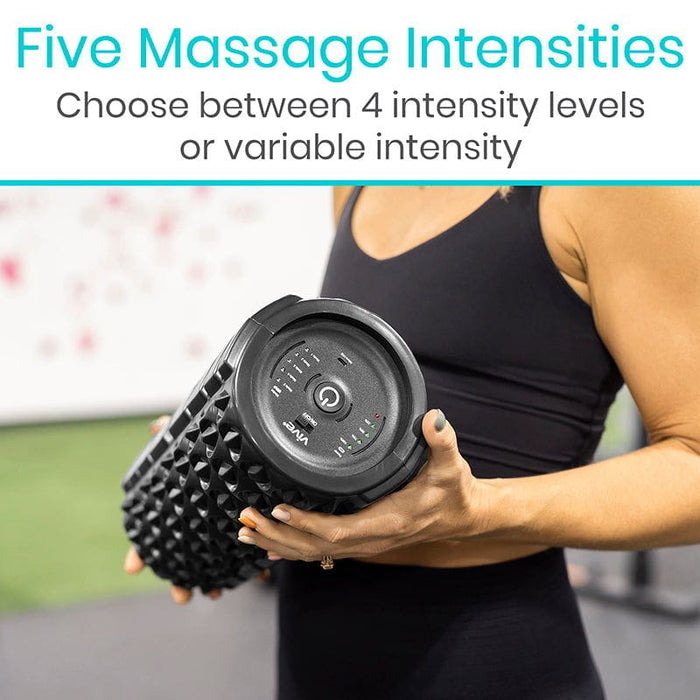
Most vibrating foam rollers offer 3-6 intensity settings, and selecting appropriately affects both comfort and results. Beginners should start at the lowest setting, which provides gentle vibration that prepares your tissues without overwhelming your nervous system. As your body adapts over several sessions, gradually increase intensity—but avoid jumping to high settings hoping for faster results, as this often causes discomfort that discourages continued use.
Higher intensities work best for dense muscle groups like quads and glutes, while lower settings suit smaller muscles, areas near bones, and relaxation-focused sessions. Some users alternate intensities during a single session, using higher settings for major muscle groups and dropping lower when approaching sensitive areas. If a setting causes sharp pain rather than productive discomfort, reduce intensity immediately—your body’s feedback matters more than following a rigid protocol.
Critical Mistakes That Undermine Your Recovery Sessions
Rolling too quickly is the most common error that sabotages results when learning how to use vibrating foam roller. Slow your movement to a pace that feels almost meditative—effective rolling requires sustained pressure that allows muscles to release. Another frequent mistake involves rolling directly on joints or bones, which causes pain without providing benefit. Always position the roller on muscle tissue, and adjust your position if you can’t feel muscle beneath you.
Many beginners also roll immediately on areas of acute pain, which can aggravate injured tissues. Instead, start sessions on surrounding muscles and approach painful spots gradually. Finally, inconsistent use limits results—occasional sessions won’t produce the cumulative benefits that regular practice delivers. Aim for at least three brief sessions weekly to see meaningful improvements in flexibility and recovery.
Maximizing Results with Proven Recovery Strategies
Combine your vibrating foam roller sessions with proper hydration to enhance tissue pliability—drink plenty of water throughout the day, especially on rolling days. Pair rolling with gentle stretching before and after sessions to amplify flexibility gains, and consider using your roller after heat therapy when muscles are warm and more responsive. Consistency trumps intensity; brief regular sessions deliver better long-term results than infrequent marathon rolling.
Track which areas feel tightest during different activities and adjust your routine accordingly—runners might prioritize legs and hips, while desk workers focus on upper back and shoulders. Over time, you’ll develop an intuitive sense of where your body needs attention and how to address it effectively. This personalized approach transforms your vibrating foam roller from a generic recovery tool into a targeted solution for your specific tension patterns.
Using your vibrating foam roller correctly transforms it from an expensive novelty into a powerful recovery ally. By mastering proper positioning, selecting appropriate vibration levels, and avoiding common mistakes, you’ll reduce muscle soreness faster, improve flexibility, and enhance overall recovery between workouts. Start conservatively, listen to your body’s feedback, and build a consistent routine that supports your fitness goals and daily comfort—your muscles will thank you after just a few sessions.


