
Your weight bench leg attachment transforms basic equipment into a powerful lower body training station, letting you target quads and hamstrings with precision. Without this versatile add-on, you’d need separate expensive machines for leg extensions and curls. Many home gym owners struggle with improper setup that leads to ineffective workouts or even injury—this happens when users skip critical alignment steps or rush through form checks. By the end of this guide, you’ll know exactly how to mount your attachment securely, position your body correctly, and execute both leg extensions and curls with perfect technique for visible muscle growth.
Mounting Your Leg Attachment on the Weight Bench

Secure mounting prevents dangerous shifts during heavy lifts. Locate the attachment slot at the end of your weight bench frame—most models feature a rectangular opening designed specifically for leg attachments. Slide the attachment’s mounting arm straight into this slot until you hear a distinct click or see the alignment pin drop into place. Never assume it’s secure based on appearance alone; give the attachment a firm tug in all directions to verify it won’t dislodge during exercise.
Verifying Proper Bench Placement
Place your weight bench on a level surface with at least three feet of clearance around all sides. Uneven flooring causes dangerous instability when performing leg movements under load. Test the bench’s stability by applying downward pressure on each corner—if it wobbles, adjust the floor surface or relocate to a more stable area. Rubber gym mats provide ideal footing while protecting your floor from accidental weight plate drops.
Checking Attachment Security Before Loading Weight
Perform this critical safety check before adding any weight: sit on the bench and move the attachment through its full range of motion with no resistance. Listen for unusual clicking or grinding sounds that indicate loose components. Examine all pivot points and connection bolts—tighten any that show play using the appropriate wrench size specified in your equipment manual. Loose hardware under load can cause sudden detachment, leading to serious injury from falling weights.
Adjusting the Roller Pad for Your Body Dimensions
Proper pad positioning determines whether you build muscle or damage joints. Sit on the bench with your back flat against the backrest and your thighs resting comfortably on the bench surface. Have a training partner adjust the roller pad so it sits directly above your ankle bones when your legs are extended. This creates optimal leverage for both extensions and curls while minimizing knee stress.
Leg Extension Pad Positioning
For leg extensions, the roller pad must contact your lower shins just above the ankle joint. If positioned too high on your shins, the pad restricts knee movement and shifts stress to your patellar tendon. Too low near your feet reduces mechanical advantage and forces you to use momentum rather than muscle control. Test the position by performing five slow extensions with minimal weight—the pad should maintain consistent contact without sliding up your legs.
Leg Curl Pad Positioning
When performing face-down leg curls, adjust the roller pad to rest directly above your heels. This placement targets your hamstrings effectively while maintaining natural hip alignment. Incorrect positioning—too close to your calves—creates awkward leverage that strains your knee joints. Lie prone on the bench and have someone verify the pad sits precisely at your heel-ankle junction before adding resistance.
Executing Perfect Leg Extensions Step-by-Step
Leg extensions build quad definition that squats alone can’t achieve. Sit firmly against the backrest with your hands gripping the bench sides for stability. Position your legs under the roller pad with knees bent at 90 degrees. Inhale deeply, then slowly extend your legs against the resistance while exhaling. Squeeze your quads hard at full extension for two seconds—this peak contraction triggers maximum muscle fiber recruitment.
Avoiding Momentum Swinging During Extensions
The most common mistake during leg extensions is using body momentum to lift heavier weights. Keep your hips firmly planted on the bench throughout each repetition—any lifting of your buttocks indicates excessive weight. If you notice your torso rising off the bench, reduce the weight by 25% and focus on strict form. Controlled movements with proper weight build more muscle than swinging heavy plates with poor technique.
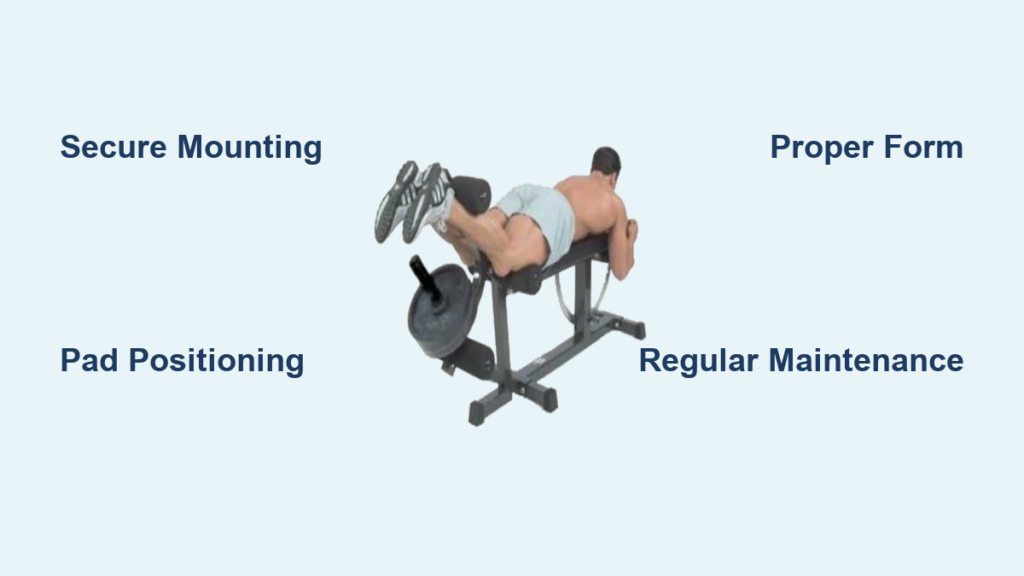
Performing Effective Leg Curls Without Straining
Face-down leg curls balance quad development with crucial hamstring strength. Lie flat on your stomach with your hips pressed firmly against the bench pad. Position your legs under the roller pad with knees straight. Grip the front handles tightly to anchor your upper body. Slowly curl your heels toward your buttocks while exhaling, stopping when your heels nearly touch your hamstrings.
Maintaining Proper Hip Alignment During Curls
Many lifters unknowingly lift their hips off the bench during leg curls, reducing hamstring engagement. Keep your pelvis pressed firmly against the bench throughout the movement—place one hand under your lower back to verify constant contact. If you lose contact, reduce the weight and focus on keeping your hip bones anchored to the bench surface. Proper hip positioning ensures your hamstrings—not your lower back—handle the workload.
Eliminating These 3 Dangerous Setup Mistakes
Using Damaged Padding Without Replacement
Worn padding exposes hard metal edges that can cause serious bruising or abrasions during leg movements. Inspect the roller pad before each workout for tears, hardening, or excessive wear. Replace damaged pads immediately—most manufacturers sell replacement padding kits that install in minutes. Never continue using attachments with compromised padding, as the risk of skin injury increases with each workout.
Skipping Weight Plate Collars
Failing to secure weight plates with collars causes catastrophic equipment failure. Always use spring collars or clamp-style weight clips on both sides of the weight stack. Test their security by gently shaking the weight stack before each set—if plates shift or rattle, tighten the collars further. Unsecured weights can slide off during movement, potentially causing serious injury from falling metal plates.
Ignoring Cable or Chain Wear
Friction cables and connecting chains degrade with use, creating dangerous failure points. Examine all cables and chains weekly for fraying, kinks, or rust spots. Pay special attention to connection points where stress concentrates. Replace worn components before they snap under load—waiting until complete failure risks sudden weight drops that could injure your legs or feet. Most equipment manufacturers provide replacement parts that install in minutes with basic tools.
Optimizing Your Leg Attachment Workout Routine
Balancing Quad and Hamstring Development
Many lifters perform twice as many leg extensions as curls, creating dangerous muscle imbalances. Match your leg extension and curl volume exactly—three sets of 12 extensions should pair with three sets of 12 curls. This balance prevents knee instability and reduces injury risk during athletic movements. Schedule leg attachment work at the beginning of your leg day when your energy levels support proper form.
Progressive Overload Without Sacrificing Form
Increase resistance only when you can complete all prescribed repetitions with perfect technique. Add no more than 5-10% weight when progressing—jumping to heavier plates too quickly compromises form and increases injury risk. If you struggle with the last two repetitions of a set, maintain that weight until you achieve all reps with control before progressing. Consistent, gradual weight increases build stronger legs than erratic jumps in resistance.
Essential Maintenance for Long-Term Reliability
Weekly Bolt Tightening Protocol
Vibration from regular use gradually loosens critical connections. Before each workout, check all visible bolts with the appropriate wrench—most attachments require 8-10mm sizes. Tighten any that show even slight play, but don’t overtighten to the point of stripping threads. Create a maintenance log to track when you last tightened each connection point, focusing extra attention on pivot joints that experience the most stress.
Monthly Lubrication Schedule
Dry pivot points create unnecessary friction that wears components prematurely. Apply silicone-based lubricant to all moving joints monthly—avoid petroleum-based oils that attract dirt. Wipe away excess lubricant to prevent sling-off during use. Pay special attention to the main pivot axle and any sliding adjustment mechanisms. Proper lubrication keeps movements smooth and extends your attachment’s lifespan by years.
Mastering your weight bench leg attachment requires attention to setup details that most lifters overlook. By securing the attachment properly, positioning pads according to your body dimensions, and executing both extensions and curls with strict form, you transform this simple add-on into a powerful muscle-building tool. Remember to balance quad and hamstring work, progress weight gradually, and maintain your equipment regularly—these practices prevent injuries while maximizing muscle growth. Start with lighter weights to perfect your technique, then systematically increase resistance as your strength improves. With consistent proper use, your leg attachment delivers professional-quality results without expensive machine purchases.


