
Struggling to reach the floor in splits despite weeks of practice? You’re not alone. The Hanumanasana (splits pose) remains one of yoga’s most challenging asanas, demanding exceptional flexibility in the hip flexors, hamstrings, and groin muscles. For most practitioners, the floor sits frustratingly far away, creating tension that throws off alignment and increases injury risk. This is exactly why learning how to use yoga blocks for splits transforms the journey from impossible to achievable. By providing adjustable support under your hands or hips, these simple props bridge the gap between where your body currently is and where you want to be. In this guide, you’ll discover precise block placements, step-by-step progression techniques, and expert tips that safely accelerate your path to the full splits pose.
Why Yoga Blocks Are Essential for Split Progression
The moment you lower into splits without proper support, you’ll likely experience one of two problems: either your hips rotate outward to reach the floor, or your spine rounds as you strain to touch the ground. Both scenarios defeat the purpose of the pose and increase injury risk. Yoga blocks solve this by bringing the floor closer to your body, allowing you to maintain proper alignment while still experiencing the deep stretch your muscles need.
When you use yoga blocks for splits correctly, you gain three critical advantages that dramatically accelerate progress. First, blocks let you relax into the stretch rather than fight to maintain balance. Second, they build strength alongside flexibility by allowing muscular engagement throughout your range of motion. Third, they provide a clear progression path—as your flexibility improves, you gradually lower the block height until you no longer need them. This systematic approach prevents the compensation patterns that actually hinder long-term progress.
Optimal Block Placements for Every Flexibility Level
The exact placement of your blocks determines whether you’ll make meaningful progress or simply waste time in an ineffective position. Understanding these three strategic placements will transform your practice immediately.
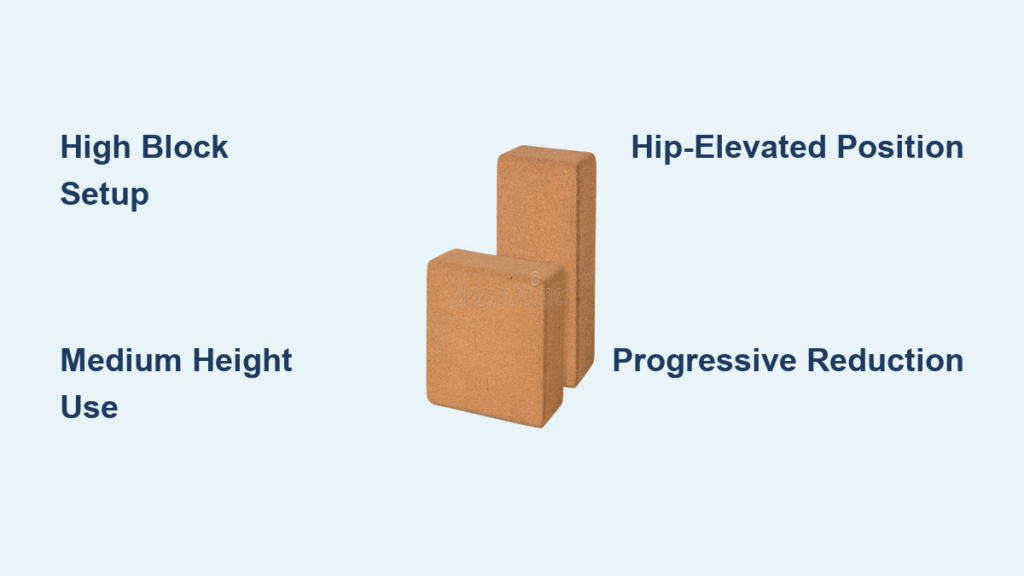
High Block Setup for Complete Beginners
Place both blocks at their tallest setting (9 inches) under your hands as you lower into the split. This maximum elevation allows beginners to experience proper hip alignment without strain. Critical tip: Position the blocks far enough forward that your shoulders stay stacked over wrists, not collapsing toward your hips. This placement works best for those who can’t yet get their hands within 12 inches of the floor in splits.
Medium Height Configuration for Intermediate Progress
Once you’ve mastered high blocks for 2-3 weeks, switch to medium height (5-6 inches). This sweet spot challenges your flexibility while maintaining enough support for proper form. Pro insight: Try placing one block at medium height and the other at low height to address hip imbalances—this subtle adjustment often creates dramatic improvements in alignment within days.
Hip-Elevated Variation for Uneven Flexibility
If one hip consistently lifts higher than the other in splits, place a single block under the front hip of your tighter side. This counterintuitive placement levels your pelvis, ensuring both sides receive equal stretching. Warning: Never force this position—if you feel joint pain rather than muscular stretching, reduce the block height or consult a yoga therapist.
Step-by-Step Split Practice with Blocks
Following this precise sequence maximizes your results while minimizing injury risk. Each step builds upon the previous one to create sustainable progress.
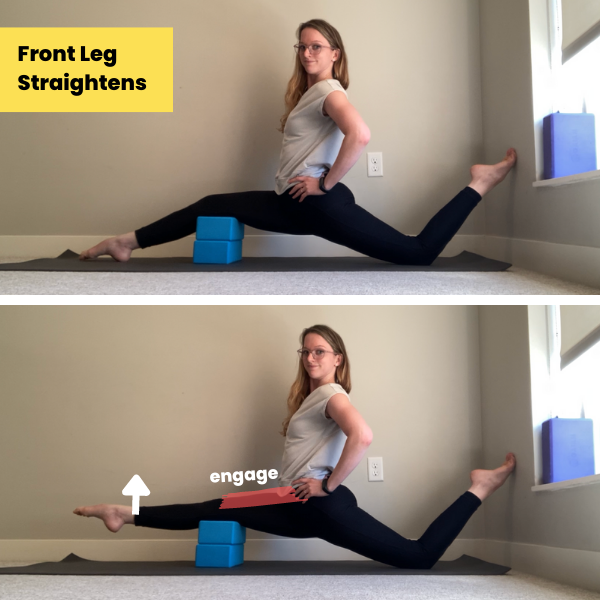
Perfect Entry Technique
Start in a low lunge with your front knee stacked over ankle. Place both blocks where your hands will land before lowering. As you slide your back leg back, keep your hips square to the front of your mat—imagine balancing a book on your pelvis. Lower slowly until your hands reach the blocks, spreading your fingers wide for stability. This controlled entry prevents the hip rotation that plagues most beginners.
Finding Your Effective Stretch Threshold
Once positioned, check three alignment points: 1) Both hip points face forward equally, 2) Front knee stays stacked over ankle, 3) Spine remains neutral. Key insight: Your optimal stretch occurs when you feel deep tension but can still breathe deeply for 5-8 breaths. If you’re holding your breath or shaking, increase block height immediately.
Progressive Deepening Method
Hold the position for 30-60 seconds while focusing on deep diaphragmatic breathing. On each exhale, gently press through your hands to lower your hips slightly. Never bounce—this micro-movement technique safely increases range of motion without triggering protective muscle contractions.
Critical Safety Practices for Block-Assisted Splits

Many practitioners injure themselves not from the splits themselves, but from skipping these essential safety steps.
Mandatory Warm-Up Protocol
Never attempt splits with cold muscles, even with blocks. Complete 10 minutes of dynamic movement first: 30 seconds of leg swings forward/backward per leg, 5 walking lunges with torso twists, and 1 minute of cat-cow stretches. This sequence increases blood flow to your hip flexors and hamstrings, making them 40% more receptive to stretching.
Pain vs. Productive Stretching Sensation
Learn to distinguish sharp joint pain (stop immediately) from deep muscular tension (productive stretching). Joint pain feels localized and sharp, while effective stretching creates a diffuse, burning sensation that gradually intensifies. If you experience knee or hip joint pain with blocks, consult a physical therapist before continuing.
Block Quality Matters More Than You Think
Invest in cork blocks with textured surfaces rather than smooth foam—they won’t slip when your hands sweat. Standard 9x6x4 inch blocks provide the ideal height variations for splits progression. Pro tip: Place a yoga towel under your blocks if practicing on hardwood or tile floors for additional grip.
Common Mistakes That Destroy Your Progress

Avoid these five errors that silently sabotage your flexibility development.
Rushing Block Height Reduction
Lowering to the next block height before your body is ready creates compensation patterns that actually slow long-term progress. Rule of thumb: Only decrease height when you can hold the pose for 90 seconds with relaxed breathing. Most practitioners need 2-4 weeks at each height level.
Collapsing Onto Blocks Instead of Supporting
Many practitioners rest their weight on blocks rather than using them as active support points. Fix this: Keep your arms slightly bent and engage your core as if you’re doing a plank. This transforms passive stretching into active flexibility training.
Ignoring Back Leg Engagement
While focusing on the front leg’s stretch, most practitioners let their back leg go limp. Critical correction: Press the top of your back foot into the floor and engage your quadriceps to create stability and balanced stretching.
Structured Weekly Training Plan for Splits Success
Follow this science-backed progression to achieve measurable results in 8-12 weeks.
Optimal Practice Frequency and Duration
Train splits with blocks 3 times weekly with at least one rest day between sessions. Each session should include: 2 minutes warm-up, 3 sets per side holding 45-90 seconds, and 2 minutes cool-down in child’s pose. Never practice splits on consecutive days—muscles need 48 hours to adapt to flexibility training.
Progressive Overload Tracking System
Document each session with: block height used, hold time achieved, and subjective difficulty (1-10 scale). Proven pattern: Most practitioners progress from high blocks to full splits in 12-20 weeks with consistent practice. Take weekly progress photos in identical lighting to visually track improvements that feel imperceptible day-to-day.
Advanced Block Techniques for Rapid Progress
Once you’ve mastered basic splits with low blocks, these advanced methods accelerate your journey to full expression.
Resistance Band Integration
Loop a yoga strap around your back foot and hold the ends in your hands while in splits with blocks. Gently pull the strap toward you while resisting with your leg—this proprioceptive neuromuscular facilitation (PNF) technique increases flexibility 30% faster than passive stretching alone.
Dynamic Transition Drills
Practice moving between block heights while maintaining the split position. Start with hands on high blocks, then walk them down to medium, then low, then back up. This builds the strength and control needed for eventually transitioning into splits without any support.
Transform Your Splits Practice Today
Learning how to use yoga blocks for splits properly turns an intimidating pose into an achievable goal for any dedicated practitioner. The key lies in strategic block placement, patient progression, and consistent practice with proper alignment. Most importantly, remember that flexibility develops gradually—trust the process as you systematically decrease block height over weeks and months. Within 3-6 months of following this precise methodology, you’ll likely find yourself achieving full splits with ease, all thanks to the intelligent use of these simple yet transformative props. Start today with the highest block setting that allows perfect alignment, and celebrate each small victory as you work toward your ultimate flexibility goals.


