
Struggling to touch your toes or sinking comfortably into seated poses? You’re not alone—tight hamstrings and stiff hips prevent countless practitioners from experiencing the full benefits of yoga. Yoga blocks provide the perfect solution, acting as extensions of your body to safely bridge the gap between where you are and where you want to be in your flexibility journey. By strategically placing these simple props beneath your hands, seat, or back, you create the support needed to relax into stretches rather than strain against your current limitations. This guide reveals exactly how to leverage yoga blocks to unlock greater range of motion throughout your body, with specific techniques that target tight areas while maintaining proper alignment. Whether you’re working on forward folds, hip openers, or shoulder mobility, these methods will help you make consistent, injury-free progress toward enhanced flexibility.
Why Yoga Blocks Transform Flexibility Practice
Yoga blocks fundamentally change how your body responds to stretching by eliminating the strain that often accompanies flexibility work. When you can’t reach the floor in a forward fold, your muscles instinctively tighten to prevent falling, sabotaging your flexibility efforts. Blocks solve this by bringing the floor up to meet you, allowing your nervous system to recognize safety and release tension. This neurological shift is critical because true flexibility requires both physical lengthening of muscles and mental permission to let go. Without blocks, many practitioners compensate by rounding their spine or forcing their joints beyond safe limits, which actually reinforces tightness rather than releasing it. By providing stable support exactly where you need it, blocks create the ideal conditions for sustainable flexibility gains—allowing you to hold poses longer with proper form while your muscles gradually lengthen.
How Blocks Activate the Stretch Reflex
Your body has built-in protective mechanisms that prevent overstretching, but these same mechanisms can hinder flexibility progress when you’re trying to reach beyond your current range. Blocks help bypass this limitation by positioning your body at the edge of your current flexibility without triggering the stretch reflex that causes muscles to contract defensively. When you place a block under your hands in a standing forward fold, for example, you can maintain a straight spine while feeling a gentle pull in your hamstrings—exactly where you want the stretch—rather than straining to touch the floor and activating protective tension throughout your back and legs. The key is finding the “sweet spot” height where you feel sensation but not strain, allowing your muscles to relax into the stretch for 60-90 seconds while breathing deeply.
Choosing the Right Yoga Blocks for Flexibility Work

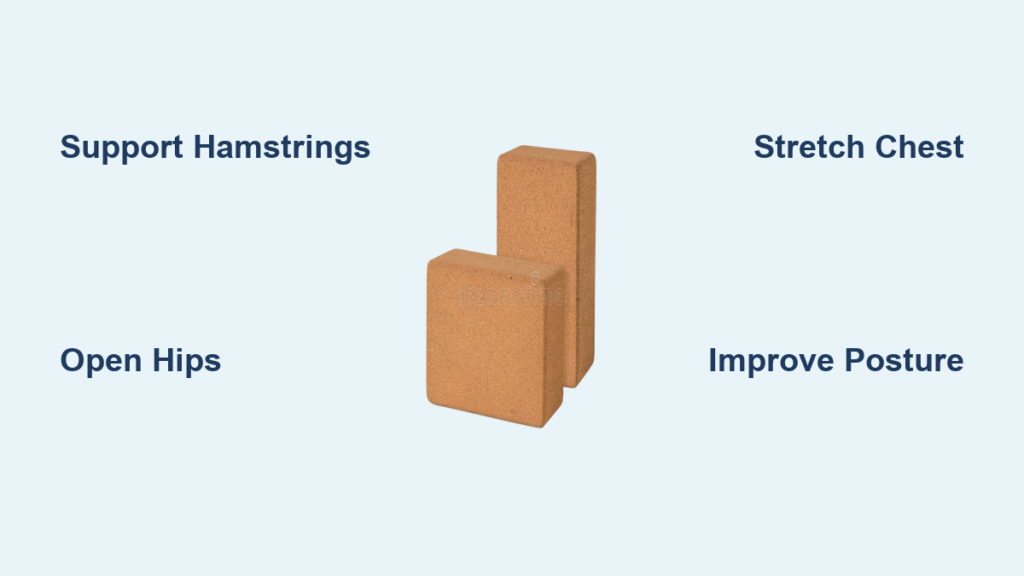
Not all yoga blocks serve flexibility goals equally, so selecting the appropriate materials and sizes makes a significant difference in your progress. Cork blocks provide superior stability for poses requiring firm support, like seated forward folds where you need your block to stay perfectly still as you hinge forward. Their density prevents compression under pressure, maintaining consistent height throughout your stretch. Foam blocks offer more give, which feels gentler during chest-opening poses where you’re lying back on the block. Their softer surface reduces pressure points while still providing adequate elevation. Consider your specific flexibility goals when choosing—those working primarily on hip and hamstring flexibility might prefer cork for stability, while shoulder and chest openers may benefit from foam’s cushioning.
Optimal Block Sizes for Progressive Stretching
Most flexibility practitioners find standard 4-inch blocks versatile enough for initial support, but having multiple sizes accelerates progress as your range of motion improves. Start with blocks at their tallest setting to make poses maximally accessible, then gradually transition to medium and low heights as your muscles lengthen. For example, in seated forward folds, begin with sitting on a block at its highest height to tilt your pelvis forward, then over weeks of practice, lower to the medium height, and eventually remove the block entirely as your hamstrings release. Having both 3-inch and 4-inch blocks allows for finer gradations in elevation, helping you make incremental progress without skipping stages that could lead to strain. Serious flexibility seekers often keep two sets of blocks—one cork, one foam—to address different muscle groups with appropriately supportive materials.
Unlock Tight Hamstrings with Strategic Block Placement
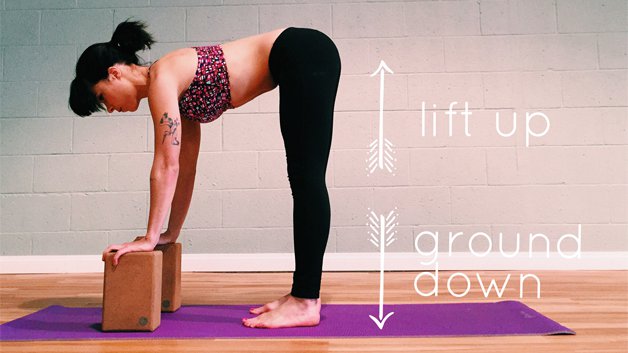
Hamstring flexibility remains one of the most common limitations, but blocks provide multiple approaches to safely lengthen these stubborn muscles. In standing forward folds, place blocks outside your feet at their tallest height, resting your hands on the blocks while keeping your spine long. This position allows gravity to work on your hamstrings without the strain of reaching for an unreachable floor, letting you focus on hinging from the hips rather than rounding your back. For seated forward folds, sit on a block with your legs extended, creating a slight pelvic tilt that directs the stretch into your hamstrings instead of your lower back. The block under your seat prevents the posterior pelvic tilt that often limits hamstring engagement in tight practitioners.
Reclining Hamstring Stretch Technique
This often-overlooked method delivers profound hamstring flexibility without strain. Lie on your back with one leg extended along the floor and the other leg lifted toward the ceiling. Place a block vertically against a wall and rest your heel on the block at a height where you feel a gentle stretch along the back of your thigh—typically the medium or tall setting for beginners. Keep both legs straight but not locked, and breathe deeply into the sensation for 90 seconds before switching sides. The magic happens when you find the precise height where you can completely relax rather than grip to maintain the position. As your flexibility improves, gradually lower the block height while maintaining the same relaxed breathing pattern, allowing your hamstrings to lengthen progressively without triggering protective tension.
Deepen Hip Openers with Precise Elevation
Hip flexibility affects everything from your walking gait to your ability to sit comfortably, making block-supported hip openers essential for comprehensive flexibility. In pigeon pose, place a block under your elevated hip at the height needed to keep both hips level—often the tallest setting for tight practitioners. This prevents collapsing into your lower back and directs the stretch into the targeted gluteal muscles. For supine figure-four stretches, position a block under the knee of your top leg to create a stable platform that allows complete relaxation into the stretch. In low lunge hip flexor stretches, place blocks under your hands to elevate your upper body, creating space to sink deeper into the front of your back hip while maintaining spinal alignment.
Butterfly Pose Modification for Tight Hips
Sit on your mat with the soles of your feet together and knees falling outward. Place one block under each knee at a height where your thighs feel supported but still experience gentle tension—typically the medium height for most practitioners. This elevation reduces strain on your inner thighs and knees while still providing a meaningful stretch. Hold for 2-3 minutes while breathing deeply into your groin area, allowing gravity to gradually draw your knees closer to the floor. As your flexibility improves, lower the blocks to the next height setting while maintaining the same relaxed posture. This progressive approach prevents the common mistake of forcing the knees down, which creates tension rather than release.
Shoulder and Chest Flexibility Techniques
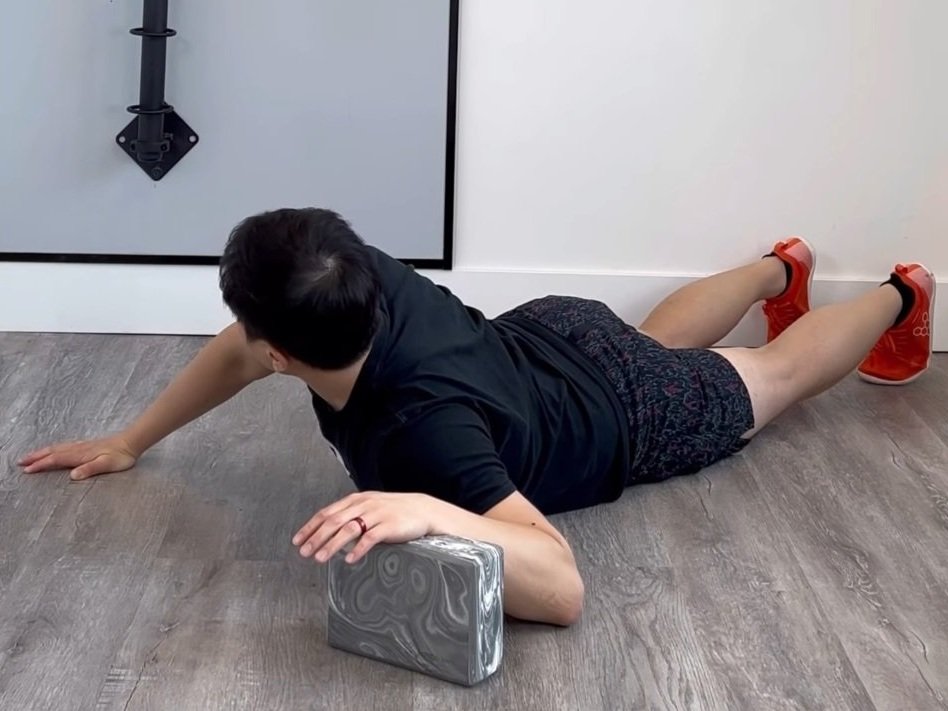
Upper body flexibility often gets neglected despite its importance for posture and movement quality. For doorway stretches, place a block in its lowest position on the floor, positioning your forearm against the doorframe with your elbow bent at 90 degrees and the block supporting your elbow. This creates a gentle chest opening without strain on your shoulder joint. In cow face pose, sit on a block to elevate your hips and place one hand behind your neck, the other reaching down your spine. Hold a strap or towel between your hands to bridge the gap, gradually working toward bringing your hands closer as your shoulder flexibility improves.
Reclining Chest Opener for Posture Enhancement
Lie on your back with a block positioned horizontally beneath your upper back at bra-line height (typically medium height). Allow your arms to fall open to the sides with palms facing up, and breathe deeply into your chest for 3-5 minutes. The block creates a gentle backbend that counteracts rounded shoulders while providing enough support to prevent discomfort in your lower back. This pose is particularly effective when combined with conscious breathing—inhale to expand your chest further, exhale to release tension in your shoulders. Regular practice gradually rewires the chronic tension patterns that limit upper body flexibility.
Common Mistakes That Hinder Flexibility Progress
Even well-intentioned practitioners undermine their flexibility gains by making predictable errors with block usage. Using blocks that are too tall shifts the stretch away from the intended muscle groups, essentially bypassing the very flexibility work you’re trying to accomplish. Neglecting to breathe deeply while in block-supported stretches converts what should be a release-based practice into a strain-based one, triggering the protective tension you’re trying to eliminate. Placing blocks in unstable positions that require constant muscular effort to balance prevents the relaxation necessary for meaningful flexibility gains. Skipping regular reassessment of which height you need means you might continue using supports you’ve outgrown, limiting your progress. Most importantly, rushing the process by forcing deeper stretches before your body is ready creates tension rather than sustainable flexibility improvement.
Integrate Blocks into Your Daily Flexibility Routine
Making yoga block work part of your regular routine accelerates results more effectively than occasional dedicated sessions. Morning stretches with blocks help wake up tight muscles and set a relaxed tone for the day, while evening sessions release accumulated tension from sitting and physical activity. Combine block-supported stretches with your existing yoga practice rather than treating them as separate sessions—use blocks during your regular sun salutations or cool-down sequences. Even brief 10-minute sessions with blocks can produce noticeable improvements when practiced consistently, as flexibility responds best to regular, patient input rather than infrequent intense effort. Set up a designated stretching space with blocks within easy reach to remove friction from the decision to practice, making consistency more achievable.
Yoga blocks transform flexibility practice by creating accessible pathways to deeper stretches while maintaining the alignment and relaxation necessary for genuine muscle lengthening. By understanding proper block positioning, selecting appropriate heights for different poses, and committing to consistent practice, you can systematically improve flexibility throughout your body. The key lies in patience—flexibility develops over weeks and months, not days, and blocks serve as supportive tools that meet you exactly where your body is currently, then gently guide you toward greater range of motion. Start with the basic techniques outlined here, pay attention to how your body responds, and adjust your approach as your flexibility evolves. Your yoga blocks aren’t crutches for limitations—they’re bridges to possibilities.


