
Nothing disrupts your yoga flow like struggling with a mat that won’t stay rolled or slides off your shoulder during your commute. Properly wrapping your yoga mat isn’t just about convenience—it directly impacts your mat’s longevity, your comfort during transport, and how quickly you can transition from daily life to practice. Whether you’re rushing to a 6am class, storing your mat between sessions, or packing for a weekend retreat, mastering the right wrapping technique ensures your mat stays protected and ready when you need it. This guide reveals exactly how to wrap a yoga mat for every scenario, so you can move through your day with the same grace you bring to your practice.
The difference between a frustrating mat experience and a seamless one often comes down to just a few simple wrapping techniques. Thicker studio mats require different handling than ultra-thin travel versions, and the method that works perfectly for your daily commute might fail completely when packing for a weekend getaway. Understanding these nuances helps you select the ideal approach for your specific mat and situation, preventing creases, maintaining cushioning integrity, and making transportation effortless.
Choose Your Wrapping Method Based on Mat Type
Selecting the right wrapping technique starts with understanding your mat’s specific characteristics. Using the wrong method can create permanent creases in thicker mats or leave travel mats loose and unwieldy. The perfect wrap begins with matching your technique to your mat’s thickness, material, and your intended use.
Identify Your Mat’s Wrapping Requirements
Standard yoga mats (3-6mm thick) wrap best with a tight roll that maintains their cylindrical shape during transport. These mats typically resist creasing but require consistent rolling technique to prevent uneven wear. Extra-thick mats (8mm+) often benefit from partial folding combined with rolling to reduce bulk while avoiding deep creases that compromise cushioning. Ultra-thin travel mats (1.5-2mm) can handle aggressive folding without damage, making them ideal candidates for compact storage solutions.
Consider how you’ll transport your mat—daily commuters need quick-release methods that allow fast transitions between transport and practice, while occasional practitioners can prioritize space-saving techniques. Outdoor yogis should select wrapping methods that protect against dirt and moisture during transport. Mats made from natural rubber maintain grip better when rolled rather than folded, while PVC mats tolerate folding with minimal impact on performance.
Match Technique to Your Transportation Needs
For studio commuters, a simple roll with a secure strap provides the fastest transition from practice to transport. Aim for a technique you can complete in under 30 seconds during crowded studio transitions. If you carry your mat on public transportation, prioritize methods that keep it securely closed to prevent accidental unrolling in tight spaces.
Travelers benefit from techniques that maximize compactness while protecting the mat within luggage. Folded mats often fit better in suitcases than rolled ones, but require additional protection against dirt and moisture. Home practitioners should choose storage methods that keep mats accessible while protecting them from dust, sunlight, and accidental damage.
Perfect the Basic Roll Technique for Standard Mats

The fundamental rolling method creates a neat, compact cylinder that’s comfortable to carry and easy to store. When executed properly, this technique works for most standard yoga mats and preserves their structural integrity through repeated use.
Execute a Professional-Quality Roll
Lay your mat completely flat on a clean surface with your practice side facing up. Begin rolling from the end opposite your hands to create natural tension as you work. Apply consistent, firm pressure as you roll to create a tight cylinder without gaps or air pockets. Keep your hands parallel to the mat’s edge to prevent twisting, which creates weak points that lead to premature wear.
As you approach the final third of the mat, increase pressure slightly to ensure the outer layers hold the roll securely. The last edge should tuck neatly under the completed roll—this creates natural tension that helps maintain the shape without excessive reliance on straps. Practice this technique until you can complete it smoothly in one continuous motion, significantly reducing your post-practice packing time.
Secure Your Roll for Comfortable Carrying
Most quality yoga mats include integrated straps that wrap around the roll and secure with Velcro or buckles. When using these straps, position them about one-third and two-thirds of the way down the roll for optimal balance. The strap should be tight enough to prevent unrolling but not so tight that it compresses the foam core or creates permanent indentations.
For mats without integrated straps, use a separate carrying strap made from soft, non-abrasive material. Wide straps (at least 2 inches) distribute weight comfortably across your shoulder during longer walks. Adjust the strap length so the mat hangs at your hip rather than your knee—this position reduces shoulder strain and keeps the mat clear of your legs as you walk. Avoid using rubber bands or string that can damage your mat’s surface over time.
Optimize Carrying Straps for Maximum Comfort

The right carrying strap transforms your rolled mat from a cumbersome cylinder into a comfortable, hands-free accessory. Understanding strap options and proper positioning prevents shoulder strain and keeps your mat secure during transport.
Master Integrated Strap Systems
Many modern yoga mats feature built-in carrying systems that thread through slots along one edge. To use these effectively, roll your mat tightly as described previously, then thread the strap through the designated slots without twisting. Pull the strap snug but not excessively tight—your goal is security without compression that could damage the mat’s cellular structure over time.
Some integrated straps include additional features like small pockets for keys or a phone. Position these pockets toward the top of the roll where they’re easily accessible but won’t interfere with your grip. If your mat’s strap feels too short or too long when properly secured, adjust your rolling technique to create a slightly tighter or looser roll that accommodates the strap’s ideal length.
Select and Position Separate Straps Properly
Separate carrying straps offer customization options that integrated systems can’t match. Look for straps with padded shoulder sections if you carry your mat regularly—this small feature makes a significant difference in comfort during longer commutes. Adjustable straps let you customize the length for different carrying styles: shorter for hand-carrying, longer for shoulder transport.
Position the strap so the mat hangs with its axis parallel to your body rather than perpendicular. This orientation keeps the mat stable during movement and prevents it from swaying or twisting with each step. When using a separate strap, wrap it around your rolled mat twice before securing it—this double wrap distributes pressure more evenly and prevents the mat from shifting within the strap during transport.
Fold Travel Mats for Maximum Compactness
Folding provides an alternative to rolling that works exceptionally well for thinner travel mats. While folding creates creases, this technique achieves the smallest possible footprint for storage and transport—essential when space is limited.
Determine When Folding Is Appropriate
Mats under 3mm thick can be folded without significant damage to their structure or performance. Travel mats specifically designed for portability often include fold lines or perforations that guide proper folding technique. If your primary concern is fitting your mat into a small suitcase or backpack compartment, folding creates a package up to 40% smaller than rolling would allow.
Folding works particularly well for outdoor practitioners who need to minimize carried volume or those who practice in multiple locations throughout the day. The slight crease created by folding typically disappears within a few minutes of practice on most thin mats, making this a practical trade-off for the space savings.
Execute Proper Folding Technique
Lay your mat completely flat with the practice side facing down. Fold the mat in half lengthwise, aligning the edges precisely to prevent uneven creasing. Then fold it in half again, or into thirds for maximum compactness. For mats with significant width, fold the sides toward the center before making your final fold to create a neat rectangle.
To minimize permanent creasing, alternate your folding direction each time you pack your mat—fold left-over-right one time, then right-over-left the next. Place a thin cloth or paper between folded sections to reduce pressure on the crease line. When storing a folded mat long-term, stand it on edge rather than laying it flat to prevent the crease from setting permanently.
Store Your Mat Properly Between Sessions
How you store your mat when not in use directly impacts its lifespan and readiness for your next practice. Proper storage prevents damage from environmental factors while keeping your mat accessible when inspiration strikes.
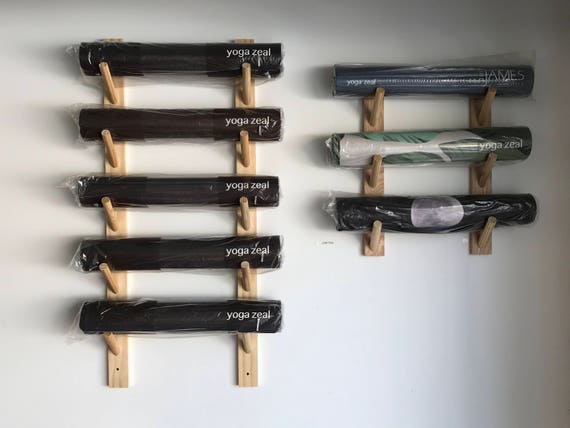
Implement Vertical Storage Solutions
Hanging your rolled mat on a sturdy hook keeps it off the floor, away from dust, and ready for immediate use. Install the hook at a height that allows your mat to hang freely without touching the floor, and position it away from direct sunlight which can degrade certain materials. Mats stored vertically maintain their cylindrical shape better than those stored horizontally.
For multiple mats, use a pegboard with appropriately spaced hooks to create an organized storage system. Some practitioners install hooks inside closet doors to keep mats accessible while maintaining a clean aesthetic. If hanging isn’t possible, store your rolled mat vertically in a corner or against a wall—this position prevents rolling and takes up minimal floor space.
Protect Mats During Long-Term Storage
When storing your mat for extended periods, clean it thoroughly and allow it to dry completely before wrapping. Store rolled mats with the practice side facing out to prevent moisture trapping against the textured surface. Place mats in breathable cotton bags rather than plastic containers, which can trap moisture and encourage mold growth.
For travel mats stored folded, place a sheet of acid-free paper between the folded sections to prevent material bonding over time. Store all mats away from heating vents and radiators—consistent exposure to heat accelerates material degradation. Check stored mats monthly for signs of moisture or material changes, especially if stored in basements or attics with fluctuating humidity.
Extend Your Mat’s Lifespan Through Proper Wrapping
How you wrap and store your mat directly affects its longevity. Consistent, proper techniques prevent the cumulative damage that leads to premature replacement.
Prevent Common Damage During Wrapping
Never roll or fold your mat while it’s damp—moisture trapped against the material encourages mold growth and material breakdown. Wipe down your mat after each practice and allow it to air dry completely before wrapping. Avoid leaving mats rolled tightly for extended periods, as this can create permanent compression in the foam core.
When transporting your mat, protect it from extreme temperatures—don’t leave it in a hot car or exposed to freezing conditions. These temperature extremes accelerate material breakdown, particularly in PVC and rubber mats. If your mat develops a slight curl from storage, unroll it and place heavy books on the corners for a few hours to restore its flatness before your next practice.
Maintain Your Mat Through Regular Care
Clean your mat after every 3-5 uses with a solution of water and mild soap, avoiding harsh chemicals that degrade materials over time. For stubborn stains, use a specialized yoga mat cleaner appropriate for your mat’s material. Always air dry your mat completely before storing—never roll it while damp.
Inspect your mat regularly for signs of wear, particularly along common fold or roll lines. Address small tears immediately with mat repair kits to prevent them from becoming larger problems. Rotate your mat periodically during practice to ensure even wear across the entire surface. With proper wrapping techniques and regular maintenance, most quality yoga mats will provide excellent performance for 1-3 years of regular use.
Mastering how to wrap a yoga mat properly transforms a simple task into an essential component of your practice routine. The right technique for your specific mat and situation ensures comfort during transport, protects your investment, and creates a seamless transition between daily life and your practice space. Start with the basic roll technique for standard mats, experiment with folding for travel versions, and implement proper storage methods to maximize your mat’s lifespan. With these skills, you’ll spend less time managing your equipment and more time focusing on what truly matters—your practice.


