
If your lower back aches after sitting at your desk or lifting grocery bags, you’re not alone—80% of adults experience debilitating back pain yearly. Kettlebell lower back exercises rebuild the exact muscles that protect your spine during daily movements, transforming weakness into resilient strength. Forget passive treatments; this guide delivers actionable kettlebell drills that target spinal erectors, multifidus, and glutes to create lasting relief. You’ll discover how to activate dormant stabilizers with precise hip hinge mechanics, avoid dangerous form mistakes, and build a bulletproof lower back in just 15 minutes daily.
These aren’t generic stretches. Kettlebell lower back exercises leverage controlled resistance to strengthen muscles through functional ranges of motion—exactly what physical therapists prescribe for disc rehabilitation and pain prevention. Whether you’re recovering from injury or building resilience against future problems, these movements ingrain proper lifting patterns that transfer directly to picking up children, gardening, or handling heavy luggage. Let’s transform your back from a liability into your strongest asset.
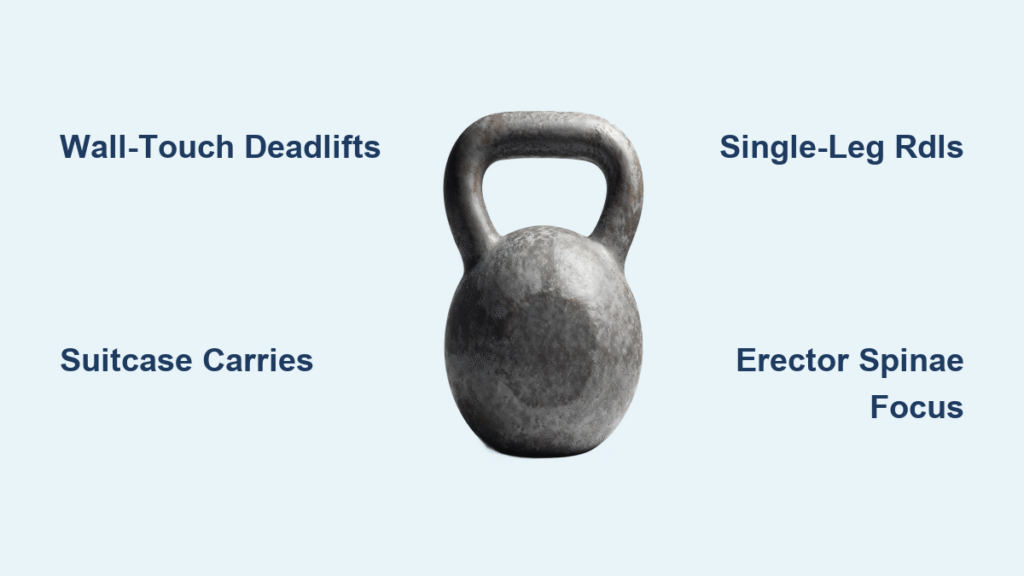
Activate Your Spinal Seatbelts: Target These 5 Lower Back Muscles

Erase Disc Shear With Erector Spinae Strength
Your erector spinae muscles act as spinal shock absorbers during lifting. When these weaken, everyday movements like bending to tie shoes create dangerous disc shear. During kettlebell deadlifts, feel these muscles engage by maintaining a straight line from your tailbone to your crown—no rounding allowed. Critical visual cue: Film yourself sideways; your spine should form one continuous curve from neck to sacrum throughout the lift. Weak erectors cause the telltale “butt wink” where your pelvis tucks under at the bottom position.
Stop Vertebrae Slippage With Multifidus Activation
The multifidus muscles are your spine’s seatbelts, locking each vertebra during rotation. When weakened (common in desk workers), this causes “spondylolisthesis”—vertebrae slipping forward. Pro tip: Hold the bottom position of your kettlebell single-leg RDL for 3 seconds while consciously pressing your lower back into an imaginary wall. This isolates multifidus engagement better than any machine. You’ll feel this as a deep burn between your spine and pelvis—not in your hamstrings.
Prevent Grocery Bag Injuries With Quadratus Lumborum Training
Your quadratus lumborum (QL) stabilizes against lateral bending—exactly what happens when carrying uneven loads like shopping bags. The suitcase carry is your secret weapon: Hold a single kettlebell at your side while walking 20 meters. Common mistake: Letting your hip hike toward your ribs. Keep hips perfectly level as if balancing a glass of water on your pelvis. Start with just 8-12lb bells for 15 seconds per side if you’re new.
Fix Rounded Backs With These 5 Kettlebell Deadlift Variations
Eliminate Lumbar Strain With Wall-Touch Deadlifts
This modified kettlebell deadlift prevents dangerous spinal rounding by using a wall as a biofeedback tool. Stand 6 inches from a wall with feet hip-width apart. Place the kettlebell between your feet. Initiate the movement by pushing your hips backward until your glutes touch the wall—this forces proper hip hinge mechanics. Grip the bell, drive through your heels, and stand tall while maintaining wall contact. Time saver: Do 3 sets of 10 daily before breakfast to rewire your nervous system. Within two weeks, you’ll automatically hinge correctly when picking up dropped items.
Stop Hamstring Dominance With Romanian Deadlifts
Most people pull kettlebells with their quads instead of hamstrings, straining the lower back. The RDL fixes this by emphasizing the hip hinge stretch. Hold a kettlebell at thigh level. Push your hips back while keeping shins vertical until you feel a deep hamstring stretch (torso at 45-60 degrees). Key visual: Your knees should stay nearly locked—only a slight softening to allow pelvic tilt. Return by explosively driving hips forward like closing a car door with your butt. Do 4 sets of 8 reps twice weekly with moderate weight (8-16kg).
Correct Muscle Imbalances With Single-Leg RDLs
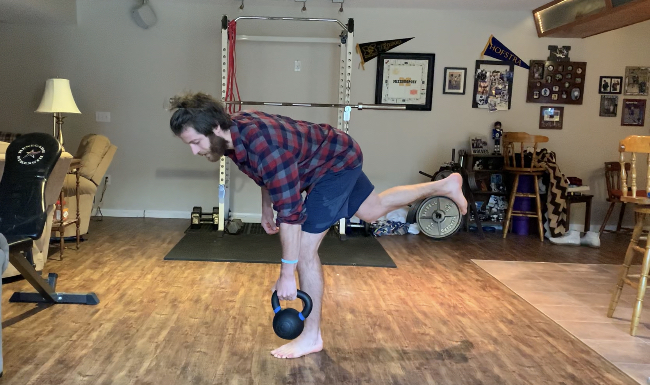
Unilateral training exposes hidden weaknesses that cause back pain. Hold a kettlebell in the hand opposite your stance leg. Hinge forward while extending your free leg behind you, lowering the bell toward your stance foot. Progression hack: Place your free hand on a wall for balance initially. As you improve, progress to fingertip contact, then no support. Do 3 sets of 8 per leg weekly. When you can perform 10 reps with 12kg without wobbling, your back pain triggers will vanish.
Build Spinal Armor With Good Mornings
Cradle a kettlebell against your upper chest. Hinge forward at the hips while keeping your spine rigid until your torso is parallel to the floor. Critical safety cue: Imagine a broomstick running from your head to tailbone—never let it bend. This loaded spinal extension strengthens erectors through their full range. Start with just bodyweight for 2 sets of 12, adding 4kg increments weekly. Avoid if you have acute disc issues.
Skip Dangerous J Curls (Unless You’re Advanced)
While J curls strengthen spinal flexion/extension control, they’re high-risk for beginners. Only attempt this advanced move if you’ve mastered neutral-spine deadlifts for 8+ weeks. Begin bent over with a light kettlebell (4-8kg), sequentially lifting by extending your spine vertebra by vertebra. Red flag: Stop immediately if you feel nerve pain or tingling. For 95% of readers, suitcase carries and deadlifts provide safer strengthening.
Program Your Pain-Free Back Routine in 3 Steps

Choose Your Starting Weight Based on Back Health
Grab the heaviest kettlebell you can lift with perfect form for 10 reps:
– Rehab phase (current pain): Use 4-8kg bells for high-rep stability work
– Prevention phase (no pain, weak back): Start with 8-12kg for deadlifts
– Strength phase (athletes): Begin at 12-16kg with focus on tempo control
Follow This 4-Week Back Resilience Plan
Monday/Wednesday routine (15 minutes):
– Wall-Touch Deadlifts: 3×12 (light weight)
– Suitcase Carries: 3x20m per side (moderate weight)
– Glute Bridges: 3×15 with bell on hips
Friday routine (10 minutes):
– Single-Leg RDLs: 3×8 per leg (light weight)
– Bird-Dog Holds: 3x20s per side with kettlebell
Progression rule: Increase weight only when you complete all reps with zero back strain. Most see pain reduction within 14 days.
Avoid These 3 Back-Destroying Mistakes
- Hyperextending at lockout: Squeezing glutes too hard pinches facet joints. Cue “ribs down” at the top position
- Letting the bell drift: Weight pulling away from legs increases spinal shear 300%. Keep it glued to your shins
- Holding breath: Creates dangerous blood pressure spikes. Exhale sharply during the hip drive phase
Essential Safety Upgrades for Injury-Prone Backs
Emergency Form Fixes for Rounded Backs
If your spine curves during lifts, immediately reduce weight by 50% and practice these drills:
– Towel squeeze: Place a rolled towel in your lower back crease; maintain pressure throughout movement
– Band-assisted hinge: Loop resistance band above knees; push hips back against band tension
– Box deadlifts: Elevate kettlebell on 6-inch platform to reduce required hip flexibility
Contraindication Checklist: Skip These If…
- You feel nerve pain (sciatica, numbness): Avoid all loaded spinal flexion (J curls, good mornings)
- You’ve had recent surgery: Use only goblet squats and suitcase carries with doctor approval
- Osteoporosis diagnosis: Stick to hip-hinge movements with light weight—never loaded spinal twists
Recovery Protocol After Back Strain
If you tweak your back:
1. Day 1: Ice for 15 minutes every 2 hours
2. Day 2-3: Cat-cow stretches 10x/hour
3. Day 4+: Begin wall-touch deadlifts with 4kg bell at 50% effort
4. Day 7: Resume full program at 30% intensity
Final Note: Consistent kettlebell lower back exercises rewire your movement patterns within 30 days. Start with just two 10-minute sessions weekly focusing on wall-touch deadlifts and suitcase carries. Track your progress by timing how long you can stand comfortably at the kitchen counter—most report 50% improvement in daily function within 21 days. Your spine wasn’t designed for passive sitting; it thrives under intelligent load. Grab that kettlebell today and build the resilient lower back that carries you through life’s heaviest moments.


