
The one-armed barbell row transforms your back training by forcing each side to work independently, eliminating the strength imbalances that plague traditional bilateral movements. Unlike symmetrical rows that let your dominant side compensate, this unilateral exercise demands complete muscle control from every fiber in your latissimus dorsi and lower back. You’ll discover muscles you never knew existed while building the powerful, balanced physique that bilateral exercises simply can’t deliver.
Whether you’re struggling with uneven back development or seeking to break through plateaus in your strength training, mastering this movement will revolutionize your approach to back training. This guide walks you through everything from proper setup to advanced variations, ensuring you extract maximum muscle-building potential from every rep of the one-armed barbell row.
One-Armed Barbell Row Muscle Activation
Your latissimus dorsi takes center stage as the primary mover during the one-armed barbell row, stretching deep with each downward phase and contracting forcefully as you pull the weight toward your hip. The lower back muscles fire continuously to maintain spinal stability throughout the movement, creating that coveted thick, powerful appearance along your entire posterior chain.
Secondary muscles join the party in supporting roles. Your biceps brachii assist during the pulling phase, while your abdominal muscles engage as natural weight belts, preventing torso rotation and maintaining strict form. This full-body tension makes the one-armed barbell row more than just a back exercise—it’s a complete core stability challenge disguised as a rowing movement. Unlike back extensions or hyperextensions that isolate specific muscles, the one-armed barbell row creates functional strength through integrated movement patterns.
Equipment Setup for Single-Arm Rows

Standard Barbell Configuration
Position a standard barbell perpendicular to your body, loading plates on only one end to create an uneven distribution that challenges your grip and core stability. The unloaded end serves as your anchor point, wedged into a corner or secured with a heavy dumbbell. This setup allows the loaded end to move in an arc pattern, mimicking natural rowing mechanics while maintaining constant tension on your working muscles.
Ensure your barbell has enough clearance to move through its full range of motion without obstruction. The plates should be securely fastened with collars to prevent shifting during your set. Beginners should start with lighter weights to master the movement pattern before progressing to heavier loads that challenge your strength.
EZ-Bar Alternative Benefits
An EZ-bar offers ergonomic advantages for one-armed barbell rows, particularly if you experience wrist discomfort with straight barbells. The curved design places your wrist in a neutral position, reducing joint stress while maintaining the same muscle activation patterns. Load the EZ-bar evenly on both sides, gripping the center curve for balanced resistance throughout the movement.
This alternative works especially well if you’ve recently performed full barbell clean and presses or overhead press variations that may have fatigued your shoulders. The EZ-bar’s design allows you to maintain proper form even when your upper body is pre-fatigued from other pressing movements.
Step-by-Step Rowing Technique
Starting Position Fundamentals
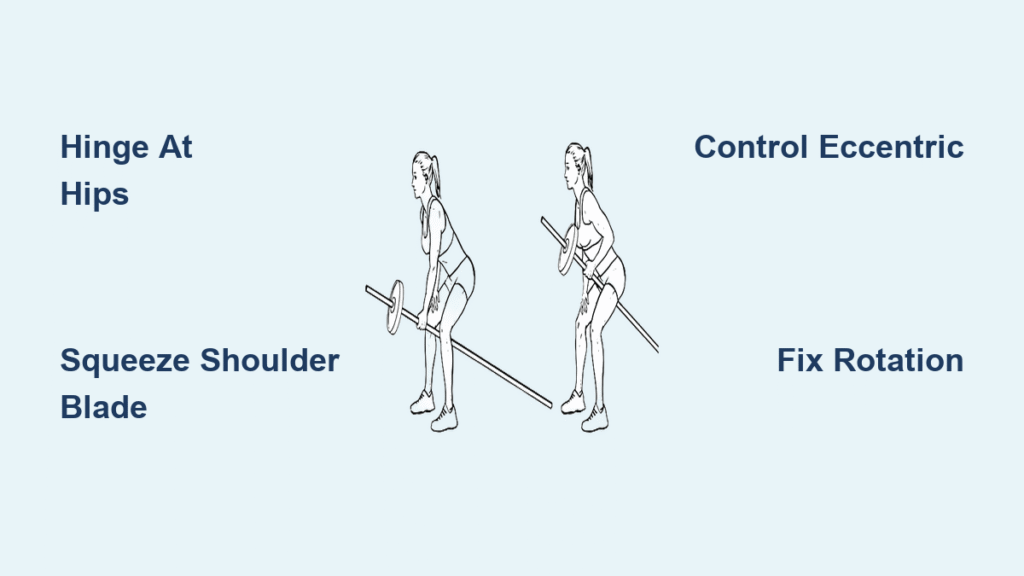
Plant your feet shoulder-width apart with the inside foot forward and outside foot back, creating a stable base that prevents rocking. Hinge forward at the hips until your torso approaches parallel with the floor, keeping your spine neutral and chest proud. Reach down with your working arm to grip the barbell just inside the sleeve, ensuring your palm faces inward for optimal lat engagement.
Your non-working hand should rest lightly on a bench or stable surface for balance, not for support. Keep your head in a neutral position, eyes focused on a spot on the floor about 3 feet in front of you. This starting position creates maximum tension in your lats while protecting your lower back from unnecessary strain.
Pulling Phase Execution
Initiate the row by driving your elbow back and slightly upward, imagining you’re pulling the bar toward your hip pocket rather than your chest. Focus on squeezing your shoulder blade toward your spine while keeping your elbow close to your body. The bar should travel in a slight arc, not a straight line, maximizing lat stretch at the bottom and peak contraction at the top.
Critical form tip: Avoid using your biceps to initiate the movement—concentrate on engaging your back muscles first. Your elbow should lead the movement, with your hand simply along for the ride. This mental cue transforms the exercise from an arm movement to a true back builder.
Lowering Control Technique
Resist gravity during the eccentric phase by actively controlling the weight’s descent. Allow your lat to fully stretch while maintaining core tension to prevent torso rotation. The lowering phase should take twice as long as the pulling phase, creating significant muscle damage that drives growth and strength adaptations.
As you lower the weight, consciously feel your lat stretching while keeping your shoulder packed in its socket. This controlled negative phase is where much of the muscle-building stimulus occurs, so never rush this portion of the rep. Aim for a 3-second descent to maximize time under tension.
Common Rowing Mistakes

Lower Back Compensation Errors
Many lifters substitute hip extension for proper rowing mechanics, using their glutes and hamstrings to cheat the weight up. Keep your hips locked in position throughout the movement, focusing solely on back muscle contraction. If you find yourself standing up during reps, reduce the weight immediately and reset your form.
This mistake often occurs when lifters try to use weights that are too heavy, similar to how some might compromise form during back extensions. Remember that the one-armed barbell row is a back exercise, not a hip hinge movement like deadlifts.
Rotation Issues During Pulls
Excessive torso rotation robs your lats of tension and increases injury risk. Imagine your torso as a steel beam—immovable and rigid. Visualize pulling your elbow back while simultaneously driving your opposite shoulder forward, creating a powerful anti-rotation challenge that strengthens your entire core.
Your hips should remain square to the floor throughout the movement. If you notice your hips twisting toward the bar, you’re likely using too much weight or losing core engagement. This is where the abdominal muscle activation becomes critical for proper execution.
Range of Motion Problems
Partial reps limit muscle development and create strength imbalances. Ensure the bar touches your hip at the top of each rep and fully extends your arm at the bottom, creating maximum muscle fiber recruitment throughout the entire movement pattern.
At the top position, squeeze your shoulder blade toward your spine for a full second before beginning the descent. At the bottom, allow a complete stretch in your lat while maintaining tension—never let the weight rest between reps. This full range of motion distinguishes the one-armed barbell row from partial movements like some jerk variations.
Progressive Overload Strategies
Weight Progression Guidelines
Start with 50% of your bilateral bent-over row weight and focus on perfecting the movement pattern. Increase load by 2.5-5 pounds weekly, prioritizing form over ego. Once you can perform 12 clean reps with a given weight, bump up to the next increment and reset your rep count.
Track your progress separately for each arm in a training log. This reveals strength imbalances that might otherwise go unnoticed. Over time, you’ll notice your weaker side catching up to your dominant side as both benefit from the unilateral nature of the one-armed barbell row.
Rep Range Variations
Alternate between strength-focused sets of 5-8 reps and hypertrophy-focused sets of 8-12 reps to maximize both muscle size and strength gains. The unilateral nature of this exercise makes it perfect for high-rep burnout sets that create exceptional muscle pumps and metabolic stress.
For strength development, perform 4 sets of 5-6 reps with heavier weight and strict form. For muscle growth, try 3 sets of 10-12 reps with controlled tempo. This variation prevents plateaus and ensures comprehensive back development from multiple stimulus angles.
Injury Prevention Protocols
Shoulder Positioning Safety
Maintain a packed shoulder position by pulling your shoulder blade down and back before initiating each rep. This creates a stable socket for your humerus while preventing impingement issues that plague traditional rowing movements. Never allow your shoulder to roll forward or upward during the pulling phase.
If you experience shoulder discomfort, reduce the range of motion slightly or try the EZ-bar variation. Proper shoulder positioning is critical since the one-armed barbell row places unique demands on your shoulder joint compared to bilateral rowing exercises.
Core Stability Requirements
Brace your core as if preparing for a punch, creating 360-degree tension around your midsection. This natural weight belt protects your spine while allowing maximum force transfer from your lats to the barbell. Exhale forcefully through pursed lips during the pulling phase to maintain intra-abdominal pressure.
Your core should remain engaged throughout the set—not just during the lifting phase. Many lifters relax their core during the lowering phase, which compromises spinal stability and reduces the exercise’s effectiveness for lower back development.
Advanced Rowing Variations
Kneeling Support Variation
Drop to a kneeling position with your inside knee and hand on a bench for added stability. This variation allows you to handle heavier weights while maintaining strict form, perfect for breaking through strength plateaus. The reduced core demand lets you focus entirely on maximizing lat contraction.
This modification is particularly useful if you’re recovering from lower back issues or need to isolate your back muscles without the core stability component. It transforms the exercise into a more direct lat builder similar to single-arm cable rows but with barbell resistance.
Deficit Row Technique
Stand on a 2-4 inch platform to increase the range of motion and stretch on your lats. This deeper starting position creates more muscle damage and growth stimulus, particularly targeting the lower portion of your latissimus dorsi. Start with 25% less weight than your standard row to account for the increased range.
The deficit position intensifies the stretch at the bottom of the movement, activating more muscle fibers through a greater range. This variation works particularly well for developing the “wing” appearance of the lats that many lifters struggle to build.
Troubleshooting Weak Points
Uneven Strength Development
Track your weights separately for each arm, ensuring your weaker side catches up to your dominant side. Never use your stronger arm as a reference for loading decisions—let your weaker side dictate progression across both limbs.
When performing your sets, always start with your weaker arm first when you’re freshest. This prevents fatigue from your stronger side from limiting your weaker side’s performance. Over time, this approach corrects imbalances that might otherwise worsen with bilateral exercises.
Progress Plateau Solutions
When progress stalls, implement rest-pause sets by performing 8 reps, resting 15 seconds, then squeezing out 3-4 more reps. This intensification technique breaks through stubborn plateaus while maintaining strict form standards.
Alternatively, try tempo variations—slow negatives, paused reps at peak contraction, or explosive pulls. These modifications provide new stimulus without increasing the weight, helping you overcome strength plateaus in your one-armed barbell row.
Mastering the one-armed barbell row transforms not just your back development, but your entire approach to unilateral training. This exercise reveals strength imbalances, builds functional core stability, and develops the powerful, symmetrical physique that bilateral movements simply can’t achieve. Start light, perfect your form, and progress systematically—the results will speak for themselves in both mirror and performance metrics.
Your next back workout presents the perfect opportunity to implement these techniques. Begin with your weaker side, maintain strict form standards, and watch as this single exercise elevates your entire training program to new levels of effectiveness and muscle-building potential.


