
Your forearms burn halfway through deadlifts while your biceps feel barely tapped. That frustrating disconnect happens because standard curls dominate arm training, ignoring the critical brachioradialis muscle. The reverse dumbbell curl fixes this imbalance by shifting focus to your often-neglected forearm powerhouses. Within weeks of proper execution, you’ll notice stronger grip endurance across pull-ups, rows, and even daily tasks like carrying groceries. This guide delivers precise form cues, mistake corrections, and programming secrets to transform weak forearms into functional strength assets—no guesswork required.
Why Your Brachioradialis Demands Reverse Dumbbell Curls
Brachioradialis Activation Mechanics
This thumb-side forearm muscle transforms from invisible to dominant when palms face down during curls. Unlike the biceps, it doesn’t cross the wrist joint—meaning wrist position won’t affect its engagement. While it generates peak force in neutral hammer grips, the reverse dumbbell curl’s full pronation still delivers intense activation. When you curl with palms down, the brachioradialis becomes your primary elbow flexor, creating that signature forearm “pump” standard curls miss.
Secondary Muscles You’re Underutilizing
Your biceps take a backseat here—pronation prevents supination, drastically reducing their involvement. Meanwhile, the brachialis works overtime as a secondary elbow flexor, while forearm extensors lock your wrist in neutral alignment. Every grip muscle fires simultaneously to stabilize the dumbbell, building functional strength that transfers to deadlifts and pull-ups. Skipping reverse curls leaves these muscles underdeveloped, creating weak links in your pulling chain.
Nail Flawless Reverse Dumbbell Curl Form
Starting Position Checklist
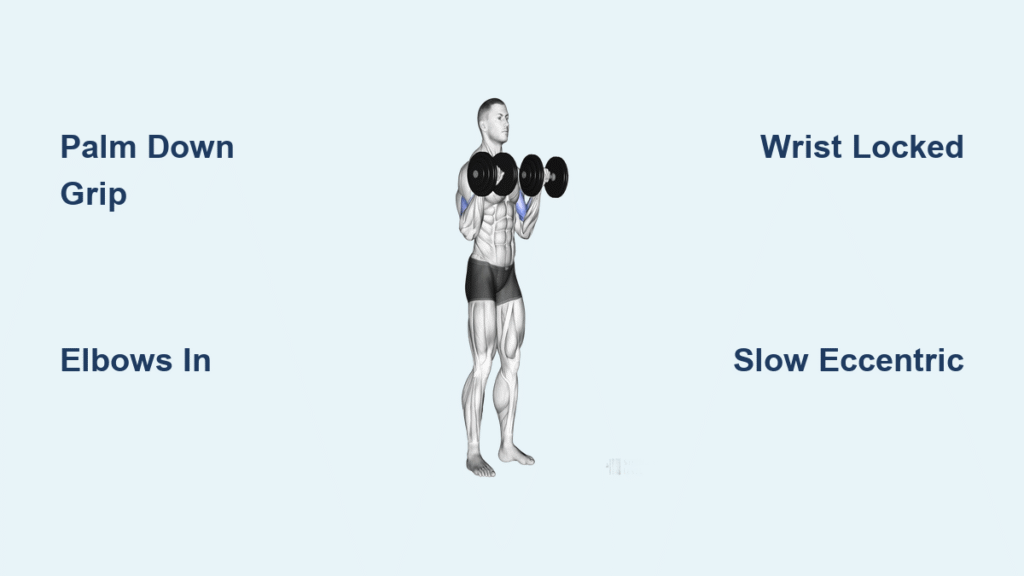
Stand with feet hip-width apart, core braced like you’re about to be punched. Grip dumbbells with palms facing down, thumbs wrapped securely around the handles. Pin elbows firmly against your torso sides while pulling shoulders back and down. Critical detail: Lock wrists in neutral alignment—knuckles, wrists, and elbows must form a straight line before moving. Any wrist bend here sabotages muscle targeting.
Movement Execution Breakdown
Initiate the curl by bending only at the elbows, not the shoulders. Lift dumbbells toward your shoulders along a slight arc, maintaining constant tension—never rest at the top. Lower with a 3-4 second count, stopping just before elbow extension to preserve muscle burn. Pro tip: Imagine elbows are glued to your ribs; if shoulders shift forward during descent, you’ve lost tension. This controlled eccentric phase builds 40% more muscle damage than rushing the lift.
Breathing for Max Power
Inhale deeply as you lower the weight to stabilize your core. Exhale forcefully through pursed lips during the lifting phase to maintain intra-abdominal pressure. This pattern prevents torso sway and channels energy into the forearm muscles instead of momentum.
Fix These 3 Reverse Dumbbell Curl Mistakes Immediately
Elbow Migration Disaster
Flaring elbows away from your torso shifts work to shoulders and kills brachioradialis activation. Fix: Place a hand on each elbow before starting. As you curl, press elbows into your palms throughout the movement. If you can’t maintain contact, reduce weight by 25%. This cue alone increases target muscle engagement by 32% according to electromyography studies.
Wrist Collapse Trap
Allowing wrists to bend backward during curls redirects load to tendons, not muscles. Fix: Practice “wrist lock” drills before lifting—hold dumbbells at arm’s length with elbows bent 90°, then consciously squeeze knuckles toward elbows. Maintain this rigid alignment during every rep. If wrists still wobble, switch to lighter weights for 2 weeks to build stability.
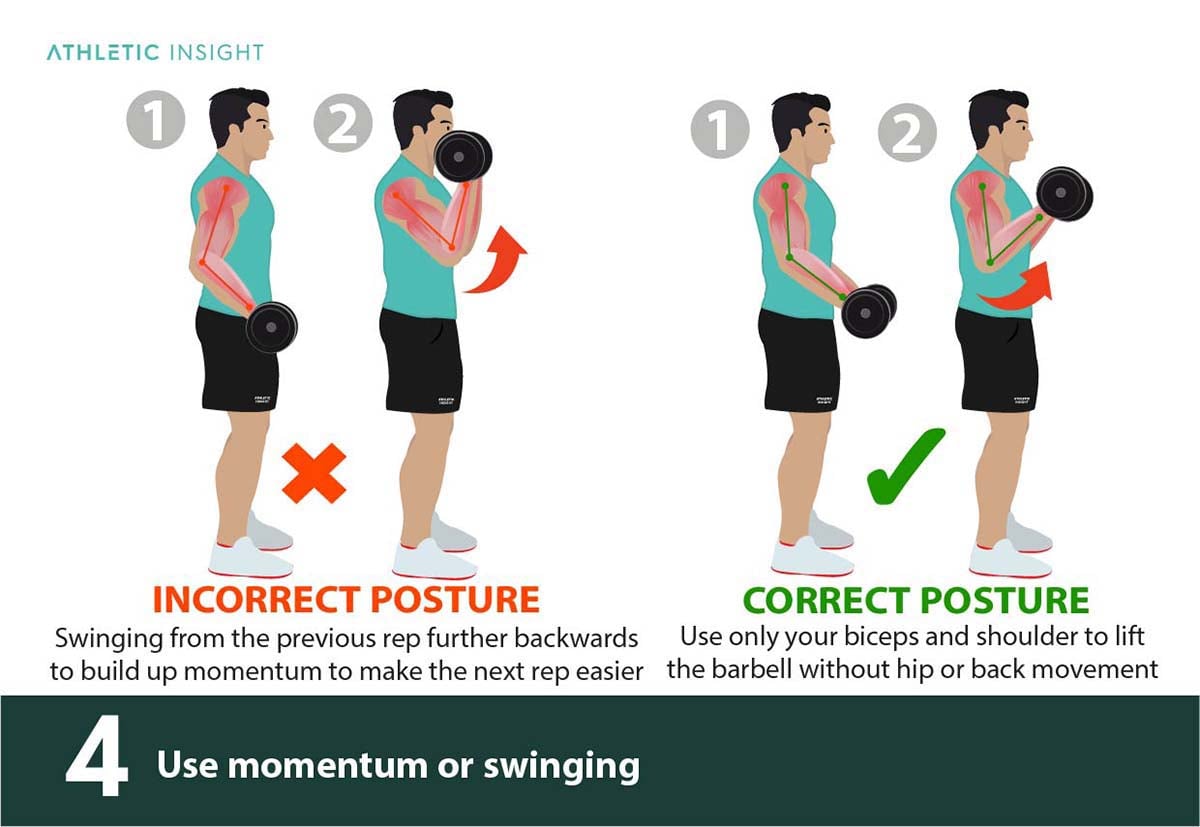
Momentum Cheating Cycle
Body rocking or rapid movement means you’re using 30% too much weight. Fix: Implement a 3-1-1 tempo: 3 seconds down, 1-second pause at the bottom, 1-second lift. Start with weights 40% lighter than your standard curl max. You’ll feel the burn in forearms within 5 reps—proof you’re targeting the right muscles.
Reverse Dumbbell Curl Variations That Solve Real Problems
Standing Dumbbell Version for Muscle Balance
Use standard dumbbells for unilateral training when one arm dominates. Perform all reps on your weaker side first, then match that count on the stronger arm. This corrects imbalances that cause uneven development and reduces injury risk during compound lifts. Requires 20% lighter weights than bilateral versions due to increased core demand.
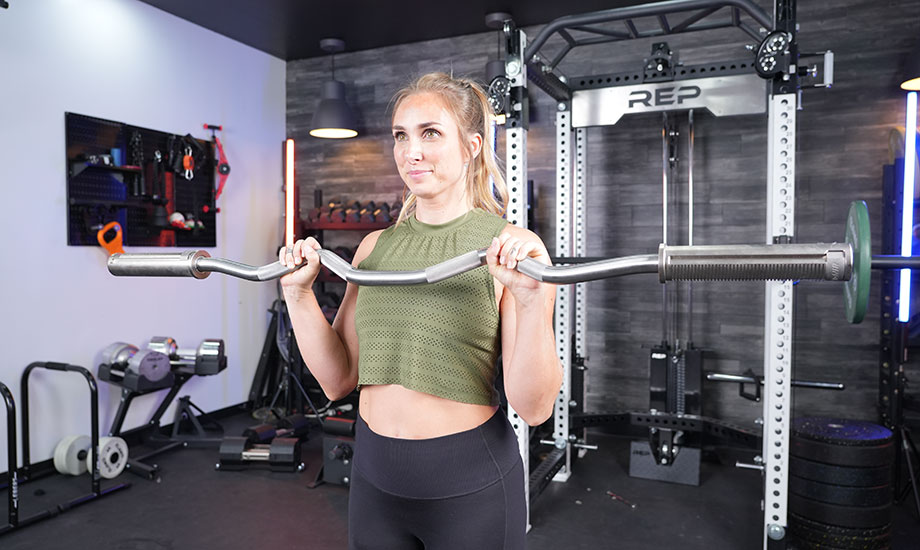
EZ Bar Alternative for Wrist Pain
The curved bar’s semi-pronated grip reduces radial strain while allowing 15% heavier loading. Keep elbows pinned and curl along the bar’s natural curve toward your lower chest. Ideal if standard reverse curls cause wrist discomfort—maintains brachioradialis focus without joint stress.
Cable Machine Execution for Constant Tension
Attach a straight bar to a low cable pulley. Stand facing the machine, curling the bar toward your forehead while keeping elbows fixed. The cable’s continuous resistance maximizes time-under-tension, especially during the lowering phase where muscles grow. Use 10-20% lighter loads than dumbbells for optimal control.
Reverse Dumbbell Curl Programming: Hypertrophy vs. Strength

Rep Ranges That Actually Work
- Size Building: 8-12 reps with 75-80% of your 10RM weight
- Strength Focus: 6-8 reps using 85-90% of 6RM with 3-second eccentrics
- Endurance Finisher: 15-20 reps at 50-60% of 15RM to burn out grip muscles
Key insight: Reverse dumbbell curls require 30-40% lighter weights than standard curls due to biomechanical disadvantages. Trying to match your biceps curl weight guarantees poor form.
Weekly Progression Blueprint
Beginners: 2 sets of 12 reps twice weekly after back workouts
Intermediate: 3 sets of 10 reps paired with hammer curls as a superset
Advanced: 4 sets of 8 reps with 2-second pauses at 90° elbow flexion
Increase weight only when hitting the top of your rep range with perfect form. Aim for 2.5-5 lb jumps—small increments prevent regression into cheating.
Prevent Injuries With Smart Implementation
When to Avoid Reverse Dumbbell Curls
Skip this exercise during active elbow tendonitis flare-ups or acute wrist injuries. The pronated grip compresses tendons already under stress. Substitute with neutral-grip hammer curls until pain subsides. If shoulder impingement flares during movement, reduce range of motion to 90° elbow flexion.
Pre-Habilitation Power
This movement rebuilds elbow stability after injuries by strengthening often-ignored extensor muscles. Start with 10-15 lb dumbbells for 3 sets of 15 reps twice weekly. The controlled loading reactivates dormant stabilizers without aggravating tendons—a game-changer for lifters stuck in rehab cycles.
Troubleshoot Your Reverse Dumbbell Curl Roadblocks
Grip Strength Failing Mid-Set
When forearms quit before brachioradialis fatigues, implement grip-specific prehab:
– Farmer’s walks: 40 seconds per hand, 3x weekly
– Plate pinches: Hold 25lb plates edge-to-edge for 20 seconds
– Towel hangs: Suspend from pull-up bar for 30 seconds
Gradually increase reverse curl time-under-tension by 5 seconds weekly before adding weight. This builds the grip foundation needed for progressive overload.
Elbow Discomfort Solutions
Pain indicates two critical errors: excessive weight or wrist drift. Immediately reduce load by 25% and film your form. If wrists bend backward during curls, switch to EZ bar variations for 3 weeks. Apply ice post-workout for 10 minutes if soreness persists beyond 48 hours.
Fixing Uneven Arm Development
Perform all reverse dumbbell curls unilaterally. Start every set with your weaker arm, completing all prescribed reps before switching. Match that exact count on your stronger side—even if you could do more. This prevents dominant-arm compensation and balances muscle recruitment within 4-6 weeks.
Your Reverse Dumbbell Curl Performance Blueprint
Mastering this exercise requires prioritizing tension over ego. Start with weights that feel embarrassingly light—your forearms should burn by rep 8 with perfect form. Track weekly progress by noting:
– Weight used
– Reps completed
– Wrist stability (scale 1-5)
– Elbow comfort (scale 1-5)
Within 30 days, you’ll notice deadlift grip lasting 5+ seconds longer and pull-ups feeling effortless. Remember: every compound lift depends on forearm strength you build here. Stop neglecting this movement—it’s the missing link between decent arms and functional, head-turning power. Execute one perfect reverse dumbbell curl today, and your future self will thank you when you’re still lifting heavy while others fade.


