
That sharp twinge in your lower back as you pull the handle isn’t normal—it’s your body screaming for help. You’re not alone: 30-50% of rowers battle rowing machine back pain every year, with lower back injuries making up 15-25% of all rowing-related issues. The culprit? Usually preventable technique errors amplified by improper setup. The good news? Most rowing machine back pain vanishes within days when you fix the root causes. This guide reveals exactly why your spine rebels during strokes, how to eliminate pain today, and what elite rowers do to stay injury-free. You’ll master biomechanical corrections, targeted recovery protocols, and setup tweaks that transform your ergometer from a pain trigger to a powerhouse.
Pinpoint Your Exact Rowing Pain Zone
Rowing machine back pain attacks three distinct areas—and each demands a different fix. Upper back pain (neck to shoulder blades) flares when you hunch forward or yank the handle too high at the finish. Mid-back pain between your shoulder blades stems from over-reaching at the catch or collapsing your chest mid-stroke. But lower back pain—the most common offender—radiates from below your ribs to your hips when lumbar spine mechanics fail under load.
Muscle Soreness vs Injury Warning Signs
Don’t ignore the difference between productive soreness and danger signals. Muscle soreness feels like a dull, familiar ache after squats—manageable and fading within 48 hours as your body adapts. True injury pain is stabbing, shooting, or forces you to stop mid-workout. If sharp pain lingers beyond 72 hours or hits when sitting/walking, you’ve crossed into injury territory needing immediate action.
When Pain Strikes Reveals the Culprit
Timing exposes your technique flaw. Pain at stroke start (catch position) means you’re rounding your back or over-reaching. Mid-stroke pain signals weak core stability causing premature hip opening. Finish-position pain (when leaning back) confirms dangerous lumbar extension beyond 1:00. Next-day pain? You likely used too high a damper setting or skipped warm-ups.
Fix These 4 Technique Errors Causing Back Pain
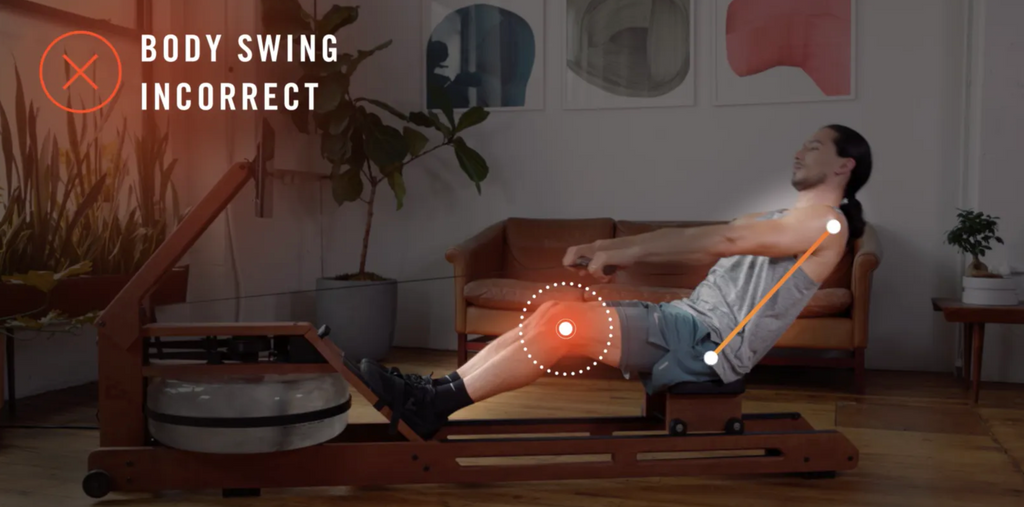
Stop Leaning Too Far Back
Leaning past 1:00 (where 12:00 is upright) hyperextends your lumbar spine, directly triggering low back pain. Research proves this over-extension correlates with injury spikes. Fix it now: Film your side profile—stop your backward lean when your shoulders align with your hips. Pro test: Row without foot straps. If you topple backward, you’re over-extending.
Prevent Early Hip Opening
Leading with your shoulders while legs push transfers crushing load to your spine instead of powerful leg muscles. Elite rowers sequence strictly: legs push → hips open → arms pull. Any shoulder-lead creates shearing forces on discs. Drill this: Place a tennis ball between your chest and the handle. If it drops mid-stroke, you’re opening hips too early.
Eliminate Rounded Back at Catch
Over-reaching by collapsing your spine into flexion multiplies disc pressure by 300%. Fix your position: Sit tall with shoulder blades gently pinched, reaching forward from hips—not by rounding your back. Your natural lumbar curve must stay intact. Visual cue: Imagine balancing a book on your lower back throughout the stroke.
Lower Your Damper Setting Immediately
High damper settings (above 5 on Concept2) force poor form compensation. Competitive rowers rarely exceed setting 4 for technique work. Start lower: Set resistance to 3-4. If you feel back strain instantly, drop to 2. Master smooth strokes before adding intensity—form always protects your spine.
Equipment Setup That Prevents Pain
Perfect Your Pelvic Position
Injury-free rowers maintain neutral or slightly anterior pelvic tilt. Check yours: Sit on the erg seat. If you feel tailbone pressure or “sitting on a golf ball,” your pelvis is posteriorly tilted—a major pain trigger. Fix it: Tuck your pelvis under slightly like zipping a tight pair of jeans. This engages core stabilizers instantly.
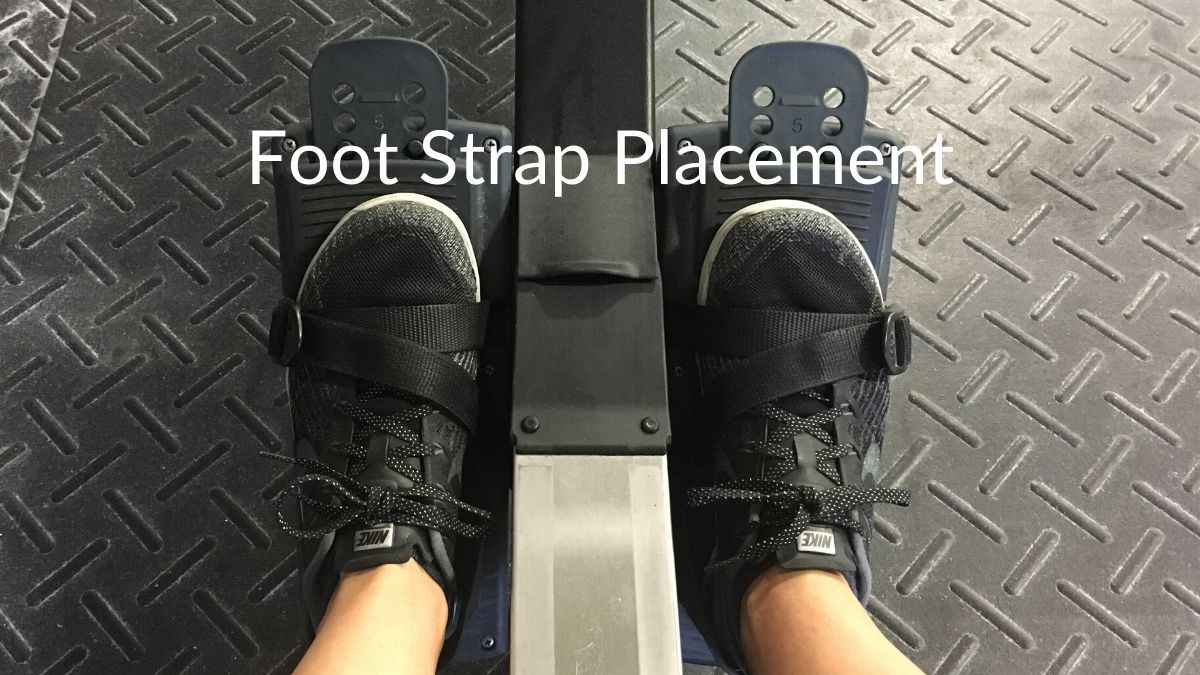
Dial In Foot and Seat Position
Foot straps must sit across the ball of your foot—not your toes—with snug (not tight) security. Seat height is critical: Your hips should stay higher than knees at the catch. Test: Row slowly. If your lower back rounds when reaching forward, raise the seat slightly. Consistent placement prevents micro-compensations that strain discs.
Ergometer vs Water Mechanics Reality
Ergometers force 70% of your stroke cycle into flexed spine positions—unlike water rowing. This explains why 50% of rowing injuries occur on machines. Elite rowers limit erg time to 30 minutes/session and prioritize technique over duration. Your setup must counteract this mechanical flaw.
8-Minute Warm-Up Protocol That Works
Off-Rower Dynamic Warm-Up (First 4 Minutes)
Skip static stretching—activate muscles with:
– Leg swings (30 sec/leg): Forward/backward to fire glutes
– Cat-camel stretches (30 sec): Mobilize spine segment by segment
– Bodyweight squats (15 reps): Focus on hip hinge without lumbar rounding
– Shoulder blade squeezes (20 reps): Anchor upper back stability
On-Rower Technique Warm-Up (Final 4 Minutes)
Row at 16-20 strokes per minute (SPM) for 4 minutes:
1. First 2 minutes: Half-stroke rows (focus on leg drive)
2. Next 2 minutes: Full strokes at 50% power (perfect finish position)
Key: If back tightens, reduce SPM by 2—not resistance.
Strength Exercises That Stop Back Pain

Core Stability Essentials
TheraBand Stability Disc Plank: Rest elbows on a disc, maintain head-to-heel alignment for 20 seconds. Add a resistance band around thighs to fire hip stabilizers. Do 3 sets daily—this directly combats lumbar shear forces during the drive phase.
Back-Specific Training Protocol
Isolated Rows on Incline Bench: Lie face-down at 45 degrees, pull dumbbells while keeping hips glued to bench (3×15 reps). This builds rowing-specific posterior chain strength without spinal loading. Critical: Squeeze shoulder blades for 2 seconds at peak contraction.
Daily Flexibility Requirements
Hamstring fixes: Tight hamstrings pull your pelvis into posterior tilt during the catch. Do dynamic leg swings (10/side) pre-rowing and lying hamstring stretches (30 sec/leg) post-workout. Hip mobility test: Can you sit tall while touching toes? If not, your rowing form is compromised.
Recovery Protocol for Existing Back Pain
Immediate 2-Week Rest Plan
Stop rowing immediately if pain is sharp or shooting. Swap to biking or swimming for 14 days—never complete rest (deconditions stabilizers). Day 1-7: Zero spinal loading. Day 8-14: Add 5-minute rowing technique drills at damper 2. If pain returns, reset the clock.
Pain Management Strategy
Ice for acute pain: 15 minutes post-activity (never directly on skin). Heat for chronic stiffness: 20 minutes pre-rowing to relax muscles. Skip NSAIDs if pain radiates down legs—use acetaminophen instead. Pro tip: Wrap a TheraPearl pack around your lower back during cool-down stretches.
When Medical Help Becomes Essential
Seek help if:
– Pain wakes you at night
– You feel numbness/tingling in legs
– Simple sitting causes sharp pain
– Symptoms persist beyond 14 days of modified activity
Red flag: Coughing/sneezing intensifies pain—could indicate disc involvement.
Long-Term Prevention Strategy
Monthly Technique Maintenance
Film your rowing every 30 days. Compare to elite rower videos—focus on hip hinge depth and finish position. Critical checkpoint: At the catch, your shins should be vertical with chest lifted. If not, book a 30-minute coaching session.
Weekly Strength Protocol
Core: 3x weekly planks with resistance band (20 sec x 4 sets). Flexibility: Daily 5-minute hip mobility routine (kneeling lunges + glute bridges). Cross-training: Replace one rowing session weekly with swimming to reduce cumulative spinal load.
Equipment Consistency Checklist
Before every session:
– Verify foot straps sit at widest foot point
– Confirm seat height allows 90-degree knee bend at catch
– Set damper to 3-4 (never above 5 for technique work)
Inconsistent setup is the #1 cause of recurring pain.
Beginner’s Safe Start Protocol
First 2 Weeks Focus
Week 1: 10-minute sessions at damper 3, focusing only on leg drive. Week 2: Add 3 minutes daily while practicing finish position. Non-negotiable: Record one stroke per session to track form drift. Never row through pain—adjust damper lower immediately.
Red Flags for New Rowers
Stop instantly if you feel:
– Electric-shock sensations
– Pain that alters your stroke rhythm
– Inability to maintain upright posture
Modify: Shorten stroke length by 20% until core stabilizes. Pain is your form coach—listen to it.
Key Takeaways for Pain-Free Rowing
Rowing machine back pain isn’t inevitable—it’s a warning sign of fixable errors. Immediately correct the big four: over-leaning at finish, early hip opening, rounded back at catch, and excessive damper settings. Build your armor with daily core planks and hamstring mobility work. Recover smart with 14 days of active rest (not total rest) using biking/swimming. Prevent relapse by filming your technique monthly and standardizing equipment setup. Remember: Elite rowers treat the erg as a technique tool—not a brute-force machine. Your spine will transform from a pain point to a powerhouse when you prioritize precision over power. Start today: Lower that damper, film your stroke, and row like your back depends on it—because it does.


