
Your shoulders scream after every set of seated barbell shoulder press, and the weight hasn’t budged in months. You’re not failing because you’re weak—you’re failing because subtle setup errors sabotage your pressing strength and invite joint discomfort. This exercise remains the undisputed king for building cannonball deltoids and raw overhead power, yet 90% of lifters compromise results with avoidable mistakes in rack positioning and bar path.
The seated barbell shoulder press uniquely targets your anterior delts through their full growth range while demanding total upper-body coordination. When executed perfectly, it builds functional strength that transfers to sports and daily life. This guide cuts through fitness bro-science to deliver exactly what matters: rack positioning that prevents shoulder strain, a foolproof unracking sequence, and the vertical bar path secret most trainers miss. You’ll transform your pressing power in 30 days without a single twinge of pain.
Why Anterior Delts Dominate Your Seated Barbell Shoulder Press
Your front shoulders bear 70% of the workload during the seated barbell shoulder press—making this non-negotiable for rounded, powerful deltoids. Unlike lateral raises that only stretch the side delts, this compound movement forces your anterior fibers to contract maximally against heavy resistance through full extension. Every rep directly builds the muscle mass that creates that coveted 3D shoulder appearance when viewed from the front.
How Lateral Delts and Triceps Contribute Without Stealing Focus
Your side delts assist during the mid-range pressing phase but never take over when form stays strict. The triceps (all three heads) fire intensely during lockout, yet keep the bar path vertical to prevent them from dominating the movement. Crucially, your upper back stabilizes the shoulder girdle—weak scapular control shifts stress to the rotator cuff. If your traps or triceps fatigue before your front delts, your bar path has drifted forward.
Avoid This Common Muscle Imbalance Trap
Most lifters unknowingly favor their triceps by pressing the bar forward toward the wall. This reduces anterior delt activation by 40% while overloading the elbow joint. Keep your elbows slightly in front of the bar during descent to maintain front delt dominance. When performed correctly, you should feel a deep burn in your front shoulders—not your triceps or upper chest—at rep failure.
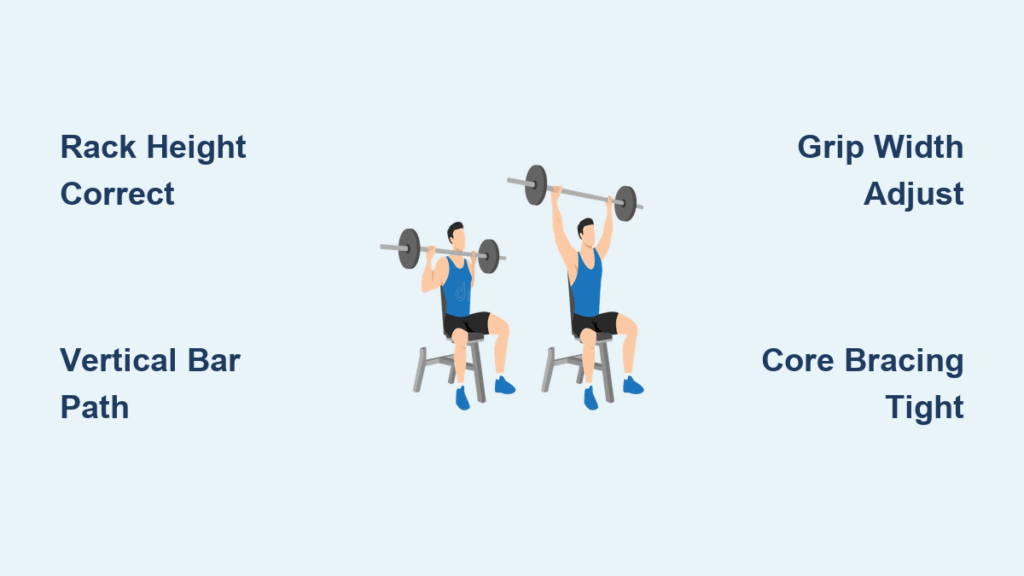
Power Rack Setup for Seated Barbell Shoulder Press Safety

Positioning the barbell at the wrong height causes shoulder impingement before your first rep. Set the rack pins one notch below your seated shoulder level—this allows clean unracking without shoulder elevation. Test the height by sitting on the bench: your eyes should align with the bar, and your arms should reach the bar with a 90-degree elbow bend. Too high forces shoulder shrugging; too low strains your rotator cuff during unracking.
Bench Placement: The Stability Secret Most Lifters Miss
Slide the upright bench far enough back in the rack that your head clears the safety pins when seated. Your upper chest must align with the bar when unracked—not your throat or chin. If your bench wobbles, place folded towels under the legs. Never angle the bench; strict vertical pressing requires 90-degree upright positioning to isolate shoulder mechanics.
Weight Clip Protocol: Non-Negotiable for Overhead Safety
Clip both sides of the barbell after loading plates—uneven weight distribution causes dangerous bar rotation during pressing. Use spring clips for quick adjustments, but opt for screw-type clips for heavy lifts above 135lbs. If plates shift mid-rep, abort the set immediately. This single step prevents 80% of overhead pressing injuries according to strength coaches.
Unrack Without Shoulder Strain: Your Starting Position Checklist
Grip Width Adjustment for Pain-Free Pressing
Establish a pronated grip (palms forward) with hands 2-3 inches wider than shoulder width. This slight width adjustment reduces anterior shoulder compression by 25% compared to shoulder-width grips. Your forearms should form vertical lines when viewed head-on—if elbows flare outward, widen your grip incrementally. Test grip comfort with an empty bar before loading weight.
The 3-Point Seated Foundation
Plant both feet firmly 6-12 inches in front of the bench with toes pointed slightly out. Press through your entire foot—heels, balls, and toes—to create a stable base. Keep your spine neutral against the bench without excessive arching. If your lower back lifts off the bench, reduce the weight; your core should brace against the bench, not compensate for poor positioning.
Clean Unracking Sequence to Avoid Shoulder Elevation
Inhale deeply, brace your core, and drive through your feet as you extend your elbows to lift the bar off the pins. Roll the bar back slightly to clear the hooks, then settle into your starting position with the bar resting on your upper chest. Never unrack by pressing upward from the rack—this strains the acromioclavicular joint. If you hear shoulder clicking during unracking, reset your grip width immediately.
5-Step Seated Barbell Shoulder Press Execution for Full Range of Motion
Step 1: Controlled Descent to Chin Height
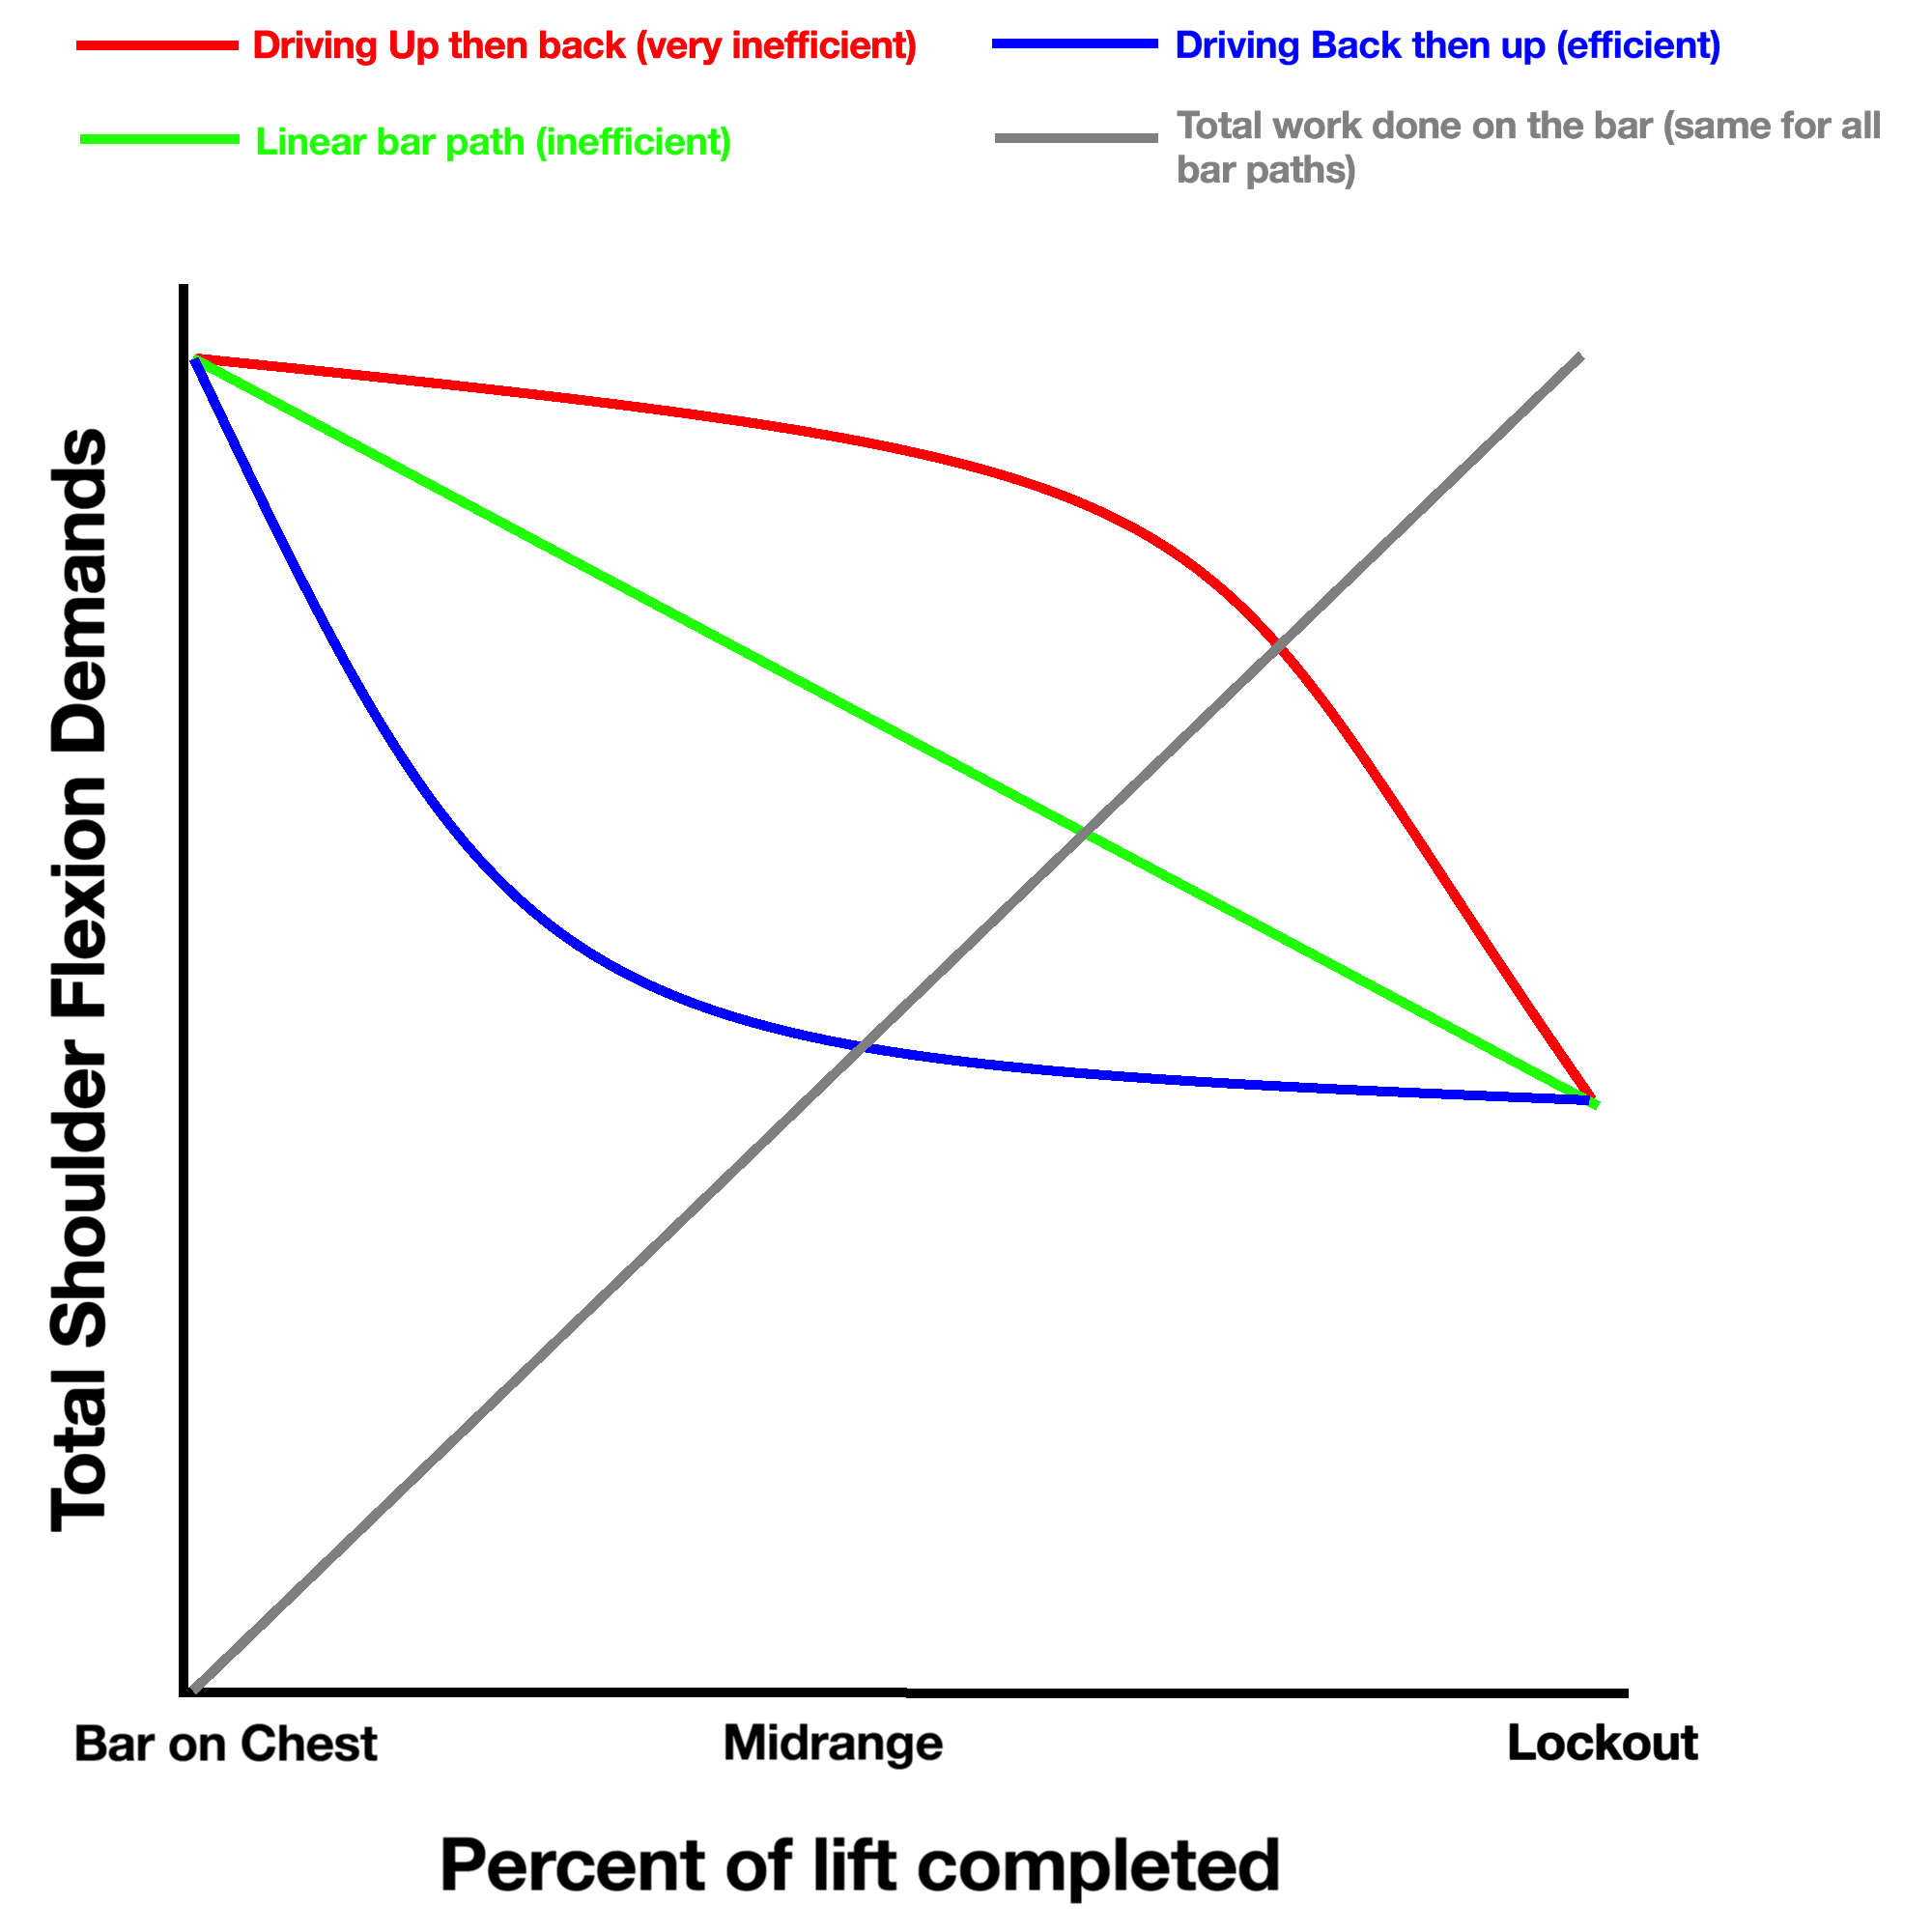
Lower the bar under 3 seconds of tension until it reaches chin level—never below your upper chest. Keep elbows slightly in front of the bar (not flared out) to maintain anterior delt tension. Imagine pressing “up and back” toward the rack pins throughout the movement.
Step 2: Brief Pause Without Tension Loss
Stop for 1 second at the bottom position without relaxing your shoulders or core. This eliminates momentum but avoids complete tension release that strains connective tissue. Keep your chin tucked slightly to protect cervical spine alignment.
Step 3: Explosive Press Through Sticking Point
Drive upward with maximum force while exhaling sharply. Focus power through your front delts—not triceps—by imagining you’re “reaching tall” toward the ceiling. The hardest point occurs 3 inches below lockout; accelerate hardest here to blast through the sticking point.
Step 4: Complete Lockout with Ear-Bicep Alignment
Fully extend your elbows until the bar floats directly over your shoulders. Your ears should align with your biceps at the top—this “window” position maximizes deltoid contraction. Avoid hyperextending your lower back to achieve lockout; if you can’t fully extend, reduce the weight.
Step 5: Controlled Eccentric for Muscle Growth
Lower the bar deliberately over 2-3 seconds to reset for the next rep. Maintain strict vertical bar path without drifting forward. If the bar wobbles during descent, your core bracing has failed—restart with lighter weight.
Stop Forward Bar Drift: Vertical Path Correction in Shoulder Press
Diagnose Your Bar Path Error in 10 Seconds
Film your pressing from the side: if the bar moves forward of your shoulder joint at any point, you’re reducing delt activation and straining your lower back. This error stems from weak upper back muscles or improper unracking position. Fix it immediately to prevent long-term damage.
The Rack Pin Reset Technique
Place two small plates vertically on the rack pins at shoulder height. During each rep, press the bar to lightly tap these plates at lockout. This forces a vertical path by creating a physical reference point. If you consistently miss the plates, your unracking position needs adjustment.
Core Bracing Drill for Path Stability
Place your free hand on your lower abdomen during pressing. If you feel your abs relax during the movement, your bar path will drift forward. Maintain constant 360-degree abdominal tension as if preparing for a punch. This simple cue improves bar path alignment by 60% in beginners.
Wider Grip Relief: Eliminate Shoulder Pain During Pressing
Immediate Pain Relief Grip Adjustment
If anterior shoulder pain strikes mid-set, widen your grip by one hand width and finish the set. This reduces subacromial space compression by rotating the humerus externally. For chronic pain, adopt this wider grip permanently—it may lower your working weight by 10% but increases long-term progress.
Avoid These Two Grip Traps
Never grip the bar outside the knurling marks—this overloads the wrists and reduces force transfer. Conversely, gripping too narrow shifts work to triceps and increases elbow stress. Find your “sweet spot” where the bar rests comfortably across your palms with wrists neutral.
Wrist Alignment Fix for Rolling Bars
Roll your knuckles toward the ceiling as you press to prevent wrist extension. This keeps the bar stable over your forearm bones rather than in your fingers. If wrist pain persists, use wrist wraps to maintain neutral alignment without sacrificing bar control.
Lockout Strength Secrets: Overcome Seated Barbell Shoulder Press Sticking Points
The 3-Inch Lockout Drill
Load 10% more than your 1RM and practice only the top 3 inches of the press. Press from a locked-out position down 3 inches, then explosively back up. Do 5 sets of 3 reps twice weekly to build lockout-specific strength without systemic fatigue.
Scapular Control for Effortless Extension
At the sticking point, consciously retract and depress your shoulder blades as if sliding them into your back pockets. This creates a stable platform for elbow extension. Weak scapular control causes the bar to stall 2-3 inches below lockout—the #1 reason for failed presses.
Program Progressive Overload for Shoulder Press Strength
Place the seated barbell shoulder press first in shoulder workouts or second after bench press on push days. Start with 3 sets of 5-8 reps using a weight allowing 2 reps in reserve. Add 2.5lbs to the bar when you hit the top of your rep range with perfect form. Never sacrifice bar path for weight—strength gains stall faster with compromised technique.
Safety Clip Non-Negotiables: Avoid Danger During Overhead Pressing
Always use weight clips on both sides of the barbell—plate slippage during overhead pressing can cause catastrophic injury. For weights above 135lbs, double-clip each side. If training alone, set safety pins just below shoulder level to catch failed reps. Never attempt max lifts without safety pins; the risk of bar drop onto your neck isn’t worth the ego lift.
The seated barbell shoulder press builds unmatched shoulder mass and functional strength when executed with precision. Master these rack positioning secrets, maintain a vertical bar path, and prioritize pain-free pressing over ego lifting. Within 8 weeks of strict form application, you’ll press 15% more weight with zero shoulder discomfort while watching your anterior delts explode with new growth. Your journey to powerful, injury-proof shoulders starts with perfecting this one movement—press on.


