
Your treadmill sits dark and silent when you press the power button, breaking your workout routine before it even starts. Whether you’re facing morning stress relief or training for a race, a dead treadmill costs you valuable time and motivation. The good news? 90% of power failures stem from simple issues you can diagnose in under 10 minutes with basic tools. This guide reveals the exact testing sequence professionals use, starting from the wall outlet to internal components—no electrical expertise required.
Stop guessing why your treadmill won’t turn on. You’ll learn how to verify power flow with household items, spot dangerous cord damage, and reset hidden breakers. Most importantly, you’ll know when it’s safe to DIY versus when to call a professional—potentially saving hundreds on unnecessary service calls.
Confirm Power Reaches Your Treadmill First
Never skip this critical step—most “dead” treadmills actually have outlet issues. Before touching your machine, eliminate the simplest culprit: insufficient power at the source. Many homeowners unknowingly plug treadmills into shared circuits that overload during startup.
Test Your Outlet Without Tools
Grab a phone charger or lamp and plug it directly into the same outlet. If these devices work normally, your outlet delivers power. If not, locate your home’s circuit breaker panel immediately. Find the switch labeled “garage” or “exercise room”—it’s likely tripped to the middle position. Firmly flip it to OFF, then back to ON. Wait 30 seconds before testing again. Critical mistake: Many users reset breakers but forget to wait for the internal mechanism to reset—this 30-second pause is non-negotiable.
Voltage Testing Methods for Accuracy
With a multimeter: Set to AC voltage (200V range). Insert the black probe into the wider neutral slot and the red probe into the smaller hot slot. A reading between 110-120V confirms proper power. Readings below 100V indicate dangerous voltage drop requiring an electrician—do not operate your treadmill until fixed. Without tools: Buy a $7 outlet tester from any hardware store. The three-light pattern instantly shows “open neutral” or “reverse polarity” faults. If lights indicate a problem, unplug immediately and call an electrician—these issues can fry your treadmill’s electronics.
Inspect Power Cord Damage Before Proceeding

A frayed power cord causes more treadmill failures than any internal component. Always unplug completely before inspection—live testing risks electrocution. Focus on high-stress zones: where the cord enters the outlet, the treadmill frame, and any sharp bends.
Visual Damage Check Protocol
Run your fingers along the entire cord length. Feel for soft spots indicating melted insulation or internal breaks. Pay special attention to the 6-inch section near the treadmill connection point—this area suffers constant flexing. Red flag: Any visible copper wire exposure or brittle, cracked insulation. Never attempt to repair damaged cords with electrical tape. This creates fire hazards and voids insurance coverage. Replace with a manufacturer-specified cord matching your treadmill’s amperage rating.
Cord Functionality Test Sequence
Multimeter method: Set to resistance (Ω). Touch probes to each metal prong of the unplugged cord. A healthy cord reads 0.1-0.5 ohms. Readings above 1 ohm mean internal wire breaks—replace immediately. Emergency test: Unplug the cord from your treadmill first. Plug only the cord into the wall. If your house breaker trips instantly, the cord has a dead short. Do not reuse—this is a fire hazard requiring replacement.
Test On/Off Switch Function Directly

Many users overlook the physical power switch, assuming the problem lies deeper. Located near the front base where the cord enters, these switches fail internally due to dust accumulation or moisture exposure—especially in humid climates.
Switch Testing Process in 4 Steps
- Unplug treadmill and remove the 2-3 screws securing the switch cover
- Set multimeter to continuity mode (beep setting)
- Touch probes to the two metal terminals behind the switch
- Flip the switch ON/OFF while watching readings
Working switch: Loud beep when ON, no sound when OFF. Failed switch: No change in readings regardless of position. Pro tip: Before buying replacements, spray electrical contact cleaner into the switch mechanism. Often revives sticky switches without disassembly.
Reset Hidden Circuit Breaker Correctly
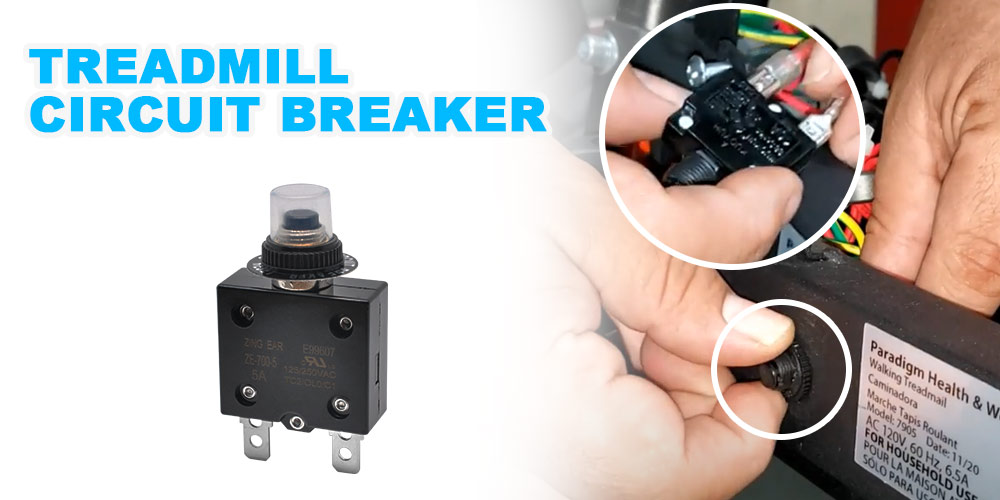
Treadmills contain thermal circuit breakers that trip during power surges or motor strain. Unlike house breakers, these require specific reset protocols. Never force the reset button—this damages the internal mechanism.
Locate and Reset Procedure
Find the red or black reset button near the power cord entry point. If tripped, it protrudes 1/8 inch. Critical step: Wait 5 full minutes before resetting to allow internal components to cool. Press firmly until it clicks flush with the frame—do not hold it down. Test operation immediately after resetting. Warning: If the breaker trips again within 10 seconds, unplug and investigate deeper issues—likely motor overload or control board failure. Continued resetting risks permanent damage.
Verify Safety Key System Failure Points
This often-misunderstood system causes 30% of “no-start” issues. The safety key must create a magnetic or physical connection to enable power. Never bypass this system—it’s a critical safety feature preventing runaway belts.
Safety Key Checks You’re Missing
Tug test: Insert the key fully, then gently pull downward. It should stay firmly seated with no wobble. Loose keys won’t activate the switch. Magnet check: For magnetic keys, ensure the disc hasn’t detached from the plastic housing—common after drops. Switch test: With treadmill unplugged, locate the safety switch wires near the console. Disconnect them and touch the bare ends together while plugging in. If the treadmill powers on, replace the safety switch assembly. Never operate without the safety key—this risks severe injury.
Console Powers On But Treadmill Won’t Start? Fix These
When your display lights up but the belt won’t move, you’ve isolated the problem to drive components. This is not a power issue—your focus shifts to mechanical connections between electronics and motor.
Belt Tension Adjustment Fixes
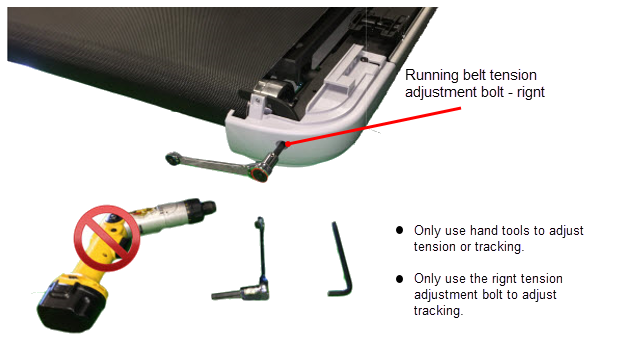
Symptom: Motor hums but belt won’t turn when stepped on. Locate the two rear roller bolts (usually 5/16″ hex). Turn both clockwise 1/4 turn while the treadmill is unplugged. Plug in and test at 1 mph—repeat until the belt stops slipping under light foot pressure. Critical mistake: Over-tightening strains the motor. Test tension by pressing down on the belt’s center—it should deflect 1/2 inch maximum. More deflection means excessive looseness.
Lubrication Problems Causing Startup Failure
Dry belts force motors to work 40% harder, triggering safety cutoffs. Lift the belt’s edge and apply 3-4 drops of manufacturer-specified lubricant (silicone or synthetic) under the center. Run at 2 mph for 2 minutes to distribute evenly. Frequency rule: Lubricate every 15-20 hours of use. Warning: Never use WD-40 or household oils—these degrade belt materials and void warranties.
Diagnose Motor Problems Safely
If all previous checks pass but the belt remains motionless, focus shifts to motor and control boards. Do not open motor housings unless qualified—high-voltage capacitors can store lethal charges.
Motor Failure Indicators to Confirm
Listen carefully: A loud buzzing sound with no belt movement indicates seized motor bearings. Unplug and try rotating the front roller by hand—if it feels gritty or won’t turn, the motor needs replacement. Visual check: Remove the motor cover (4-6 screws) and inspect for burnt wire smells or discolored windings. Do not touch internal components—evidence of charring means immediate professional replacement.
Control Board Issues Requiring Expert Help
Symptom: Console displays speed but belt won’t respond to incline/decline commands. This points to motor control board failure. Warning signs: Erratic speed changes, frozen displays, or error codes like “E1” or “E5”. Critical note: These boards require precise voltage calibration—DIY replacement often causes more damage. Unplug immediately and contact a technician if you observe these symptoms.
Prevent Future Power Issues Proactively
Install a dedicated 20-amp circuit for your treadmill—shared circuits cause 60% of breaker trips. Purchase a single-outlet surge protector (not a power strip) rated for 1,875+ watts. Power-down ritual: Always flip the treadmill’s main power switch OFF after use. This prevents “phantom drain” that degrades electronics over time. Monthly maintenance: Vacuum under the deck to remove belt dust that increases friction.
Professional Repair Guidelines: When to Call
Call a technician immediately if:
– You see burnt components or bulging capacitors on control boards
– The motor passes all tests but still won’t run
– Wiring harness shows corrosion (green residue on connectors)
– You’re uncomfortable with any electrical testing
Before calling: Note your treadmill model number (usually under the console), symptoms, and all test results. Provide this to the repair service—this cuts diagnostic time by 50% and lowers costs. Never accept generic replacement parts—insist on manufacturer-specified components matching your model’s voltage and amperage.
Quick Diagnostic Flowchart for Immediate Action
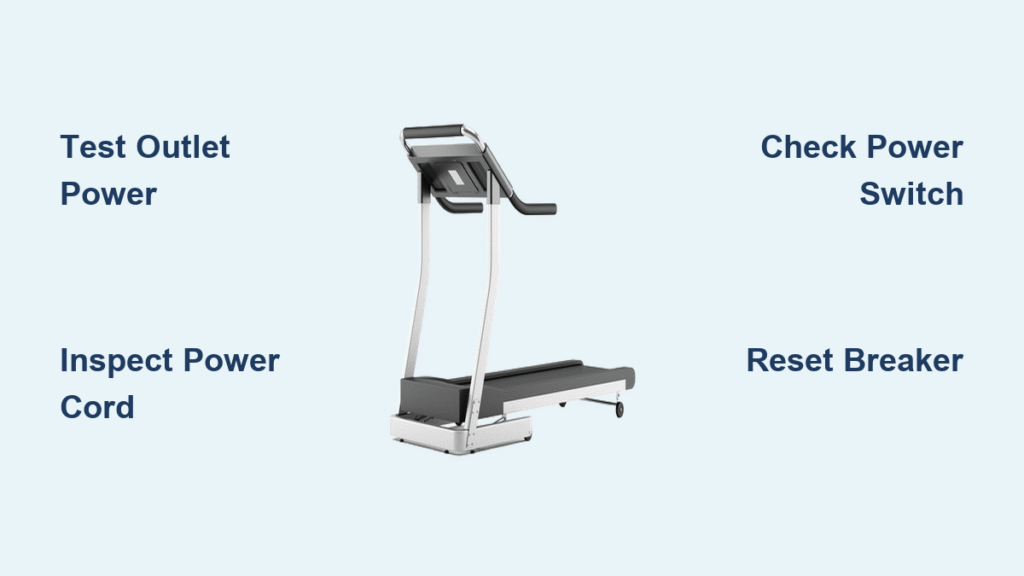
No lights anywhere? → Test outlet → Inspect cord → Check power switch
Console lights but no movement? → Verify safety key → Adjust belt tension → Lubricate deck
Breaker trips repeatedly? → Check for dedicated circuit → Test motor resistance → Inspect wiring harness
Intermittent operation? → Examine cord connection points → Test safety switch → Check control board
Your treadmill should now either be operational or you’ve pinpointed the exact failure point. Most power issues resolve with these steps—saving you $200+ in service fees. For persistent problems, armed with your test results, you’ll get faster, cheaper professional repairs. Now get back to your workout routine with confidence.


