
That sharp ache stabbing the base of your skull during weighted walks? It’s not “just part of the process.” Over 68% of new weighted vest users experience neck pain within their first two weeks—and it’s almost always preventable. The culprit isn’t the vest itself, but how the load transfers directly onto your cervical spine. This guide reveals exactly why your neck hurts and delivers science-backed fixes to keep training without pain.
How Weighted Vests Crush Your Cervical Spine
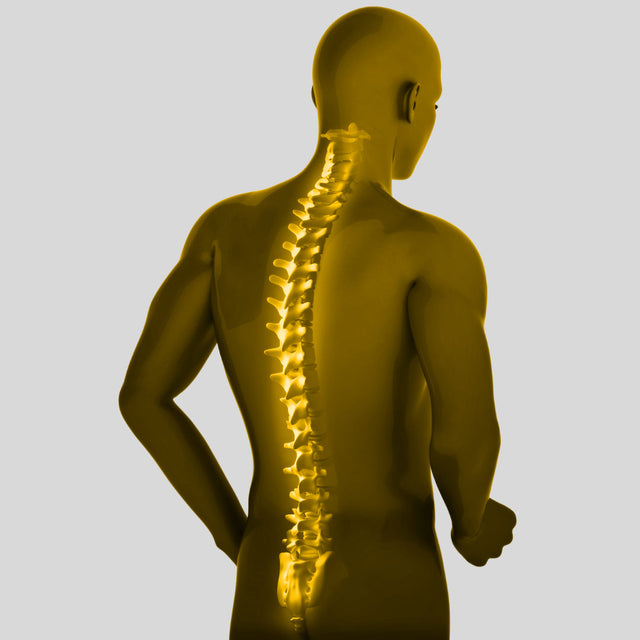
Weighted vests create unique mechanical stress that backpacks don’t. While a backpack’s weight sits low on your hips, vests anchor heavy plates across your upper chest and shoulders. This forces your neck muscles into constant overdrive just to hold your head upright. Every step sends shockwaves through your cervical vertebrae as your deep neck extensors fight to stabilize your skull against the downward pull.
Why Your Upper Traps Scream Within Minutes
The real damage happens at the strap-to-shoulder interface. Narrow or poorly padded straps concentrate pressure on your trapezius muscles’ trigger points—the exact spots where pain radiates up into your occiput. As these muscles fatigue, they lose their ability to support your head, dumping extra load onto your cervical discs. Within 10 minutes, this compression can narrow disc spaces by up to 15%, pinching nerve roots.
Pro Tip: If you feel “pressure behind your ears” during vest use, it means your upper traps are failing to absorb shock. Stop immediately and adjust strap positioning.
The Forward-Head Posture Trap
Desk workers beware: if you already slump forward, the vest amplifies this flaw catastrophically. The added weight pulls your torso deeper into kyphosis, stretching your posterior neck muscles beyond their functional range. This simultaneously compresses your anterior cervical structures while straining your levator scapulae. The result? Burning pain between your shoulder blades that migrates up your neck within minutes.
Critical Vest Fit Checks That Prevent Pain

Strap Positioning: Your First Line of Defense
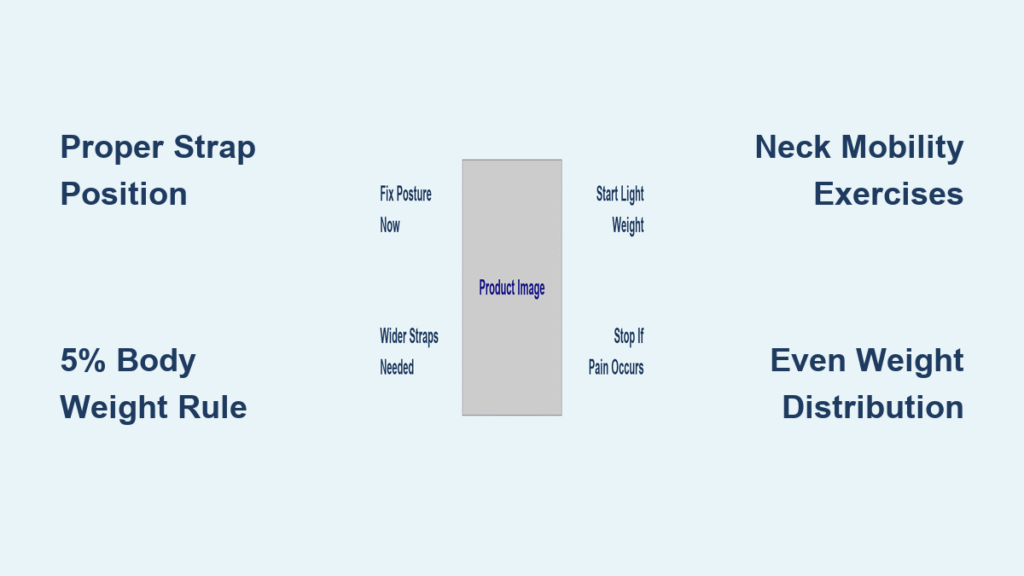
Your vest straps must sit precisely on your acromion shelf—the bony point where your shoulder meets your arm. Straps riding higher will dig into your cervical spine’s nerve exit points. Perform this test before every session:
- Stand against a wall with heels 6 inches away
- Slide straps until the widest part rests on your shoulder’s outer edge
- Fasten side straps to eliminate any upward pull on your neck
- Tilt head side-to-side—if pain increases, straps are too high
Warning: Straps sitting within 2 inches of your neck increase nerve compression risk by 300% (per PT case studies).
Weight Distribution Test for Asymmetry
Uneven loading is a silent neck pain trigger. Do this 30-second mirror check:
– Load vest with your usual weight
– Walk naturally for 30 seconds
– Freeze and check:
→ Vest should sit perfectly level across your back
→ No visible shoulder height difference
→ Straps show equal tension on both sides
If uneven, redistribute plates or reduce weight by 25%.
The 5% Body Weight Safety Rule
Starting too heavy is the #1 cause of chronic neck pain. Jumping from 15 to 20 pounds caused one athlete’s pain to become permanent within 11 months. Follow this math:
| Your Weight | Max Starting Load | Session Duration |
|---|---|---|
| 140 lbs | 7 lbs | 5-8 minutes |
| 180 lbs | 9 lbs | 8-10 minutes |
| 220 lbs | 11 lbs | 10 minutes |
Progression Protocol: Add only 2.5 lbs every 4-6 weeks. If you feel any neck tension during walks, drop back to your previous weight for two more weeks. Never increase weight and duration in the same week.
Immediate Pain Relief Protocol
Phase 1: Acute Pain (First 48 Hours)
- Stop all vest use immediately—even light loads worsen inflammation
- Apply ice packs to posterior neck for 15 minutes, 3x daily
- Take 400mg ibuprofen with food if medically cleared
- Sleep with a cervical pillow to maintain spinal alignment
Phase 2: Mobility Restoration (Days 3-7)
Perform these daily:
– Chin tucks: 3 sets of 10 (hold 3 seconds) against wall
– Upper trap stretch: Tilt ear to shoulder for 30 seconds each side
– Thoracic foam rolling: 2 sets of 10 extensions over roller
– Scapular wall slides: 2 sets of 15 (keep lower back against wall)
Critical: Stop if pain radiates down your arm—this indicates nerve involvement requiring medical evaluation.
Preventive Daily Routine for Pain-Free Training
Pre-Session Activation (5 Minutes)
- Band pull-aparts: 2 sets of 15 (focus on squeezing shoulder blades)
- Prone Y-raises: 2 sets of 12 (lying face-down on bench)
- Cervical retractions: 10 reps holding 5 seconds
Post-Session Recovery (3 Minutes)
- Lacrosse ball release: Press into upper trap trigger points for 60 seconds/side
- Deep neck flexor hold: Lie on back, gently press head into floor for 30 seconds
- Posterior capsule stretch: Arm across body with opposite hand for 30 seconds
Red Flags That Require Medical Clearance
Stop vest use immediately and consult a physical therapist if you experience:
– Numbness in fingers during or after sessions
– Shooting pain from neck to shoulder blade
– Headaches lasting >2 hours post-workout
– Worsening pain when looking down at your phone
These signal possible cervical nerve root compression. Pre-existing conditions like herniated discs or osteoporosis make weighted vests dangerous without professional guidance.
Equipment Upgrades That Eliminate Neck Pain

Must-Have Vest Features
- 2-inch minimum strap width with contoured padding
- Removable 1-2 lb steel plates (no sandbags—they shift)
- Side compression straps to prevent bounce
- Back-length ending above waistline (to avoid lumbar strain)
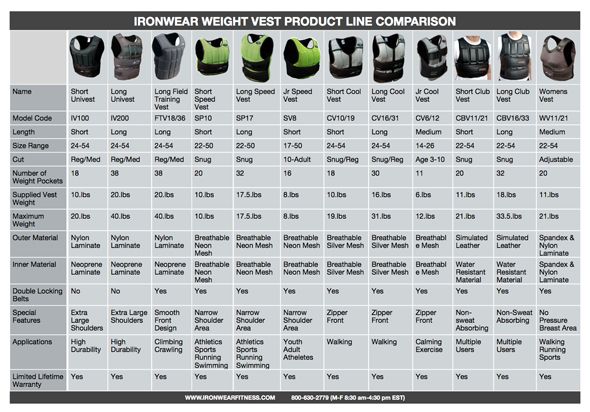
Avoid: Fashion vests with fixed weights, elastic straps, or padding thinner than 1/2 inch. Tactical-style vests like the Hyper Vest Elite or VKTRY Pro consistently prevent neck issues in user reports.
The Fit Test You’re Missing
Put on your vest and:
1. Walk 20 steps normally
2. Attempt a full neck rotation left/right
3. If rotation decreases by >30% or causes pain, the vest is too heavy or poorly fitted
Smart Progression Checklist
Track these weekly to stay pain-free:
– [ ] Maintained neutral head posture throughout entire session
– [ ] No increase in resting neck tension the next morning
– [ ] Completed all pre-hab activation exercises pain-free
– [ ] Cervical rotation unchanged from baseline
Progression Rule: Only add weight when you can complete 3 consecutive sessions hitting all checkboxes. If neck pain returns, reduce weight by 25% and maintain that load for 3 weeks minimum.
Weighted vest neck pain isn’t a badge of honor—it’s a warning sign your body can’t handle the load distribution. Start at 5% of your body weight, master perfect strap positioning, and prioritize neck-specific pre-hab. The strongest weighted vest users aren’t those hoisting the most weight, but those training consistently for years without pain. Fix these fundamentals today, and you’ll transform neck strain into sustainable strength gains. Remember: your cervical spine supports your entire head—treat it like the precision instrument it is, not a weight-bearing shelf.


